AI portraits and headshots: choose a style and keep your likeness
Someone asks for a headshot by Friday and the best photo you have was taken in a kitchen. You don't need thirty portrait styles. You need the right first job for that photo, and a way to tell whether the result still looks like you.
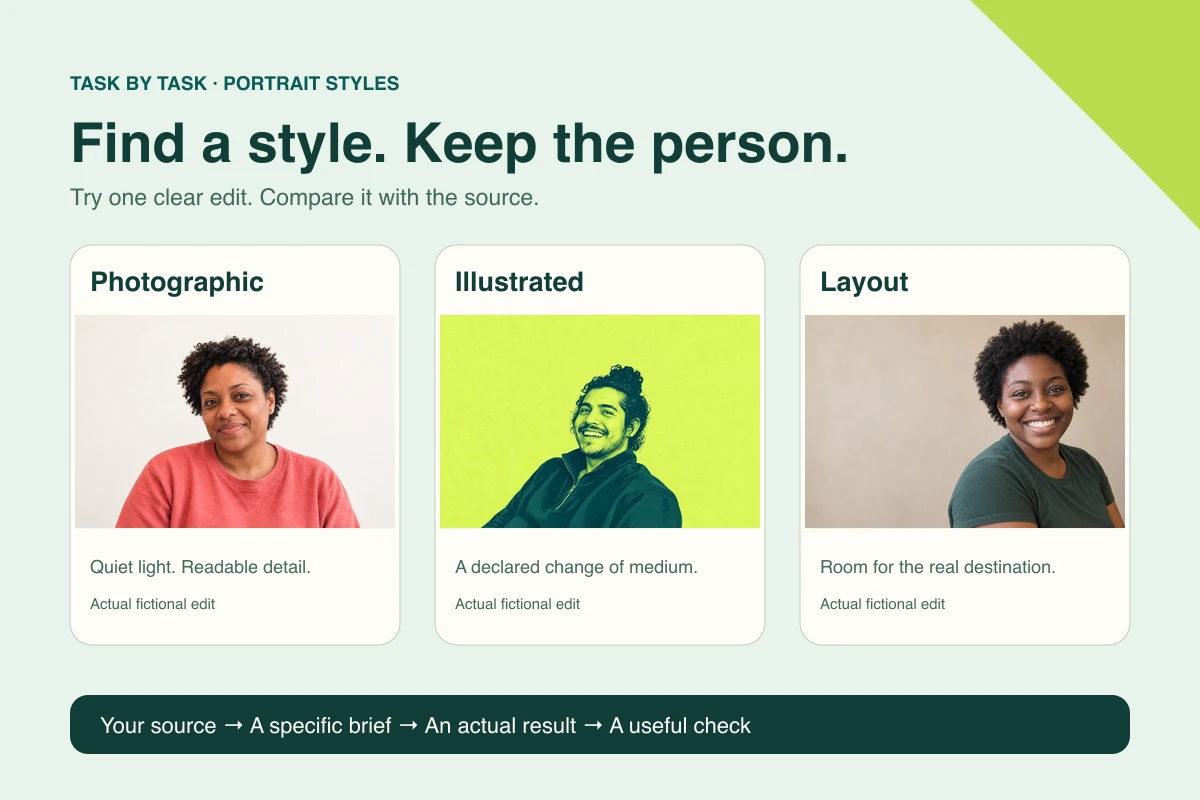
What you'll make
a route card for your portrait: which guide to use, a three-part brief for one candidate and the first thing to check when it comes back.
What you'll need
a recent, readable photo of yourself, or of an adult who has agreed, that your organisation lets you use in its image editor (ChatGPT and Gemini both edit attached photos). Know where the image will go, such as a profile circle or a website section. Keep the untouched original. About 15 minutes.
Example result.
Job: square profile photo, shown as a small circle
Photo: readable, hair complete, busy kitchen behind
Route: neutral studio edit
Brief: keep the face, hair, navy jumper and expression; change the
kitchen to plain grey and even out the light; frame head and
shoulders with a clear band of space above the hair
Check first: the face at full size, then the hair edge in the circle
1. Check the photo before choosing a style
Look at the photo you have, not the one you wish you had. Are both eyes readable? Is the hair complete, or does the frame cut it off? Is the face blurred, in deep shadow or hidden by a hand or a phone?
If the hair is clipped or the face is unreadable, don’t edit yet. The source-photo coach helps you plan a quick retake. An image editor will fill in what the camera missed, and it’ll do it confidently, but it can’t know what was really there.
Why this works: every later check compares the result with the original. If the original can’t show a detail, you can’t check it.
What you should see: a one-line verdict: “usable as it is” or “retake first, because…”.
2. Pick one route for where the image will go
Start here. Most readers need three guides: the neutral studio headshot for a first edit, the headshot preservation brief for writing the request, and the source-photo coach when the photo isn’t good enough. The other styles in the portrait library are optional variations once that first edit works.
| Your job | Start here | First check |
|---|---|---|
| A photo profile | Neutral studio or window light | The face, then the small crop |
| A wider website section | About-page portrait | No body parts the photo never showed |
| A speaker image with words | Text-space portrait | Real text fits without covering the person |
| A deliberate illustration | Duotone | Recognisable features in the new medium |
| A clipped or unreadable photo | Source-photo coach | A retake plan, not invented detail |
Why this works: the destination decides most of the brief. A small profile circle and a wide web banner fail in different ways, so they need different checks.
What you should see: one row that matches your job, and one guide to open.
3. Write the brief in three parts
Write the request as what stays, what changes and where it will be used. The headshot preservation brief has a ready template in three blocks, PRESERVE, CHANGE and FRAME. Use it with the treatment from the guide you chose in step 2.
Attach the untouched original rather than describing yourself in words. In ChatGPT, select + and then Add photos & files; in Gemini, attach the photo in the prompt box. If you also add a colour swatch or framing sketch, say what each attachment is for: the photo supplies the person, and the extra file supplies only the colour or the layout.
Why this works: “make it professional” doesn’t say what may change. Three short parts give you something to compare the result against.
What you should see: one candidate, not a gallery. A single result is easier to judge honestly.
Check the result
- Compare the eyes, nose, jaw, expression, hair, glasses and clothes with the original at full size, before you judge the style.
- Look for things nobody asked for: a smarter jacket, smoother skin, fuller hair.
- Check the frame: complete hair, a clear band of space above it, and no body parts the original didn’t show.
- Preview the image where it will be used, at the size it will be used.
The usual failure: the style is right, so nobody checks the frame. The hair ends up pressed against the top edge, and the final crop cuts it off. It’s easy to miss at full size and obvious in a profile circle. Ask for a narrow correction:
The candidate has [specific visible problem].
Use my untouched original as the reference for appearance and clothing.
Correct only [the light, framing or background issue],
keeping the useful treatment and the same person.
Don't reshape the face or invent missing body detail to solve it.
[specific visible problem] is what you saw, such as “almost no space above the hair”. The second bracket is the one thing to change, such as “make the frame slightly wider with a clear band of background above the hair”.
If a repair changes the face, go back to the original with a smaller job, crop it yourself or take a new photo. You don’t have to keep generating until the person becomes sufficiently impressed with their new jaw.
Worked example: three routes, one shared failure
Fictional example. Three different fictional photos, three routes from the table, and the same mistake in all three first results.
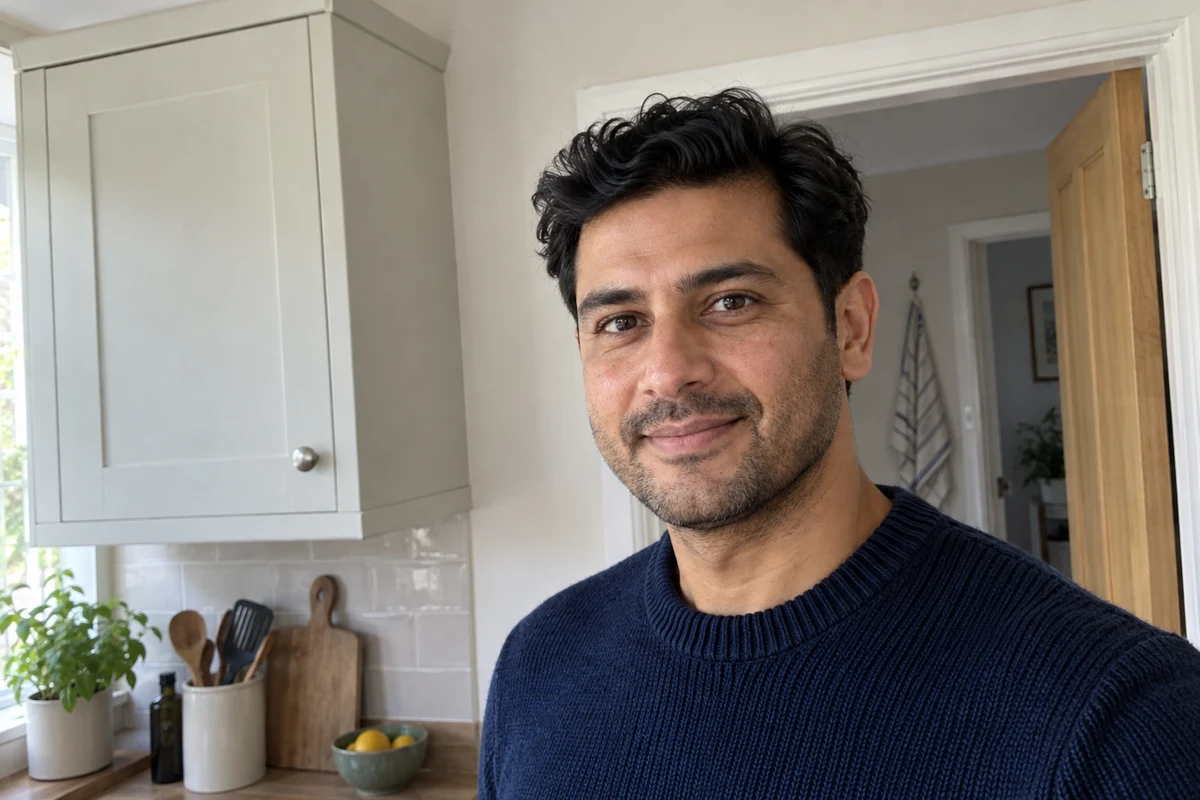
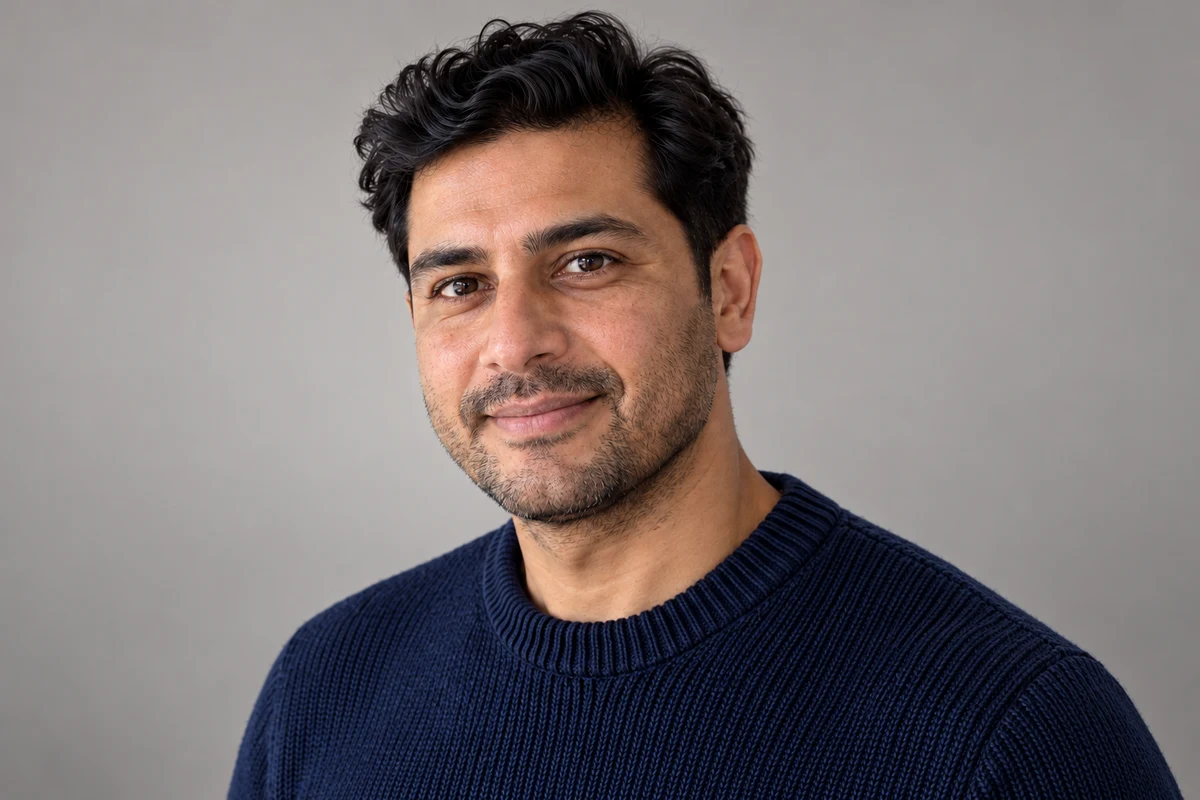
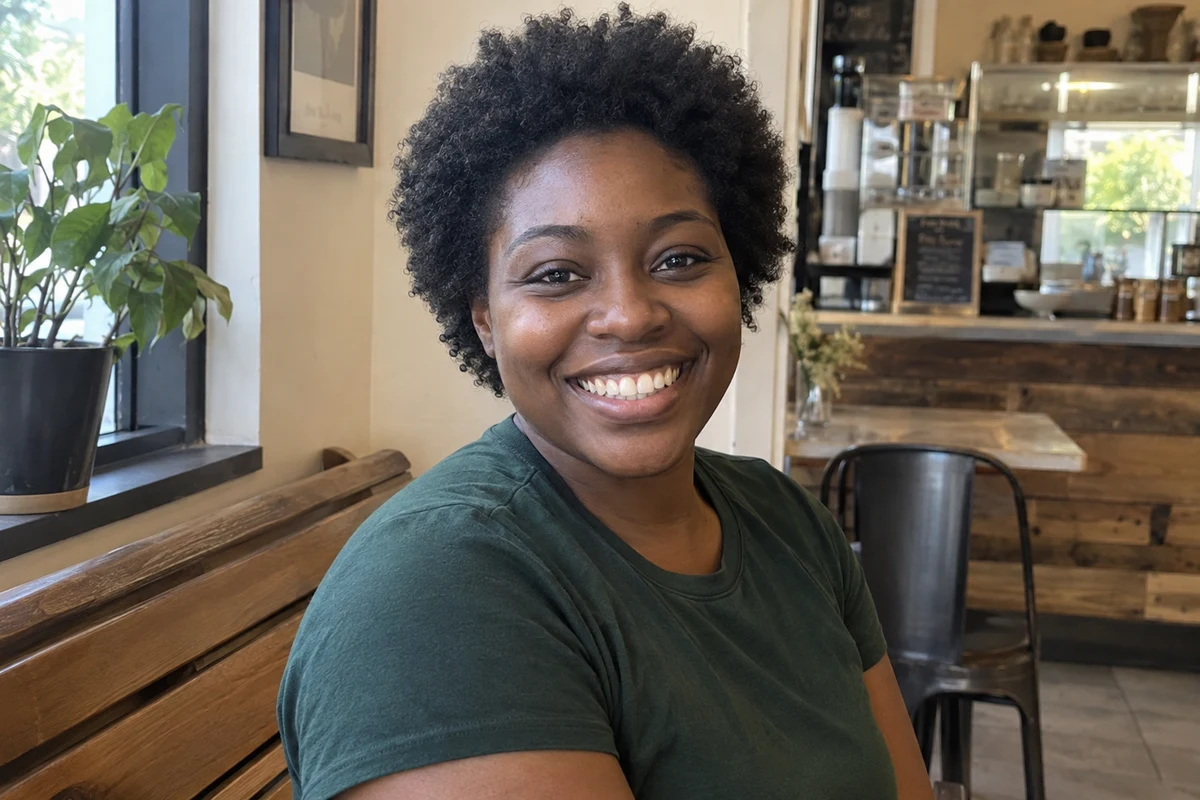
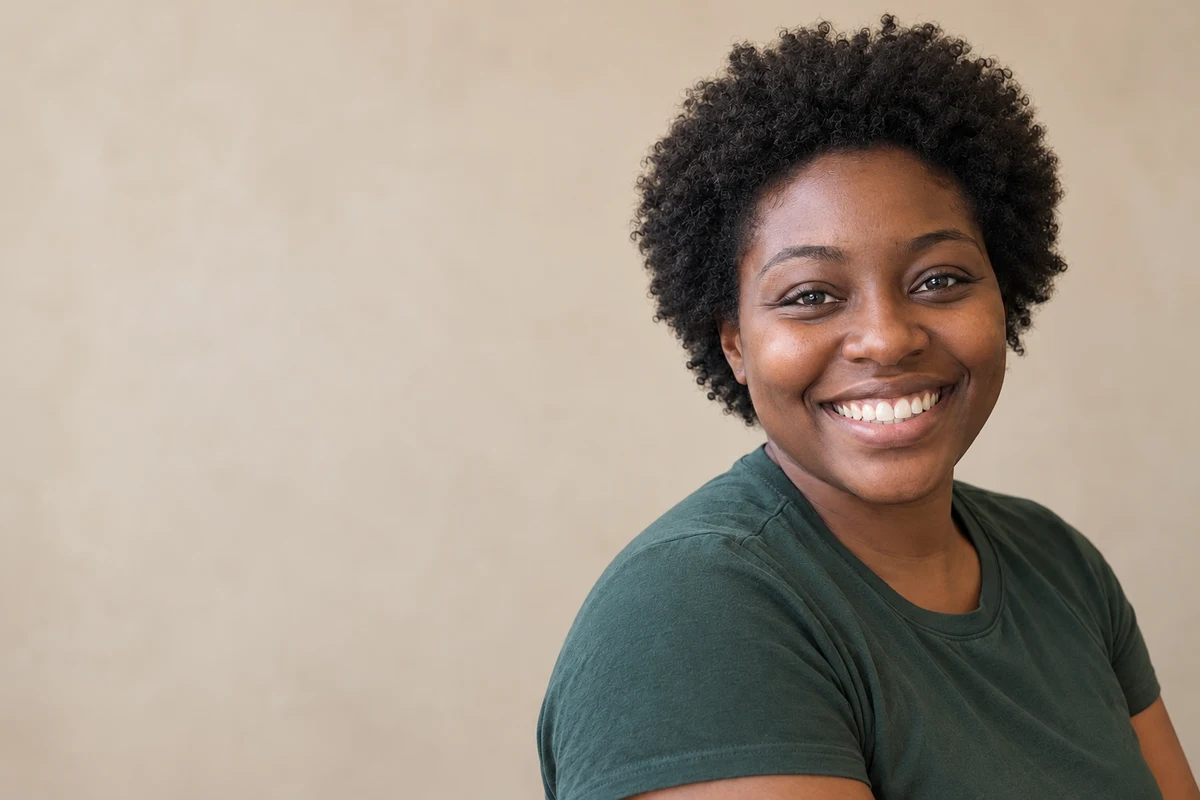
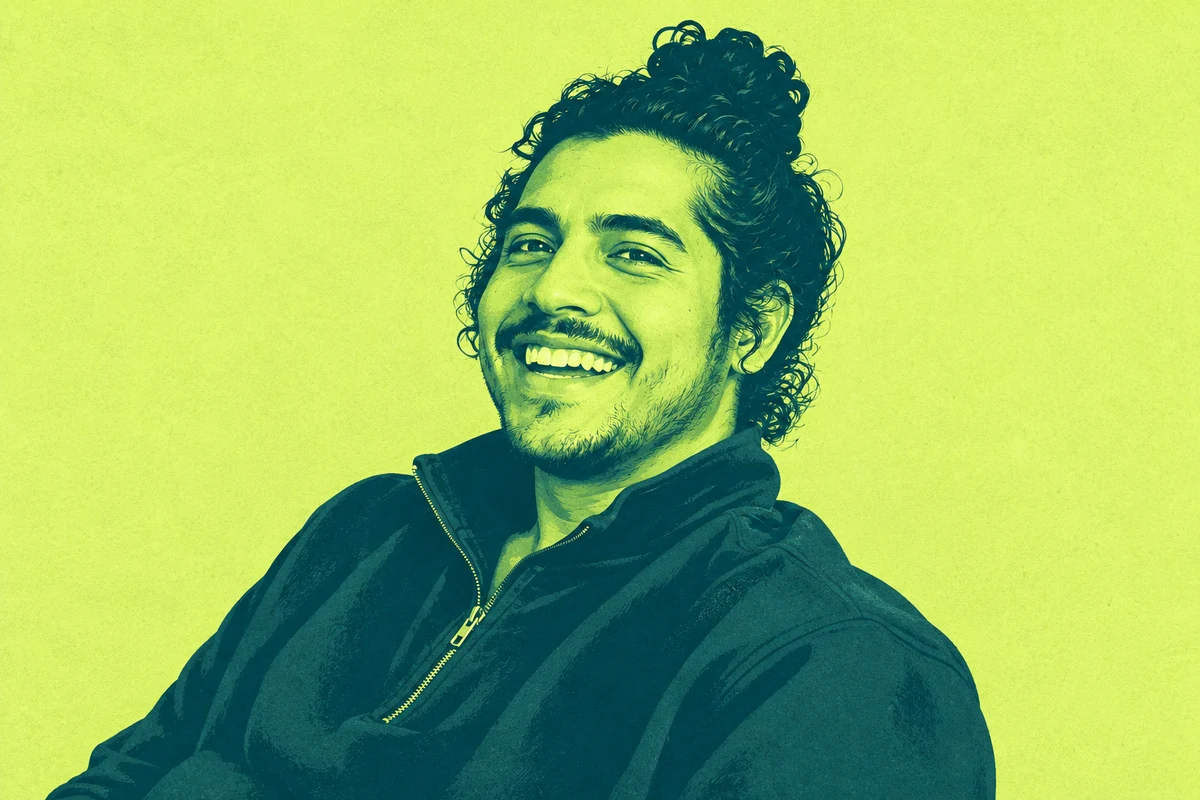
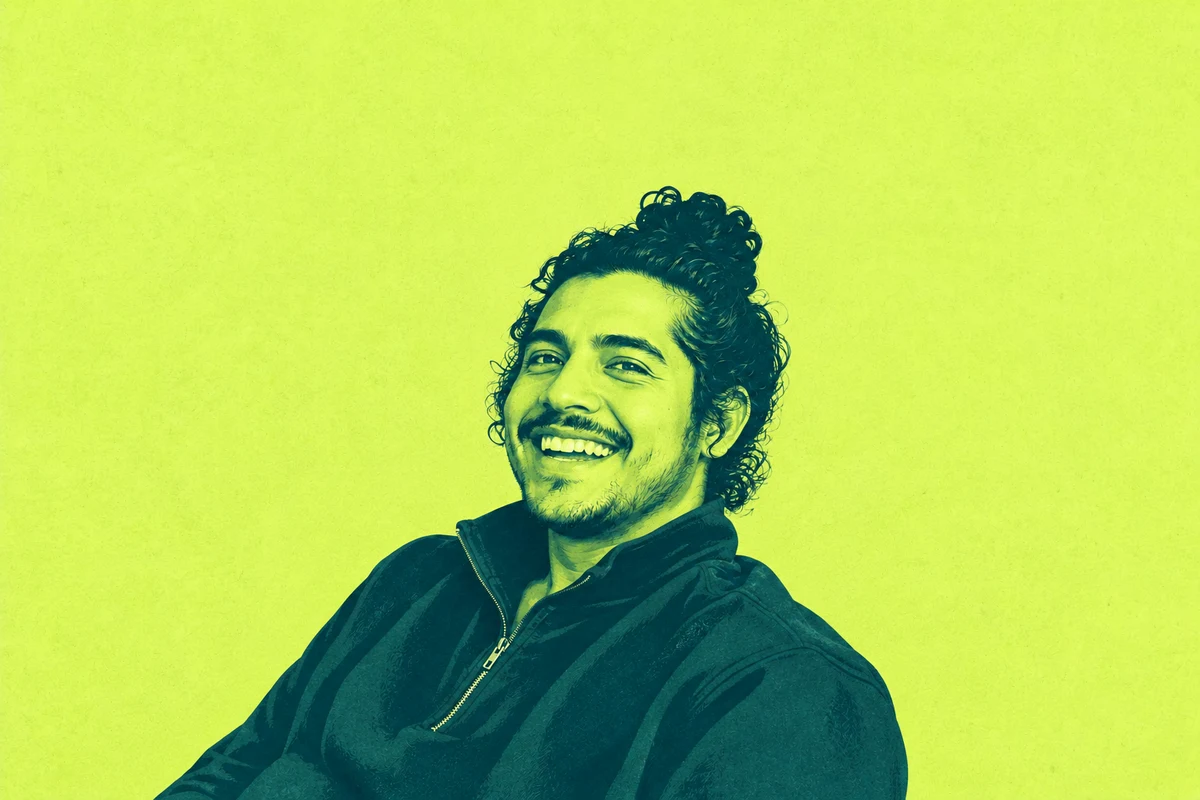
- What each route fixed. The studio edit replaced the kitchen and evened out the light. The About-page edit moved the person to one side and left quiet space for text. The duotone made a deliberate change of medium while keeping the laugh and the tied curls.
- The failure. All three briefs asked for space above the hair, and all three first results crowded it. Each looked fine as a whole image.
- The repair. The duotone shows the fix: a framing-only correction like the one above made the portrait smaller with a broad band above the bun, and kept the palette, laugh and reclined pose. It also redrew the mouth and hair slightly, which is why the face gets a fresh comparison after every repair. Each route’s own guide covers its repair in full.
Go deeper
Give each attachment one job
When you add a colour swatch, a style sample or a layout sketch, the editor may borrow a face or a hairstyle from it. The reference-pack guide shows how to label each file so the photo stays the only source of the person.
Check the file you'll actually upload
A portrait in a chat isn’t yet a profile export or a transparent cut-out. Download it and look at the saved file in its destination. The cut-out guide covers transparent edges, and the brand-colour guide covers matching a background colour without tinting the person.