Try a soft window-light portrait without changing your face
Soft window light gives a portrait shape without a dramatic studio look. "Cinematic" won't get you there. Say where the light comes from, how much shadow is acceptable and what about the person must stay exactly as it is.
What you'll make
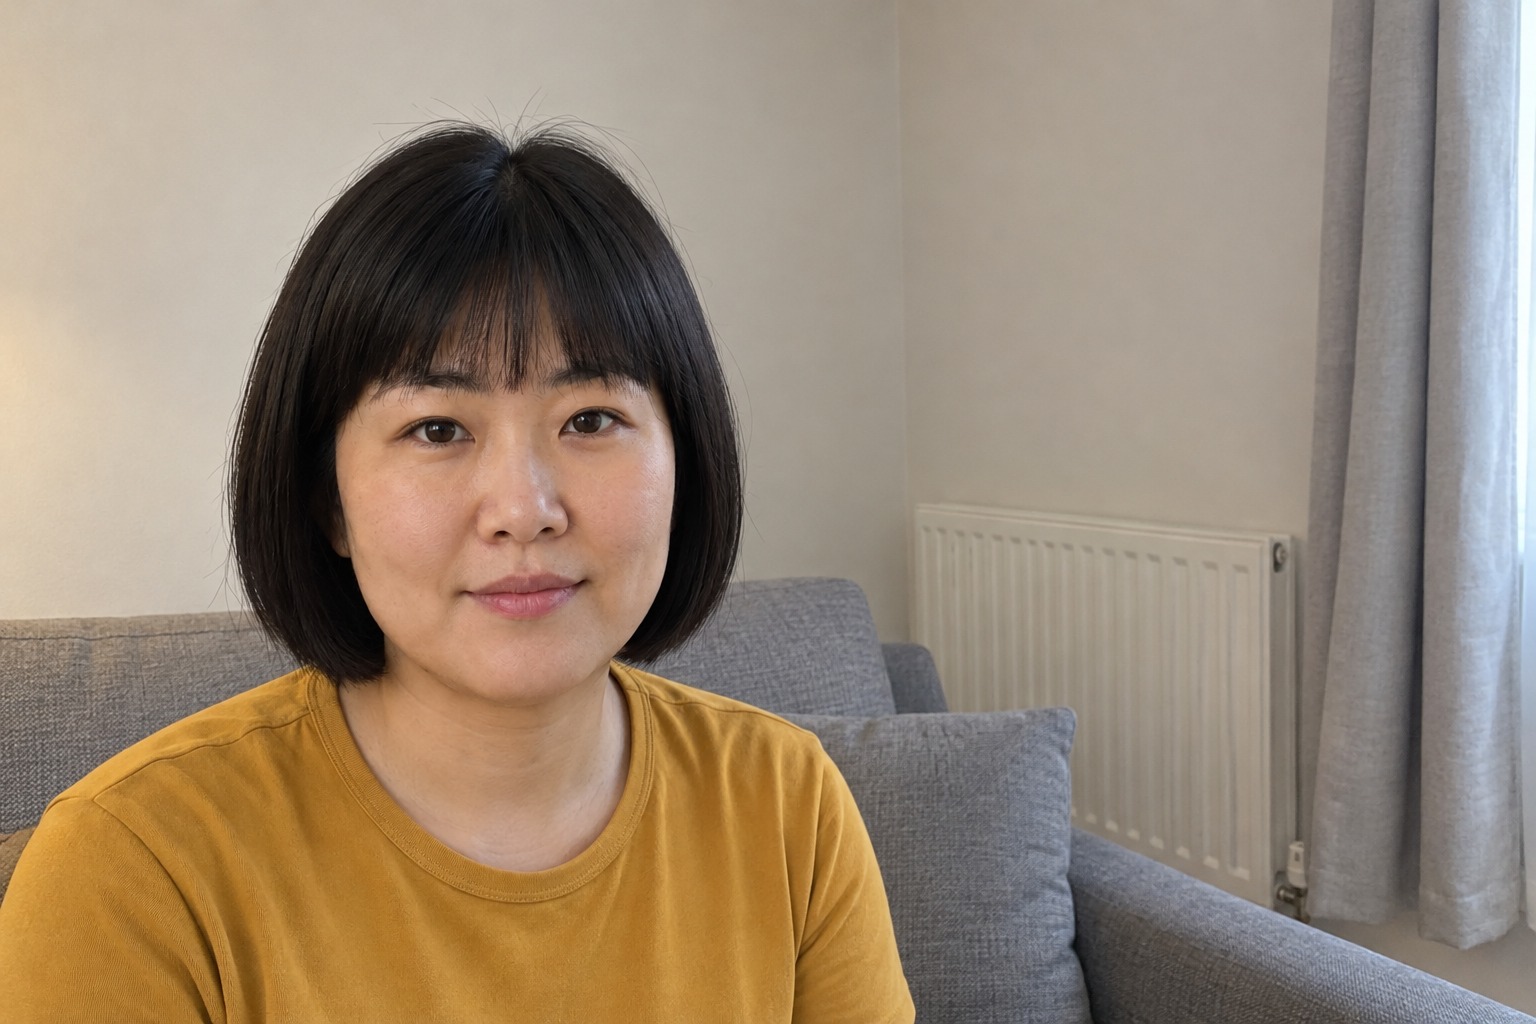
one softly lit portrait, compared with the untouched original and checked at the size it will be used.
What you'll need
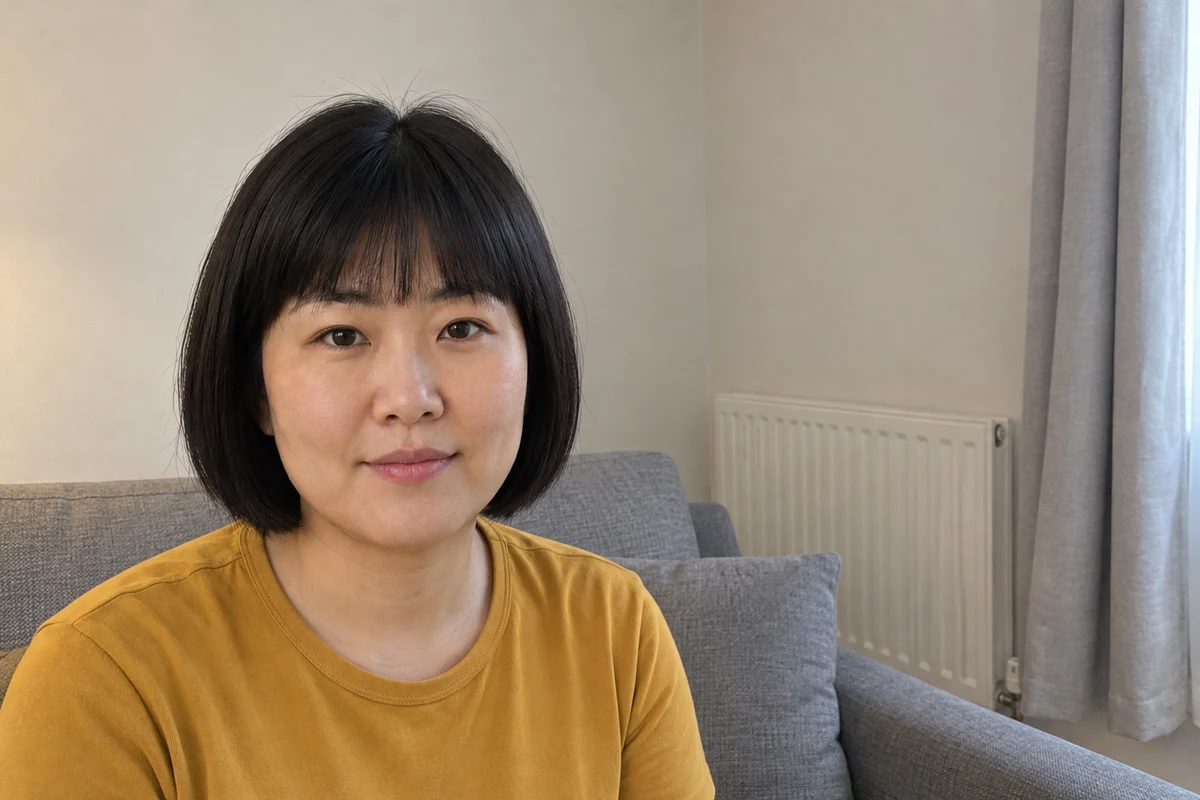
a recent, readable photo of yourself or of an adult who has agreed, and an image editor your organisation lets you use (ChatGPT and Gemini both edit attached photos). Keep the original. If the face is in deep shadow or blurred, improve the photo first. To practise, use the fictional sofa-room photo.
Example result.
1. Choose a light direction you can describe
For a first attempt, choose broad soft light from one side, a quiet wall and a gentle shadow on the other cheek. Say whose left you mean. “Viewer’s left” (also called camera left) is the left of the picture as you look at it; in a frontal portrait, that’s the person’s right.
Softness and brightness are different things. Soft light gives a gradual fall into shadow; more brightness can wash the face out. You want readable eyes and skin texture, not a white patch where the forehead was. There’s no need for a visible window or a luxury office. The light does the work; the window can stay imaginary.
Why this works: “viewer’s left” is something you can check in the result. “Nice light” isn’t.
What you should see: a one-line choice, such as “soft light from the viewer’s left, gentle shadow on the right cheek, plain ivory wall”.
2. Give the editor a restrained brief
Attach the untouched original and paste the request with your choices filled in.
Edit my attached portrait into a natural soft window-light headshot for [intended use].
Keep the face, apparent age, expression, hair, clothes, accessories and skin texture exactly as photographed.
Use broad soft daylight from the viewer's [left / right], with a gentle, readable shadow on the opposite cheek
and a quiet warm-ivory background. Keep skin colour as it is in the original, and both eyes readable.
Keep a head-and-shoulders crop with the full hair and some headroom. Keep the head angle, gaze and posture.
Don't add a window, props, text, jewellery or a new outfit. Don't reshape the face or smooth away lines. Return one image.
[intended use] is where it’s going, such as “a team page”; [left / right] is the side you chose in step 1.
Why this works: the person is listed as fixed, so the only changes left open are the light, the wall and the crop.
What you should see: one image of the same person, lit from the side you named, with a shadow you can still see into.
3. Check the face, then the light
Check the face first: eyes, nose, jaw, hairline, expression, apparent age and accessories. Then the light, side by side with the original:
- Is the brighter cheek on the side you asked for?
- On the shadow side, can you still read the far eye, the nose shadow and the edge of the cheek?
- Has the light changed skin colour, or smoothed away texture?
- Does the background stay quiet when the image is small?
Then preview it in the real crop, such as a small circle. One eye can disappear into shadow at avatar size.
Why this works: a flattering crop and wall make it easy to miss a colour or texture change. A fixed order of checks stops that.
What you should see: a short note of what matches the original and what changed.
Check the result
- The light comes from the side you asked for.
- Both eyes are readable, including on the shadow side.
- Skin colour and texture match the original.
- The face, hair, expression and clothes are unchanged.
The usual failure: the warm background spills into the skin. The request said to keep skin colour as in the original, and the result comes back warmer anyway. A nicer crop and wall make it easy to accept. Spot it by comparing a cheek in both images at the same zoom.
Keep the person, clothes, expression, light direction and framing exactly as they are.
The skin is warmer than in my original photo. Using the original as the reference, return the skin to its original colour.
Don't brighten the whole image or retouch the face. Return one image.
Worked example: a sofa-room photo to soft window light
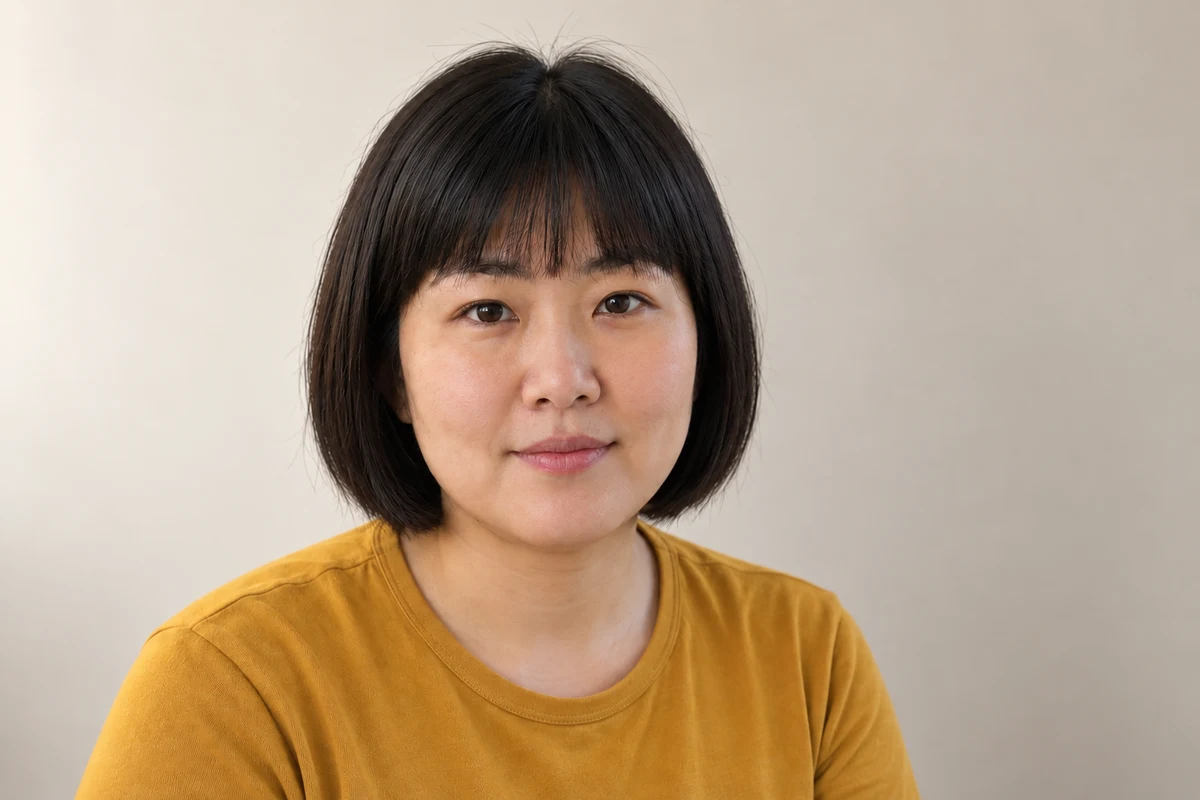
Fictional example. The source is the sofa-room photo above: the person sits to one side, with a radiator and curtain behind her. The request used light from the viewer’s left and a warm-ivory wall.
- What held: the closer crop centres the face and removes the radiator and curtain. The bob, fringe, closed-mouth expression and ochre top survived.
- The failure: the skin is warmer than the original, even though the request asked for natural skin colour. The repair prompt above is the next step, with the original attached again, then a fresh comparison of the whole image.
- The direction: it’s subtle here, a soft shading rather than a strong side light. That’s acceptable for a team page. If you wanted more shape, make one change only: “a little more shadow on the right cheek, both eyes still readable”.
Try it
Make the lighting instruction inspectable
Build a request that names the light direction and keeps the shadow side readable, then compare it with the example above.
The AI skill: Translate a style word into visible light and shadow constraints.
Loading the controls…
Instruction sketch. It is not a lighting simulation or an edited photograph.
The sketch separates direction from fill. In the example above, the skin came back warmer than the original: check colour, likeness and direction separately.
Your instruction preview
Use broad soft light from the VIEWER'S left. Use gentle fill so the shadow remains soft and both eyes stay readable. Keep the source person, natural skin colour, expression, hair, clothes and complete framing. Compare the actual result with this direction and with the original; do not assume the request was followed.Try it on your work: Add the instruction to your own photo request. Check which cheek is brighter and whether both eyes stay readable; change one thing at a time.
Go deeper
When soft light smooths the skin
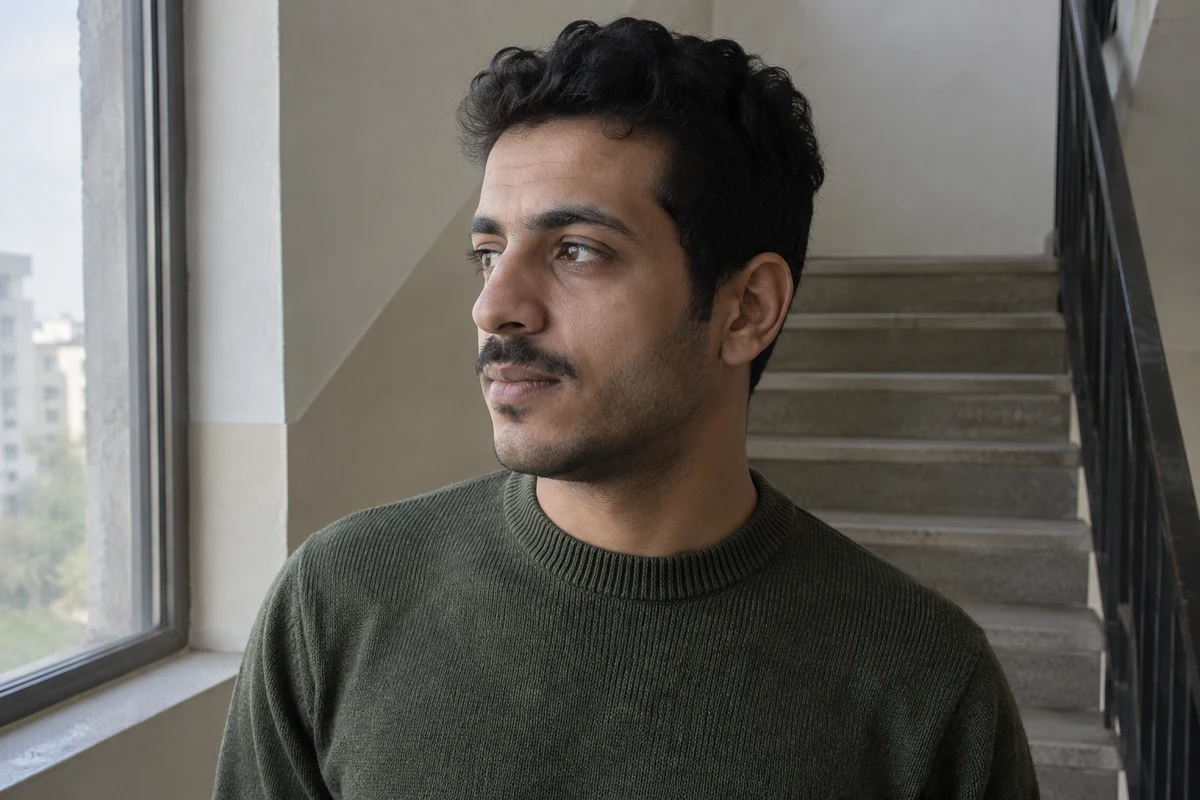
In this second fictional example, the source already had usable daylight from a stairwell window. The edit calmed the background and softened the far-side shadow, but the skin also came back smoother than in the original. “Soft light” isn’t a smoothing instruction. Compare the near-side cheek at full size, and if texture has gone, ask for “the skin texture from my original photo, unchanged” and nothing else.
Keep glasses in the review
Soft light can still put reflections on lenses. Check the eyes behind them, the bridge, the frame shape and the arms. Don’t ask for clearer eyes by quietly removing the glasses. The pencil portrait guide has a glasses check.
When a retake beats an edit
If one side of the face is lost in darkness, the editor has to invent what it can’t see. A new photo near a bright, diffused window may need only a crop. For brighter or darker treatments, see high-key and low-key portraits; keep the same “what must stay the same” list and change only the light.