Make a neutral studio headshot with believable detail
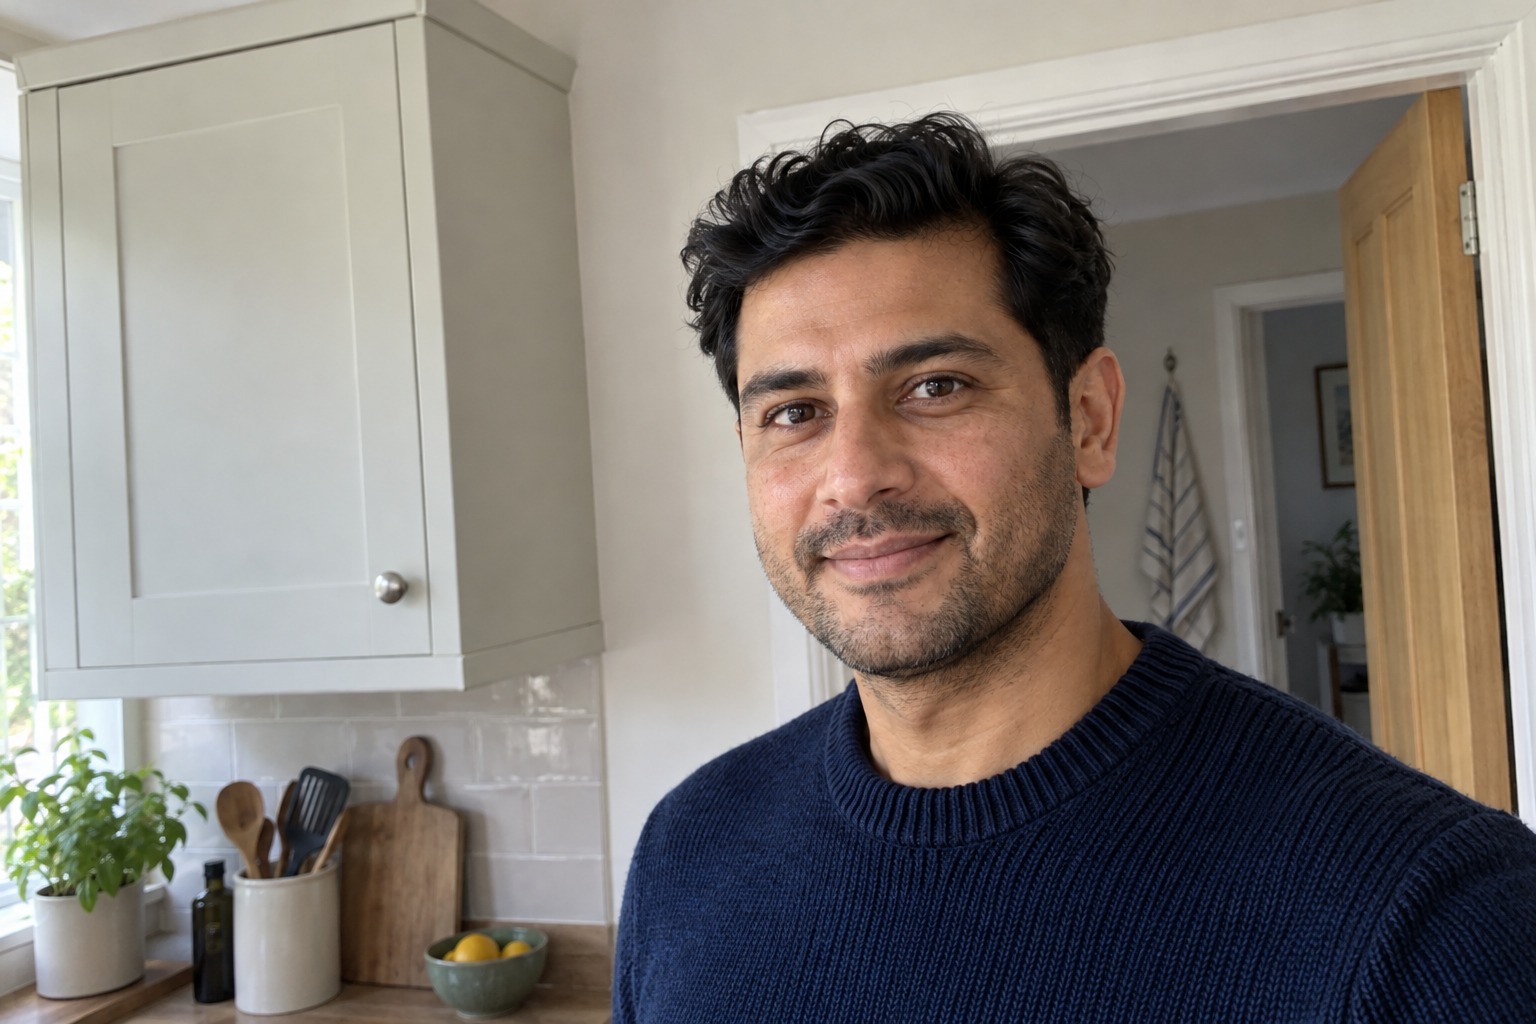
You need a profile photo and the best one you have was taken in the kitchen. A studio-style edit doesn't need a new face, a new outfit or a surprisingly expensive office — just a quieter background and better light on the same person.
What you'll make
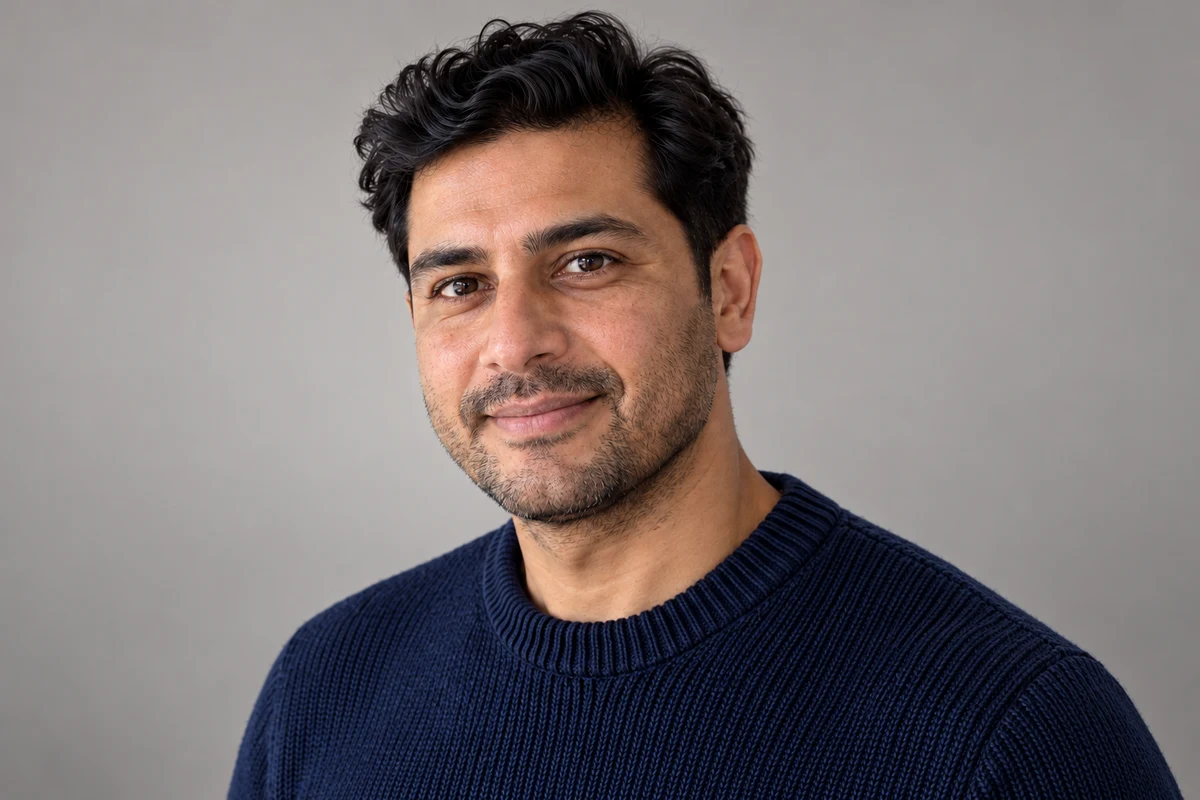
a studio-style headshot of the same person, with a quiet background and even light, and a clear decision to keep it, fix one thing or use the original.
What you'll need
a recent, clear photo of yourself, or of an adult who has agreed, an image editor your organisation lets you use (ChatGPT and Gemini both edit attached photos) and where the picture will go. Keep the original. To practise, use the fictional kitchen photo.
Example result.
1. Decide what needs changing
Look at the original and pick the smallest job that will work:
| What you see | First route |
|---|---|
| Face and light already good | Crop, or change only the background |
| Light uneven, face still readable | One restrained lighting and background edit |
| Blur, glare or part of the face hidden | Retake the photo |
If the face is right and you only need a tighter crop, a crop tool is more predictable than asking a model to regenerate the picture.
Why this works: an AI edit regenerates the whole image. The less you ask it to change, the less there is to check.
What you should see: one route, and a short list of the visible problems you want fixed.
2. Brief the light, frame and background, with what must stay
Attach the original and ask for one candidate:
Edit my attached photo into a natural neutral-studio headshot for [use].
Keep the person's facial proportions, apparent age, natural skin colour
and texture, expression, hair, clothes and accessories as photographed,
and keep their head angle, gaze and shoulder posture.

Improve only the [visible problems]. Use a balanced head-and-shoulders
crop with complete hair and a little headroom, soft even light with
both eyes readable, and a quiet [background] background.
No retouching, suit, props, text, logos or invented body parts.
Make one candidate.
[use] is where it will appear, such as a profile or speaker page. [visible problems] is your list from step 1, such as “off-centre framing, uneven light and busy background”. [background] is a shade such as warm grey or pale stone.
Why this works: “studio” on its own leaves the editor to invent a whole look. Separating what stays from what improves tells you exactly what to compare afterwards.
What you should see: one candidate with a plain background and better light, of what should be the same person.
3. Check the person before the background
Put the original and the candidate side by side at full size. Check the eyes, nose, jaw, hairline, age and expression; then glasses, accessories and clothes; then colour and skin texture. Only then look at the background and crop: is all the hair inside the frame, and does it work at profile size?
If the person has changed, don’t repair the candidate. Restart:
Reject that candidate because [the change]. Start again from my
untouched original, not the candidate, and change only the background.
Keep the person's appearance, colour, texture, clothes, expression
and framing exactly as in the original.
Why this works: a lovely background is the easiest way to stop looking at the face. Checking the person first keeps the order right.
What you should see: the same person, plus a short list of anything the candidate missed from the brief.
Check the result
- The face, age, expression and hairline match the original.
- Skin colour and texture look like the original, not warmer or smoother.
- The clothes and accessories are the ones in the photo.
- The hair is complete, with space above it, at the final crop.
The usual failure: the edit gets most of the brief right and quietly misses two things — the crop is tight, and the face comes back a little warmer and more textured. Because the background is so much better, it reads as a success. Spot it by naming one improvement and one miss before deciding. Then ask for exactly the misses:
The background and balanced position are useful. There is too little
headroom, and the face looks warmer and more textured than the original.
Using my untouched original as the reference for the person, make a
slightly wider crop with full hair and space above it, keeping the
clothes and expression. Don't smooth or reshape the face to fix it.
Worked example: the kitchen photo
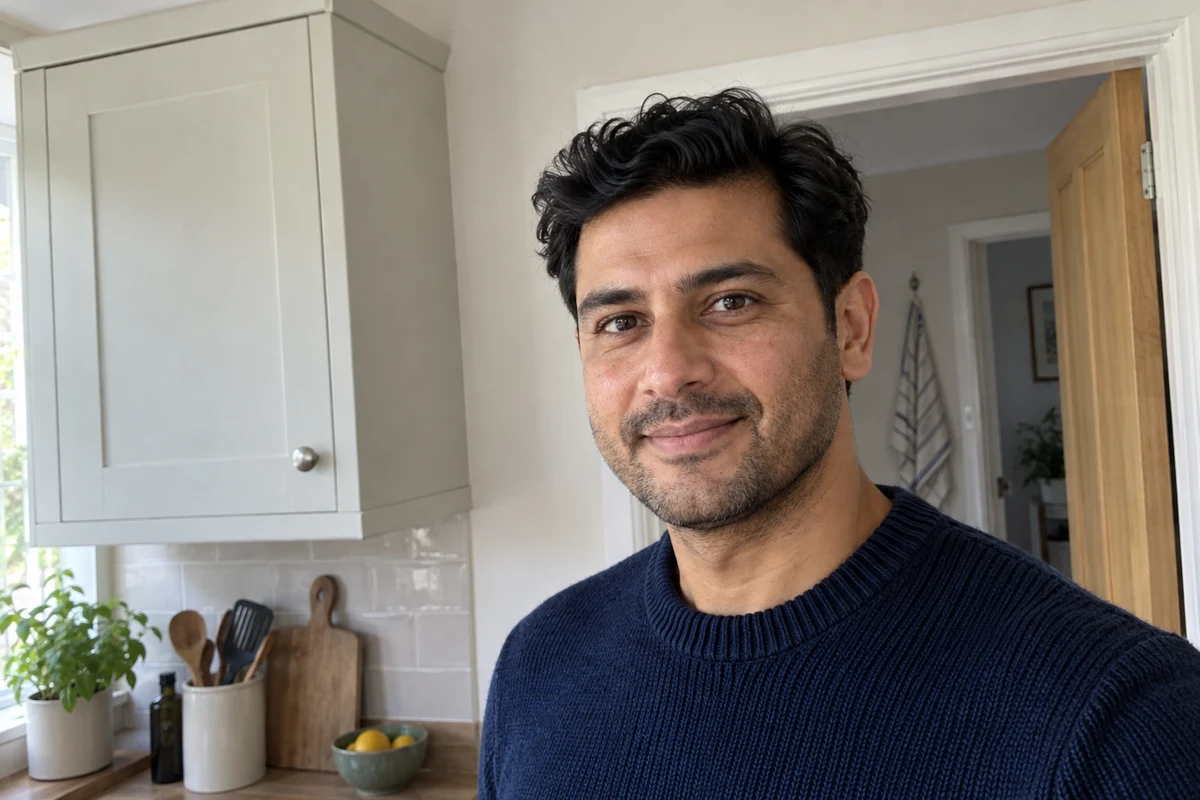
Fictional example. The kitchen photo at the top is usable: clear eyes, full hair, readable skin. The kitchen is busy, the face sits to the right and the window makes one side brighter. The brief asked for balanced framing, even light and a plain warm light-grey background.
- What worked. The candidate balanced the composition, removed the kitchen and evened out the light. The hair, navy jumper, stubble and closed-mouth smile came through.
- What it missed. The eyes sit near the middle of the frame rather than the upper third, the headroom is tight, and the skin and stubble look warmer and more pronounced. That’s the usual failure: a better picture, slightly less like him.
- The repair. The prompt in Check the result names those two misses and nothing else. Try it below compares that request with a vague one. If the face still drifts after one narrow repair, keep the original and change only its background in an ordinary editor; the cut-out guide shows how.
Try it
Read the candidate before asking for another one
Connect a visible improvement and a remaining limit to the next request.
The AI skill: Review requested changes separately from changes to the source person.
Loading the controls…
The kitchen is gone, the framing is balanced and the light is even. The headroom is tight and the face looks warmer and more textured than the original.
Choose the next instruction to inspect
The repair in Check the result names exactly what you can see — tight headroom and a warmer, more textured face — and keeps the original as the reference for the person. Nothing else is open to change.
The next request
Try it on your work: Name one improvement and one miss in your own candidate, then ask for the miss only. If the face has changed, go back to the original.
Go deeper
Bright background (high-key) without washing out the person
For a bright, airy look, brighten the background, not the person. Ask for a clean off-white background with soft neutral light and gentle facial shadows, and keep the “natural skin colour” line from step 2. A bright background is not a promise about skin colour: the same treatment can affect two people differently, so each person checks their own. Never assume high-key means lighter skin. If a pale shirt disappears into the wall, darken the wall, not the face:
Keep the person's appearance, skin colour, face detail, clothing and crop.
Make only the background slightly darker ivory so the pale clothing
separates from it. Don't darken the face or change the shirt.
Other light treatments
The same brief works with one line changed. Low-key: “a quiet deep charcoal background, soft light from the viewer’s left, gentle fill so both eyes stay readable” — see the low-key guide. Window light: “soft daylight from one side as if from a nearby window” — see window-light portraits. Black and white: try a plain conversion first — see black-and-white headshots. Each still needs the person checked first.
Knowing when to stop
Sometimes the right move is to keep the original. In one fictional case the photo was already clear and softly lit. A taupe background edit made the face look warmer; a correction using the original as the colour reference didn’t fix it; a background-only restart still looked warmer. Three tries, same drift, so the original was kept. Describe a colour concern by what you see (“warmer face”, “lighter skin”) rather than claiming a measurement, and let the person in the photo make the final call.