Create a black-and-white headshot with readable detail
Black and white can make a team page look consistent overnight. Removing colour is a two-second job in any photo app; the AI edit is for the photo that also needs a new background, and it comes with the risk of a slightly different face.
What you'll make
a black-and-white headshot with readable eyes, hair and clothing, made either by a plain conversion or by an AI edit you have compared with the original.
What you'll need
a recent photo of yourself, or of an adult who has agreed, and the place it will be used. For the AI route, an image editor your organisation lets you use (ChatGPT and Gemini both edit attached photos). Keep the untouched original. To practise, use the fictional park photo.
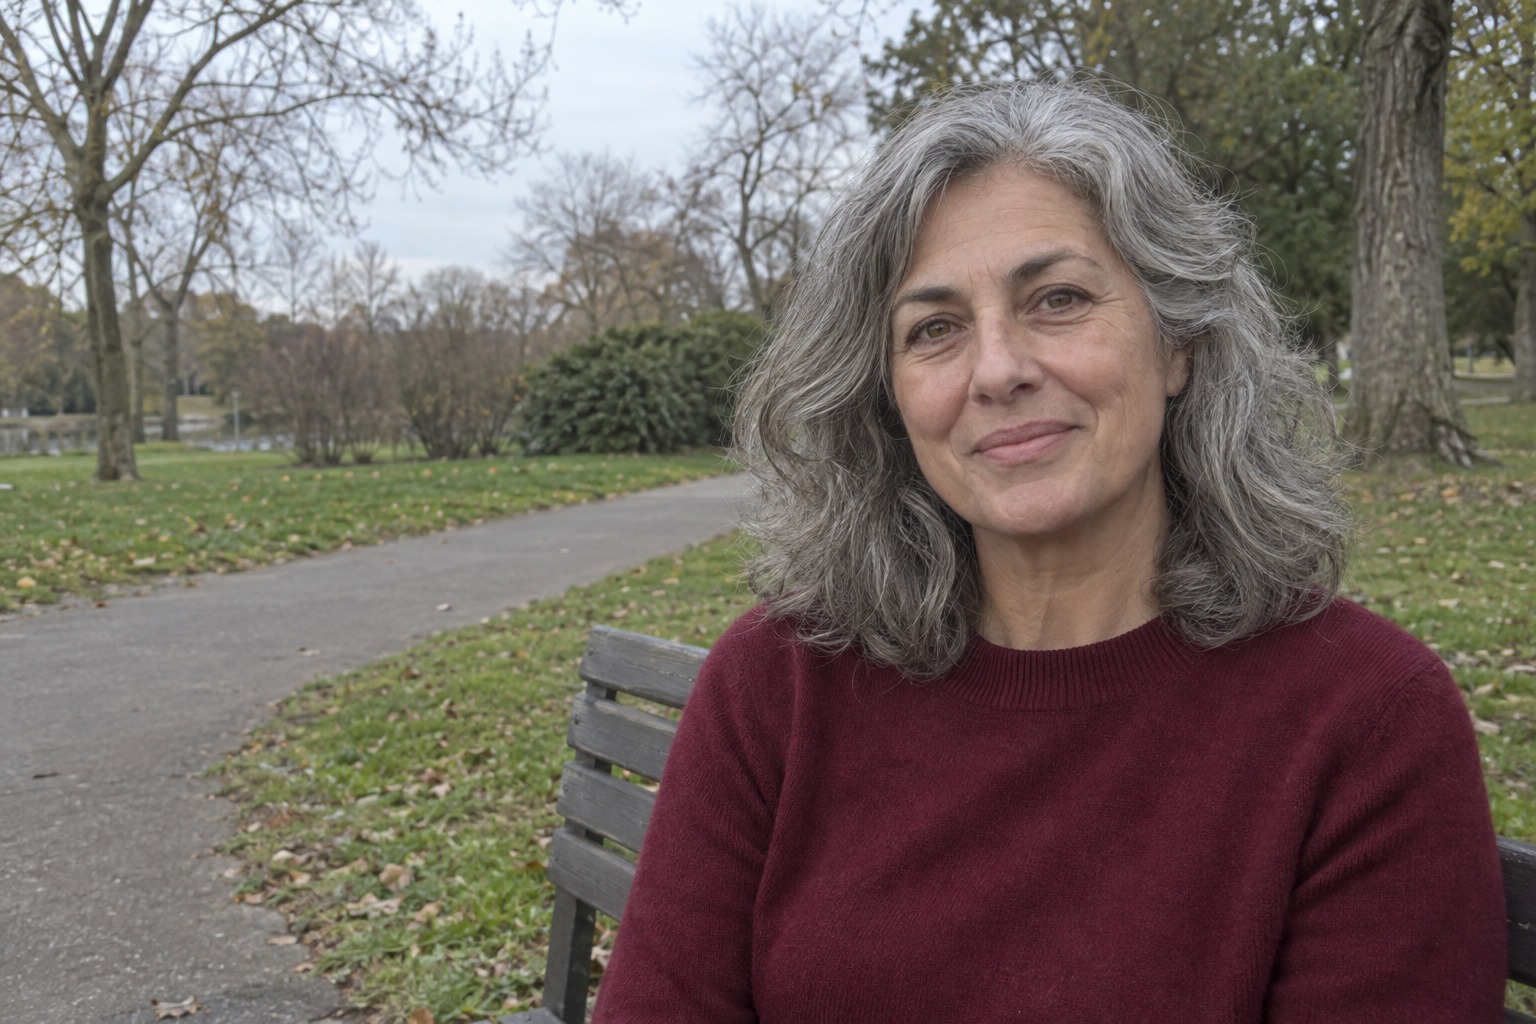
Example result.
1. Try a plain conversion first
If the photo is already good — clear face, decent framing, a background you can live with — don’t use AI. Open it in your photo app, choose a black-and-white filter (Mono on an iPhone), raise the contrast a little and look at the eyes. That keeps every detail the camera recorded, because nothing is regenerated.
| What you see in the photo | Route |
|---|---|
| Clear face, good framing and light | Plain conversion |
| Readable face, busy background, off-centre framing | AI edit (step 2) |
| One eye or the jaw lost in shadow | Take a clearer photo first |
Why this works: removing colour doesn’t need a new face. An AI edit regenerates the whole image, so it’s only worth it when you also need changes a filter can’t make.
What you should see: either a finished conversion you’re happy with, or a clear reason to move to step 2.
2. Brief the person and the tones separately
Attach the untouched photo in your image editor and ask for one candidate:
Edit my attached photograph into a natural black-and-white
head-and-shoulders portrait for [intended use].

Keep the person's facial proportions, apparent age, expression,
hair, clothing and accessories exactly as in the original.

Improve [what the photo needs]. Use a quiet [light / mid-grey / dark]
background. Keep mid-tone detail around both eyes, in the hair and in
the clothing, rather than turning highlights white and shadows black.

Include the whole hair outline with modest headroom and room for the
final crop. No added text, props or clothes. Make one candidate.
[intended use] is where it will appear, such as a team page. [what the photo needs] is the visible problem, such as “the framing and the busy background”. The last bracket is the background shade you want.
Why this works: mid-tones are the greys between solid black and white, and they carry the detail in skin, hair and clothing. Asking for them by name gives you something to check that “dramatic monochrome” doesn’t.
What you should see: one greyscale image (not warm brown or blue-tinted) of what should be the same person.
3. Compare the face before the contrast
Put the original and the candidate side by side at full size. Check the eyes, nose, jaw, hairline, apparent age and expression first. Colour has changed on purpose; the face shouldn’t have changed with it. Then check the tones:
- Both eyes are readable, including the shaded side.
- The hair has a plausible outline that separates from the background.
- The clothing still looks like the same garment, not a black shape.
Finally, shrink it to the size it will be used. An eye lost in shadow is easy to miss at full size.
Why this works: a striking tonal result is the easiest way to stop looking at the face. Checking likeness first keeps the order right.
What you should see: the same person, with detail you can read in all three areas.
Check the result
- The face, expression, hairline and apparent age match the original.
- Both eyes are readable at the final size.
- Hair and clothing keep visible texture.
- The image is greyscale, unless you chose a tint.
The usual failure: the person changes along with the colour. The expression shifts slightly, the hair gets fuller, and because everything is now grey and polished it reads as an improvement. Spot it by looking at the eyes and mouth side by side with the original, not at the candidate alone. If they differ, don’t try to repair the face. Restart from the original with a narrower brief, or use a plain conversion:
Start again from my attached original photo, not the previous candidate.
Change only the background to a quiet mid-grey and convert to black and white.
Keep the face, expression, hair, framing and clothing exactly as they are.
Make one candidate.
Worked example: the park photo that came back smoother
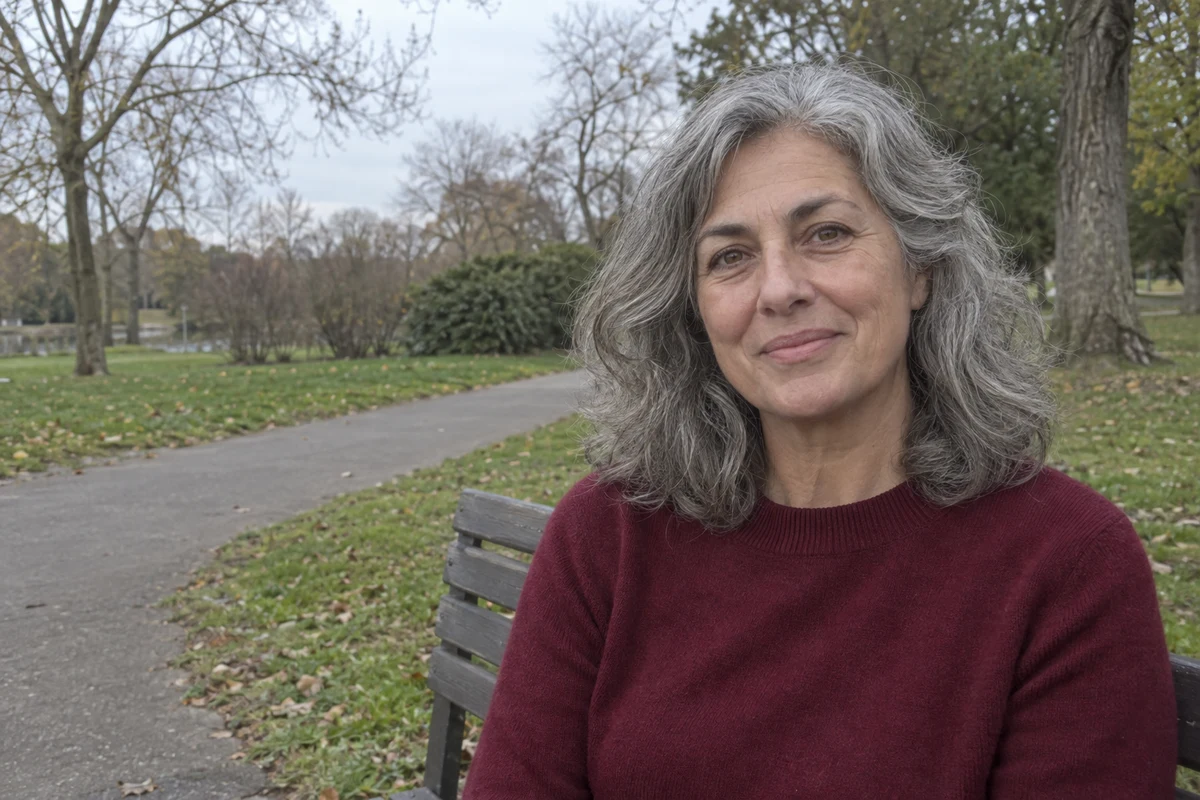
Fictional example. The park photo at the top has overcast light, an off-centre composition and a prominent path and trees. The face is readable and the hair is fully in frame. Because it needed a new background and framing as well as monochrome, it went down the AI route with the step 2 brief.
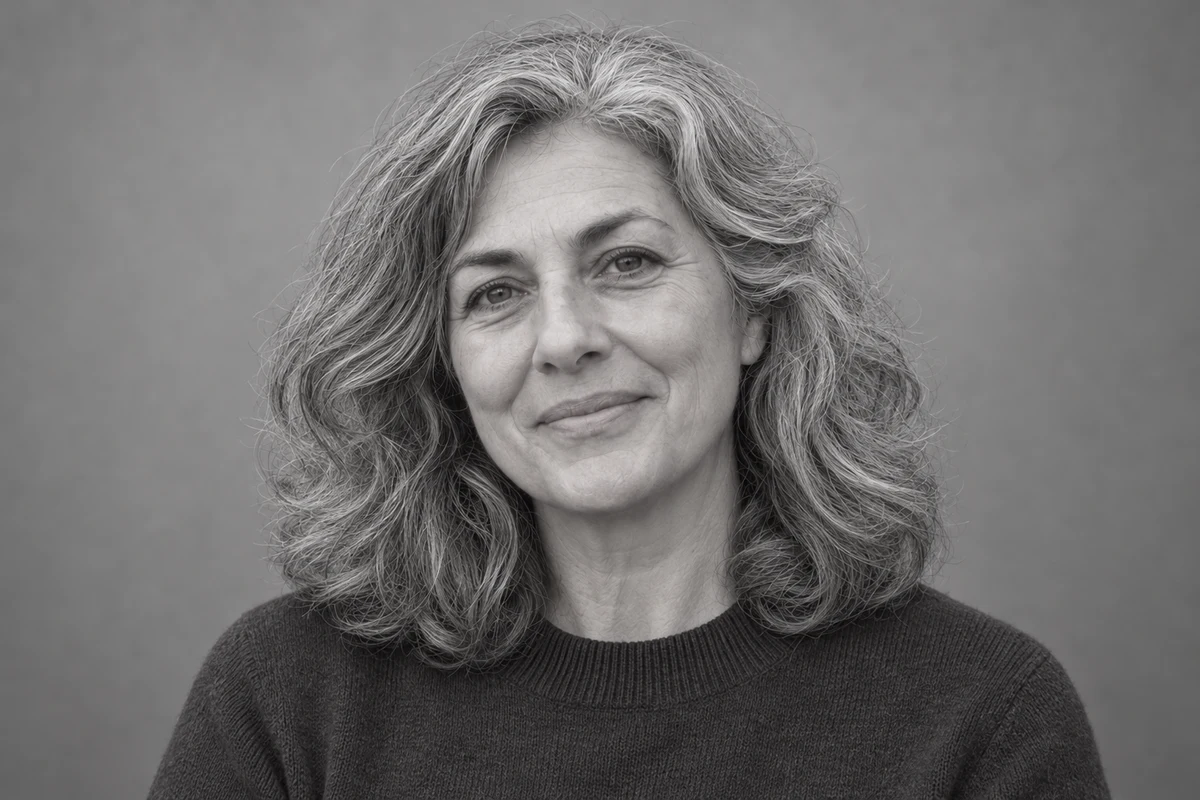
- What worked. The candidate removed the park, gave the face more of the frame and kept readable tones in the eyes, hair and jumper. The burgundy jumper became dark grey but kept its knit and neckline.
- The failure. The hair came back fuller and more finely detailed than the original, and the expression and facial detail subtly differ. Use the lens in Try it to compare the eyes and hair side by side.
- The decision. For a real person, that’s a reason to reject this candidate. The repair is the restart prompt above, or a plain conversion of the original with a background tidy in an ordinary editor. A good tonal treatment of a slightly different face is still the wrong photo.
Try it
Inspect tones where the detail matters
Zoom into the eyes, hair and clothing in the original and the AI edit, and decide whether the face is still the same face.
The AI skill: Check one area at a time, and tell new generated detail apart from what the camera recorded.
Loading the controls…
Both eyes stay readable, but the expression and facial detail subtly differ from the original. A good tonal treatment doesn't make it the same face.
The lens enlarges fixed exported images using browser display cropping. The two views are not geometrically registered, and they do not measure likeness or recover missing pixels.
Your instruction preview
Compare my original photo and this black-and-white candidate around both eyes and the mouth. Point to any visible change in facial structure or expression before suggesting a tonal fix. If an eye is lost in shadow, suggest a small contrast reduction that keeps the original appearance. Do not invent hidden features.Try it on your work: Zoom into your own candidate the same way. Fix only a fault you can see; restart from the original if the face has changed.
Go deeper
Stop a dark jumper turning into a solid black patch
If the face is right but the contrast has swallowed detail in one area, fix that area rather than regenerating:
Keep the current person, expression, hair, clothing and crop.
Reduce the contrast in [area] so its mid-tone detail is readable.
Keep the black-and-white treatment and background.
Do not lighten the whole face, smooth the skin or reshape features.
[area] is the place you can see the problem, such as “the jumper and collar”. If a small manual contrast adjustment in a photo editor does the same job, that’s the safer fix.
Transfer the method to a brand-colour treatment
A duotone portrait changes the palette deliberately. The same order still applies: check the face first, then the treatment, then the small-size preview. Get the person’s agreement before using a stylised profile picture of them.