Try a low-key portrait and catch what the editor added
A darker portrait can suit an author page, a talk or an editorial layout. The image editor may also hand back something more polished than you asked for, including a jacket you have never owned.
What you'll make
a dark-background portrait with a readable face, the light on the side you asked for and the clothes the person was actually wearing.
What you'll need
a recent photo of yourself, or of an adult who has agreed, that your organisation lets you use in its image editor (ChatGPT and Gemini both edit attached photos). Keep the untouched original. To practise first, use the fictional patio photo.
Example result.
1. Decide how dark the treatment should be
Choose a dark, quiet background, soft light from one side and enough fill light to read the opposite eye and cheek. Fill means gentle light that keeps the shadow side visible. You don’t need a real lighting rig to describe its purpose in a brief.
For a small profile image, keep the face especially readable. A full-size editorial portrait can carry more contrast than a tiny circle. If the dark version doesn’t suit the use, try a neutral studio treatment instead.
Name the side of the light from the viewer’s point of view — the window-light guide explains why and lets you practise it.
Why this works: “dramatic” is hard to check. “Soft light from the viewer’s left, both eyes readable” is not.
What you should see: a one-line decision: background, light side and how small the final crop will be.
2. Request a dark setting, not a missing face
Attach the untouched original in your image editor and ask for one candidate:
Edit my attached original portrait into an understated low-key treatment
for [intended use]. Preserve the person's face, expression, apparent age,
hair, clothes, accessories, natural skin colour and texture.

Use a quiet deep charcoal background and broad soft light from the
VIEWER'S [left / right]. Keep gentle fill on the opposite side so both
eyes, the nose and jaw remain clearly readable. Do not black out half
the face or replace lost detail with invented features.

Keep complete head-and-shoulders framing and room for the final crop.
Let hair separate naturally from the background without a neon edge.
Do not add props, text, jewellery, a new outfit or hidden body parts.
Make one candidate to compare with the untouched source.
[intended use] is where the portrait will appear, such as a speaker page. [left / right] is the side you chose in step 1.
Why this works: the opposite-eye instruction turns “dark” into something you can check, and the hair-separation line asks for a readable outline rather than a glowing edge.
What you should see: one darker portrait of the same person, with both eyes still visible.
3. Check which side is actually lit
Put the candidate next to the original at full size and look at the light:
- Which cheek is brighter in the image you received?
- Can you still see the eye on the shadow side?
- Do hair, beard or glasses edges look plausible?
A direction word is easy to write and surprisingly easy to fail to check. If the light is on the wrong side and that matters for the layout, correct that one instruction rather than asking for “more cinematic” light:
The candidate appears brighter on the viewer's [left / right], but I
requested the other side. Restart from the untouched original.
Put broad soft light on the viewer's [required side] and retain gentle
fill so both eyes are readable. Keep the person, clothing, skin colour,
expression and framing unchanged. Do not make the whole image darker.
[left / right] is the side the light landed on; [required side] is the one you asked for.
Why this works: it names the one error and restarts from the original, so the fix doesn’t drift further from the person.
What you should see: light on the side you asked for, with the face and framing unchanged. If the direction doesn’t matter for this use, you can keep the first candidate and note that you chose to.
Check the result
- The eyes, nose, jaw, hairline, apparent age and expression match the original.
- The clothes and accessories are the ones in the original, on both shoulders.
- The face is still readable at the size it will be used.
- The background is quieter, not just darker over everything.
The usual failure: the editor adds something plausible you didn’t ask for, most often a smarter outfit. It looks good, which is exactly why it slips through. Compare the neckline and shoulders with the original before you judge the mood. If something was added, attach both images and name the change:
Use my untouched original as the appearance and clothing reference.
The second image is a candidate with an unwanted outer garment.
Make a new portrait with only the original clothing across the chest
and both shoulders. Keep the useful dark background and soft light,
complete hair and comfortable headroom. Do not change the face,
expression, pose or natural skin detail while repairing the outfit.
If a repair changes the face or still hides important detail, go back to the original or a simpler treatment. You don’t have to keep generating until something works.
Worked example: the polo that became a blazer
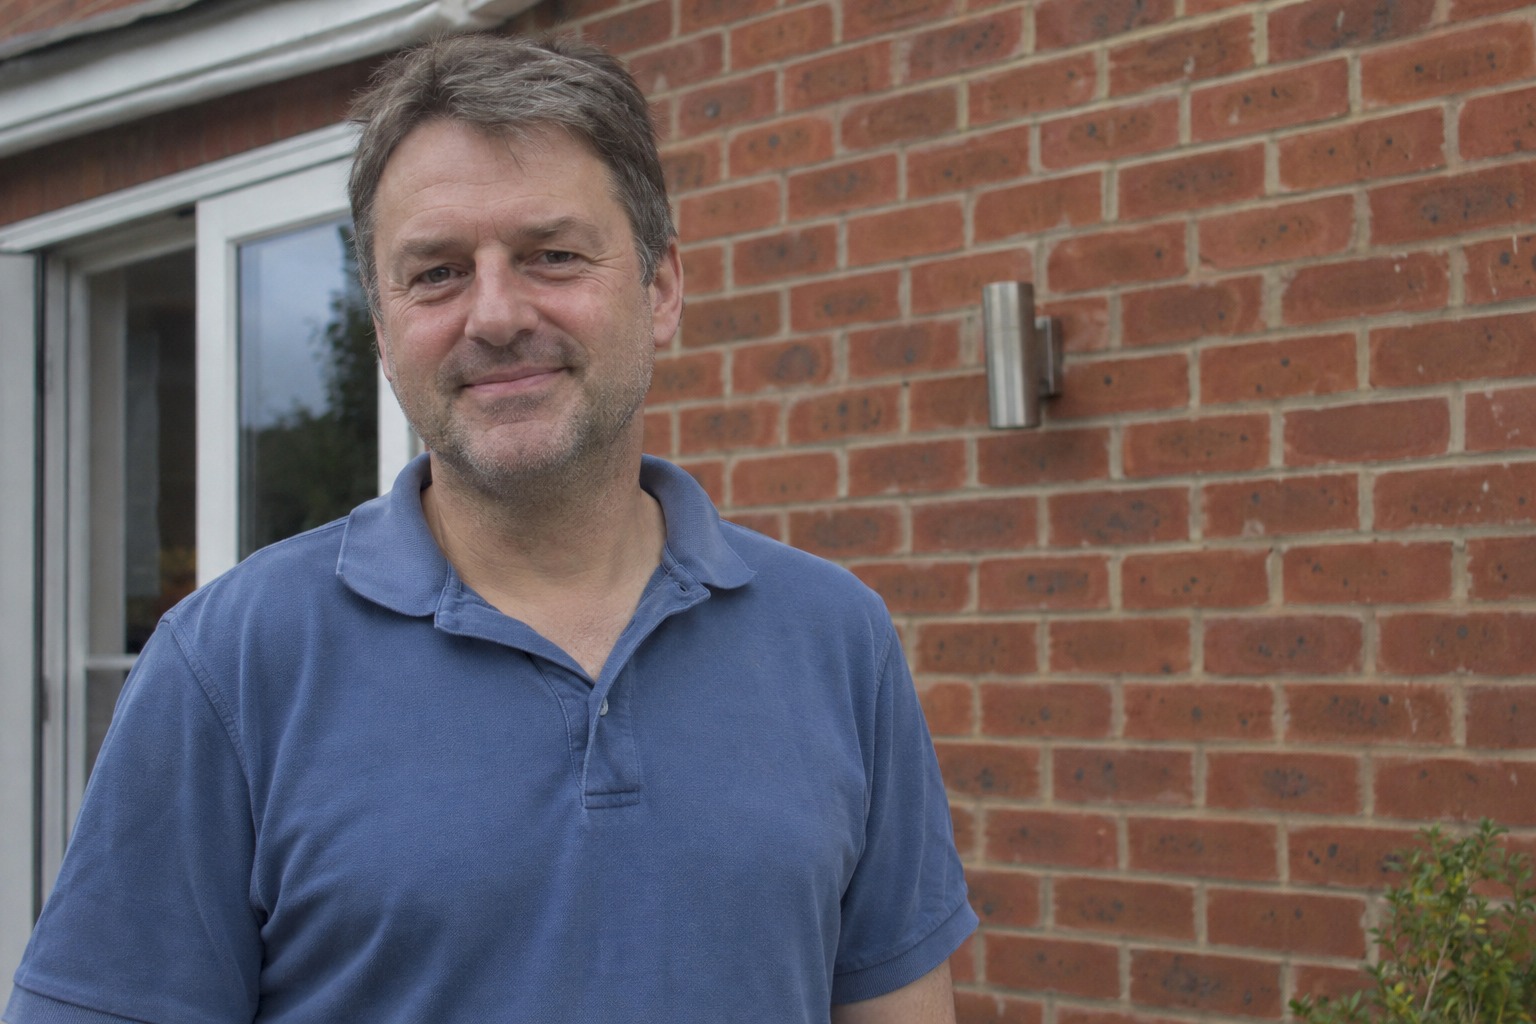
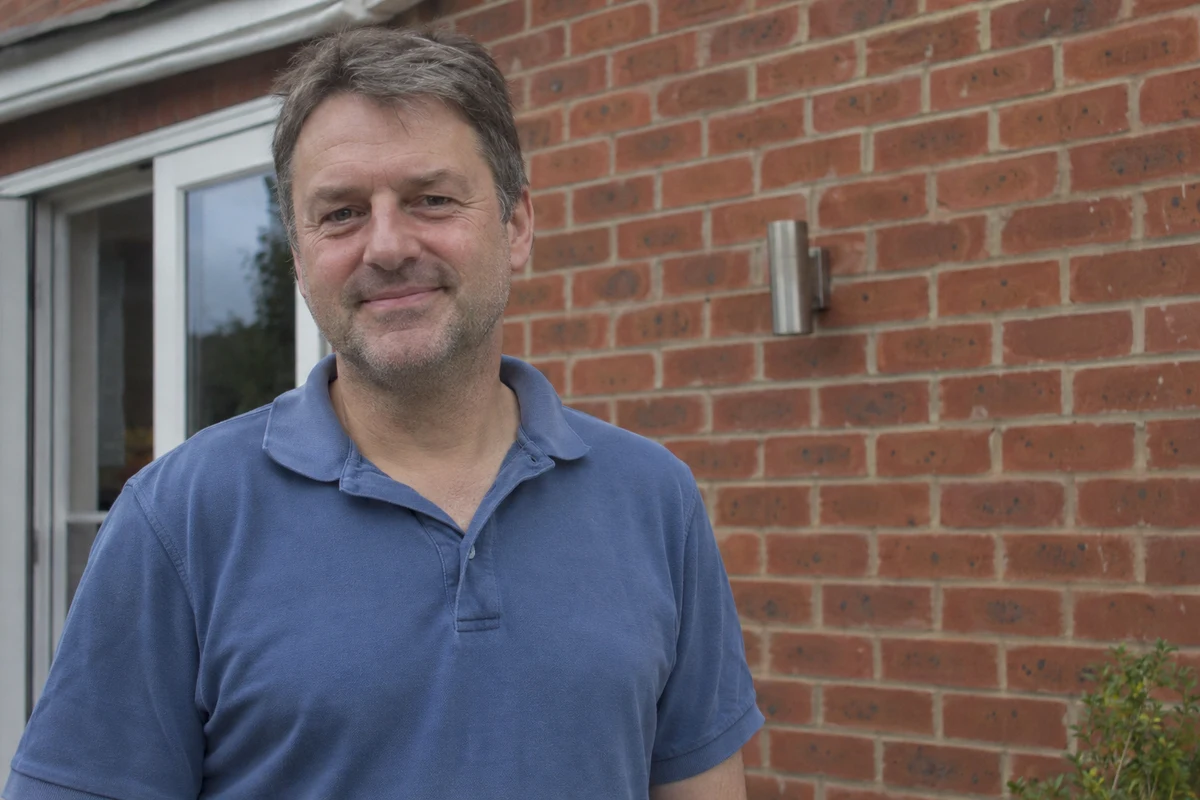
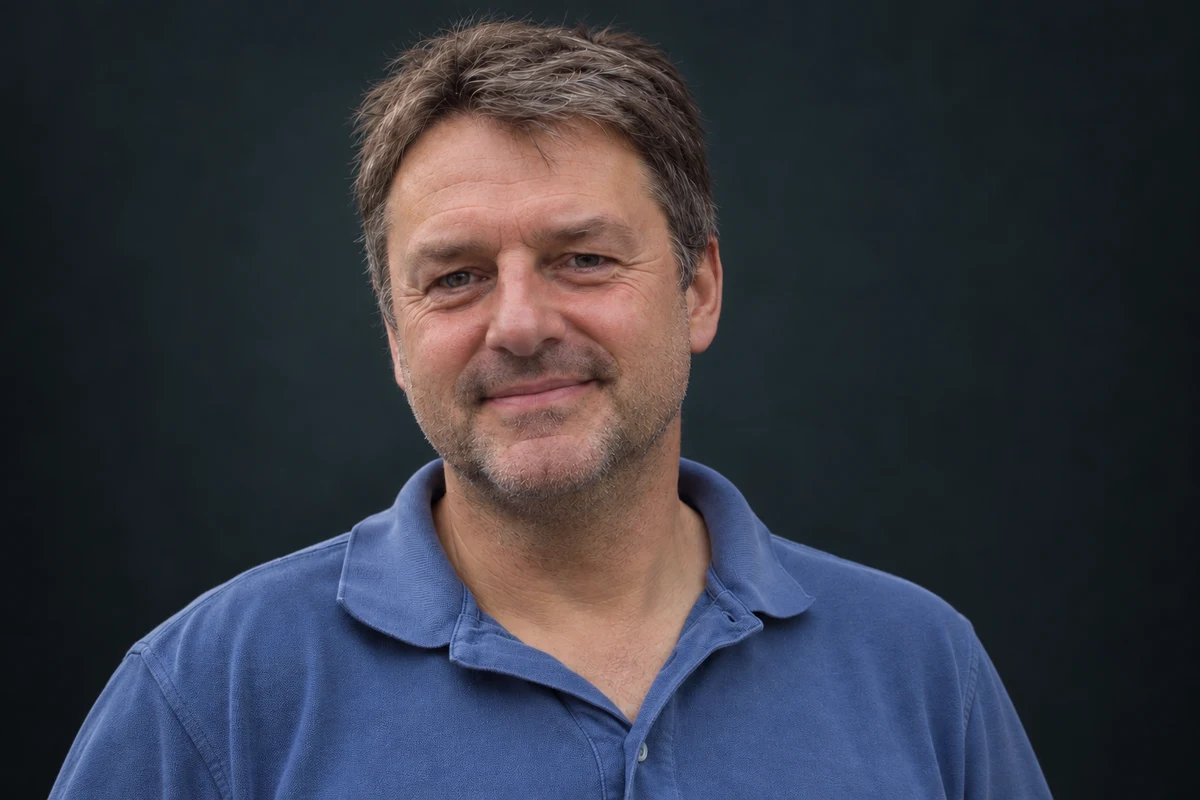
Fictional example. The patio photo at the top has a readable face, dim light, a busy brick wall and spare space to one side. The brief asked for a closer crop, soft light from the viewer’s left, a charcoal-teal background and the same clothes.
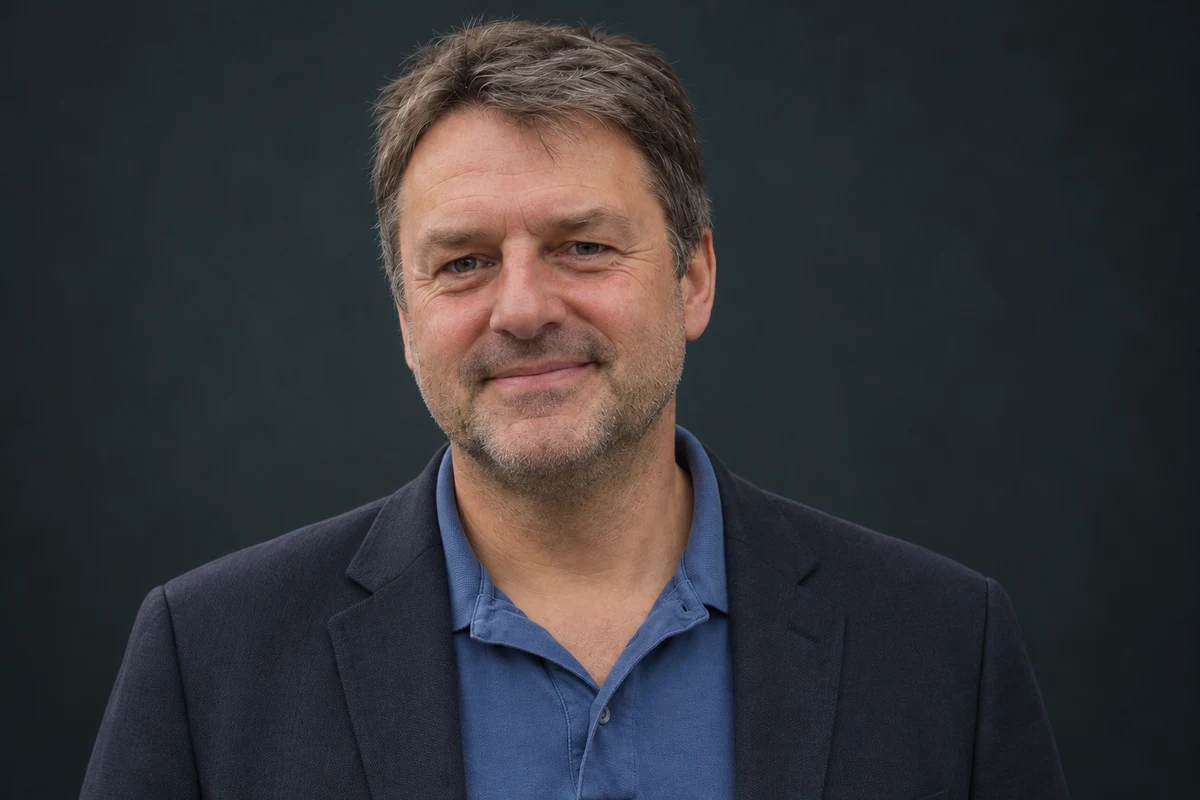
- The failure. The first candidate improved the crop and the light, and added a navy blazer. The brief said to keep the clothes. A convincing new outfit is as much a failure as a malformed hand.
- The repair. We attached the untouched photo as the reference and the blazer version as the image to correct, then used the repair prompt above. The blazer went, and the blue polo covers both shoulders, as in the after image at the top.
- What still needs a look. The repaired face is warmer and more detailed than the soft original, and the hair looks fuller. Fixing the clothes didn’t settle likeness, so the person in the photo should compare it with the original before using it.
Try it
Catch the unrequested outfit
Compare the first edit with its repair and spot what the editor added.
The AI skill: Reject plausible but unrequested changes instead of approving them because the output is attractive.
Loading the controls…
The dark background and closer crop are useful, but the blazer was not in the source and the brief said to keep the clothes. A plausible addition is still a failed instruction.
Choose the next instruction to inspect
Name the error and describe what should occupy the affected area. Keep the untouched source as the appearance authority; the executed two-reference request is recorded above.
The next request
The added outer garment was not in my source. Use the untouched original as the authority for face and clothing. Keep only the original blue polo across the chest and both shoulders, with its collar and fabric visible. Retain the useful dark background and readable soft light. Do not change the person while repairing the outfit.Try it on your work: Compare your own candidate with its source before judging the style. Repair one named change; restart if the person changed.
Go deeper
Test the portrait against a dark page
A dark image can merge into a dark website. Preview the real crop in its layout. Ask for a modest background change only if separation is the problem, and don’t brighten skin as a shortcut.
Keep the person and facial light unchanged. Make the background slightly
lighter charcoal so the image separates from the dark page. Do not add
a glowing outline or change skin colour. Keep the original as the
appearance reference and make one candidate for comparison.
Transfer the technique to a product scene
For a dark product on a dark backdrop, say which surfaces and edges must stay visible, and compare with the product reference, not only the mood. If the model changes the shape, markings or material to create contrast, restart with a smaller background request.