Build a useful reference pack for an AI portrait edit
You attach your photo, a colour you like and a crop shape, and ask the editor to “use these”. It uses all three, including in ways you didn't mean.
What you'll make
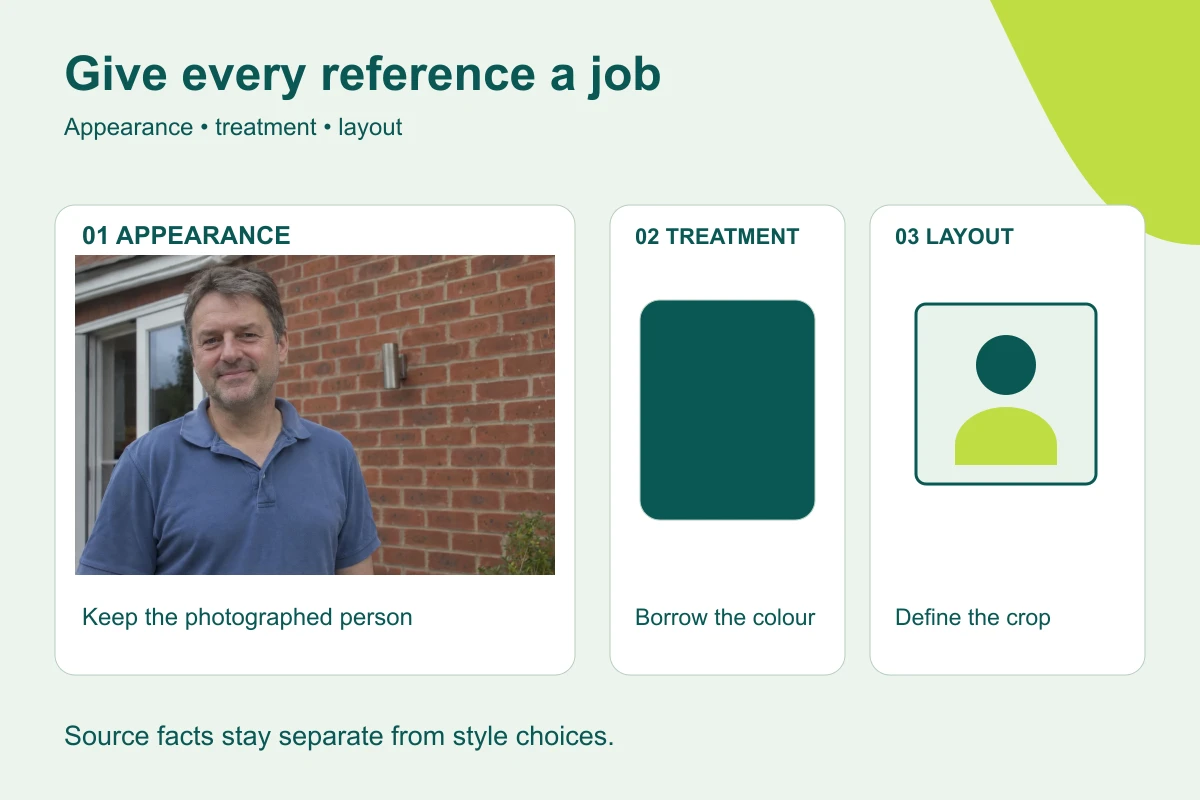
a small, labelled set of reference images and an editing request that tells the editor which image is the person and which ones only guide the look or the frame.
What you'll need
a recent photo of yourself, or of an adult who has agreed, that your organisation lets you use in its image editor, plus any style image you own or may use. ChatGPT and Gemini both accept several images in one message. Keep the untouched original. To practise, use the fictional patio photo.
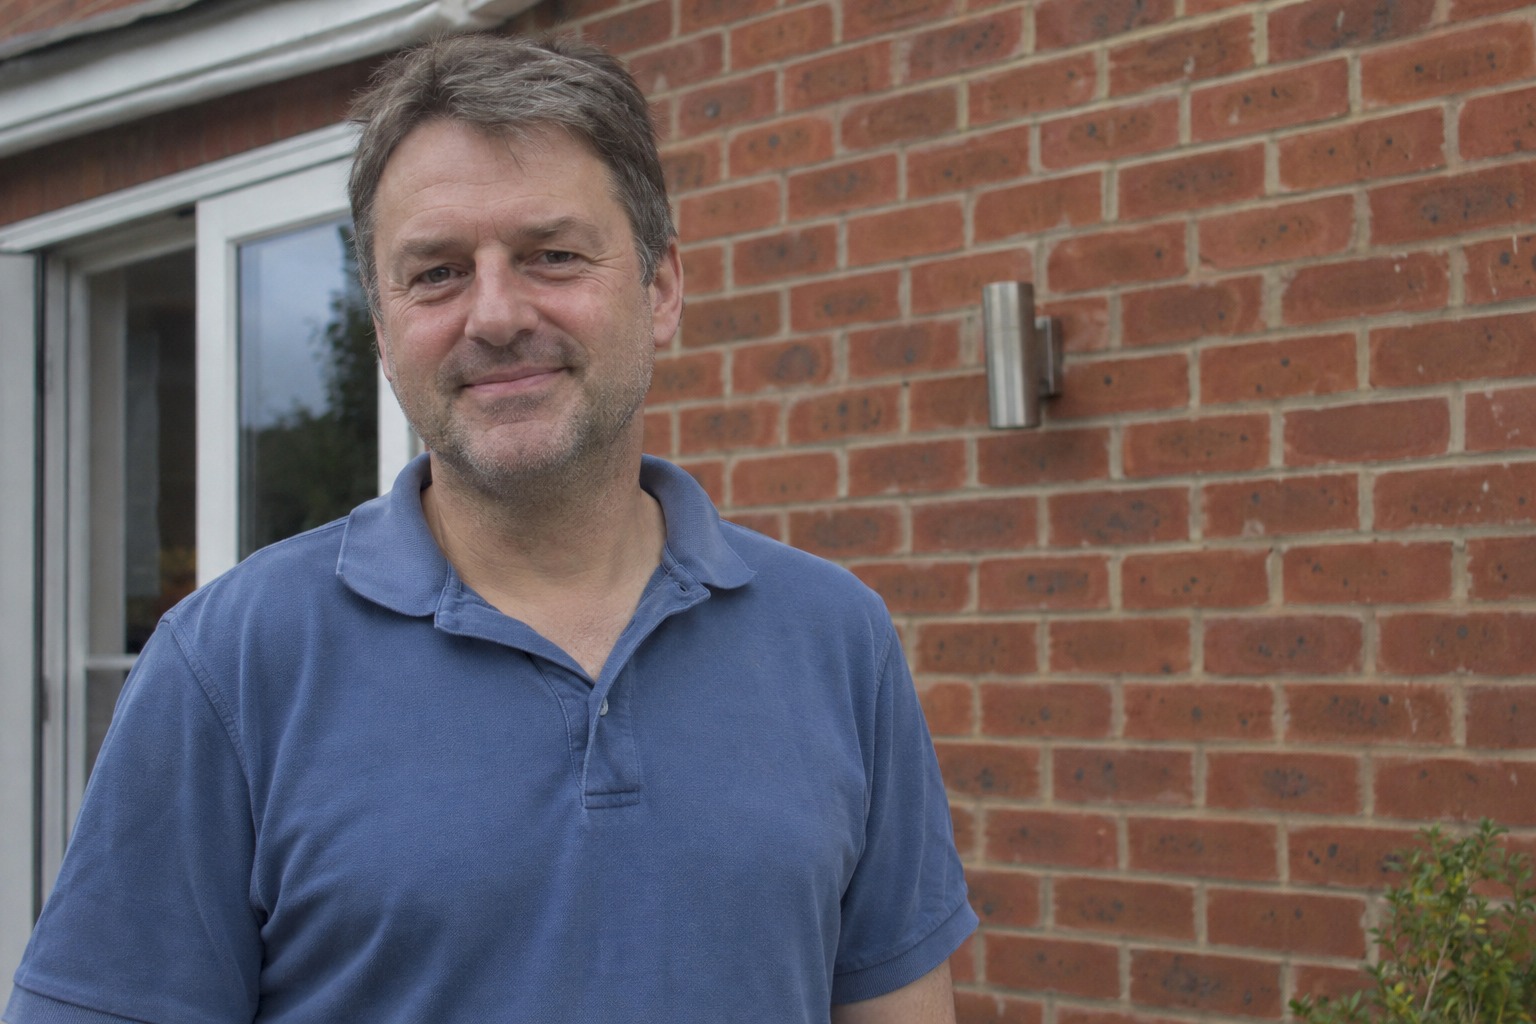
Example result.
Image 1 – patio photo:   the person. Face, hair, expression, blue polo.
Image 2 – teal swatch:   background colour only.
Image 3 – square sketch: framing only. Head and shoulders, room above the hair.
Not attached:            a colleague's headshot with nice light. Described in words instead.
1. Give each reference one job
Start with the best photo of the person: readable eyes, complete hair, visible shoulders and believable skin detail. An editor can’t reliably recover a hidden feature, so if something important is missing, take a better photo. A pile of weak photos is still a pile of weak photos.
Add a style or layout reference only if it settles something you can’t describe well in words.
| Reference | What it decides | What it must not decide |
|---|---|---|
| Your original | Who the person is and what they wear | A new background or pose |
| Treatment | Light, background colour or medium | Anyone’s face, age or clothes |
| Layout | Shape of the image and space around the head | Extra body, props or objects |
A photo of someone else is a poor shortcut for describing light. Its face tends to come along with it, so describe the light in words instead.
Why this works: an unlabelled set of images leaves the editor to guess which one is the person, and guessing is where faces get blended.
What you should see: a short list like the example result, with one job per image.
2. Write the request with the roles named
Attach the images in the order you’ll describe them. OpenAI’s own guidance does the same: refer to each image by its order and say how they relate. If filenames aren’t visible, call them “first image”, “second image” and so on.
Edit the person in my original portrait, [first image].
That image is the identity and clothing reference.

The other image, [second image], is a treatment reference ONLY.
Borrow its [soft light / background colour / illustration medium].
Do not borrow its person's face, hair, body shape, age, clothing or pose.

Preserve the original person's facial proportions, expression, apparent
age, hairstyle, accessories, clothing and natural skin detail.
Frame the head and shoulders for [intended use].
Do not invent hidden features, extend the body or add text and props.
Make one candidate for comparison with the untouched original.
[first image] and [second image] are the names or upload order you’re using. The light/colour/medium choice is the one thing the treatment image should contribute. [intended use] is where the portrait will appear.
Why this works: “use both images” leaves the most important choice open. Saying what each image may and may not contribute closes it.
What you should see: one candidate with the treatment you asked for and the person from your original.
3. Check which reference won
Put the candidate beside the untouched original. Check the eyes, nose, jaw, hairline, expression, apparent age and clothing first, then judge the treatment separately. A lovely result with the reference person’s nose is a failed edit.
Why this works: a strong treatment makes it easy to miss a small change to the person, so you check the person first.
What you should see: the requested light or colour on a person you’d recognise from the original.
Check the result
- The face, hair and expression come from your original.
- The clothes are the ones in your original, in the original colours.
- The treatment image only changed the light, colour or medium.
- The framing matches the layout reference without new body parts.
The usual failure: something arrives from the wrong place — a feature from the style image, the swatch colour on the clothes, or an outfit nobody attached. Spot it by comparing neckline, shoulders and colours with the original before you look at the background. Restart from the original rather than editing the faulty candidate:
The treatment is useful, but the candidate took [specific feature]
from somewhere other than my original. Restart from my original portrait.
Use the second image only for [specific treatment]. Keep the original
person's face, clothing and all other appearance details.
Do not continue editing the candidate with the incorrect detail.
[specific feature] is what changed, such as “a navy blazer”. [specific treatment] is the one thing the second image was for.
Worked example: the patio photo that grew a blazer
Fictional example. The patio photo was edited into a dark-background portrait with a written brief that said to keep the clothes. The first candidate added a navy blazer.
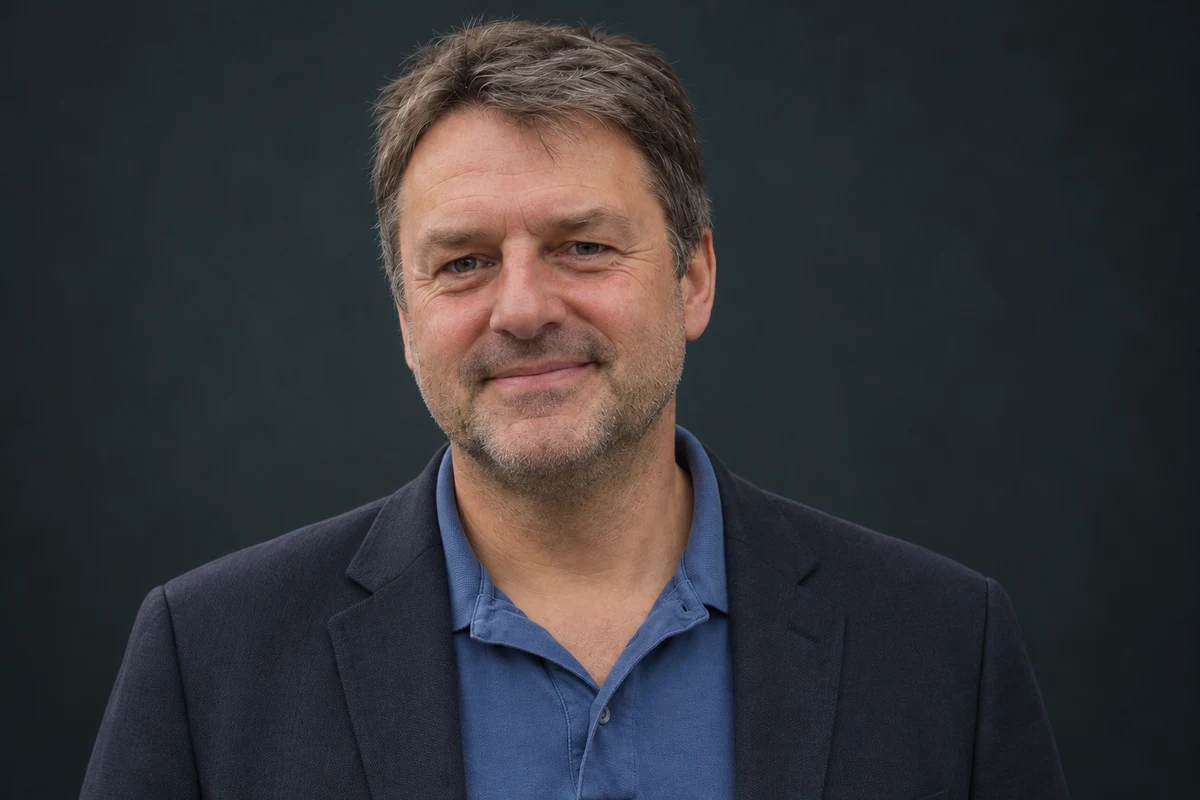
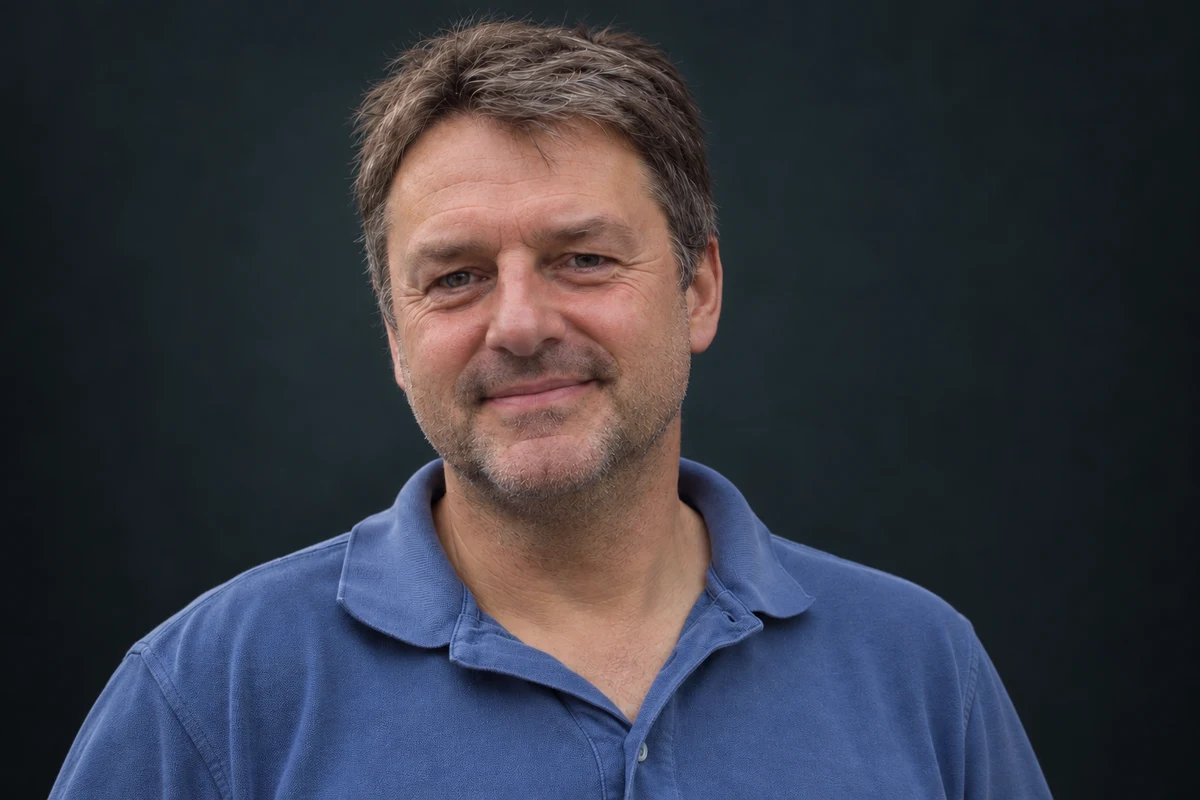
- The failure. The blazer wasn’t in any image. It came from the editor’s idea of a “portrait”, which is exactly the kind of detail that slips in when the original isn’t named as the clothing reference.
- The repair. Two images went back in, each with a job: the untouched photo as the appearance and clothing reference, and the blazer candidate as the image to correct. The blue polo returned on both shoulders.
- What still needs a look. The repaired face is warmer and the hair fuller than in the photo. Labelling the references fixed the clothes; it didn’t prove likeness. The full story is in the low-key portrait guide.
Try it
Give each reference a clear job
Decide what each image is for, and which one shouldn't be attached at all.
The AI skill: Label reference authority instead of asking the model to combine unrelated pictures.
Loading the controls…
Assign an authority to each attachment. Use the buttons, or drag a card to a role. The brief becomes usable when the source, treatment and layout have distinct jobs.
Original patio photo
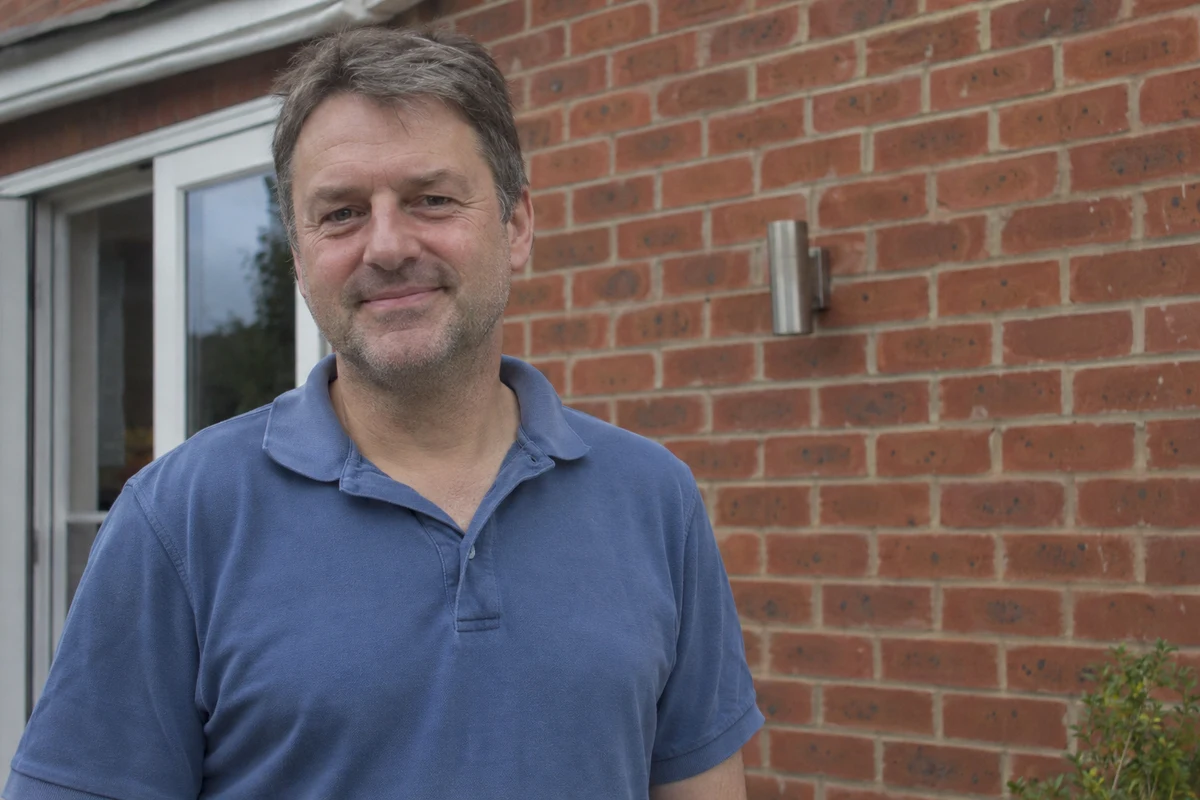
Recent photo of the person, blue polo, busy background.
No role assigned
Teal colour swatch
A flat teal you'd like behind the portrait.
No role assigned
Profile framing sketch
A square outline with a head-and-shoulders shape.
No role assigned
Colleague's headshot
Someone else's portrait whose soft lighting you like.
No role assigned
Drop a reference here, or assign it with its buttons.
Drop a reference here, or assign it with its buttons.
Drop a reference here, or assign it with its buttons.
Your instruction preview
Choose exactly one permitted source photograph as the appearance authority. A swatch or frame cannot establish who the person is.Try it on your work: Name your own images by upload order. Attach only references that settle a real decision, and compare the result with the untouched original.
Go deeper
Two views of the same person
A second recent photo can show a feature the first one hides. Label it as a supporting view of the same person and say which image sets the pose. Don’t ask the editor to average different ages, expressions or haircuts; pick one current main photo.
The second photo is a recent supporting view of the same person.
Use it only to understand [the partly hidden feature].
Keep the pose, expression, clothes and framing from the first photo.
If the references conflict, ask me which one to follow.
Use the same roles for a product scene
For a product shot, the real product photo is the object reference and a second image can guide light or background. Keep labels, proportions and materials tied to the product photo, and check those first — a new logo is the product version of a borrowed nose.