Make a credible executive headshot for a board or leadership page
The board pack goes out on Monday and the only recent photo was taken in someone's kitchen. A leadership portrait can look considered without making them younger, inventing a new smile or giving them a boardroom they've never sat in.
What you'll make
a leadership-style portrait with soft, deliberate light and a quiet background, the same face and expression, and the clothes the person actually wears unless you decide otherwise.
What you'll need
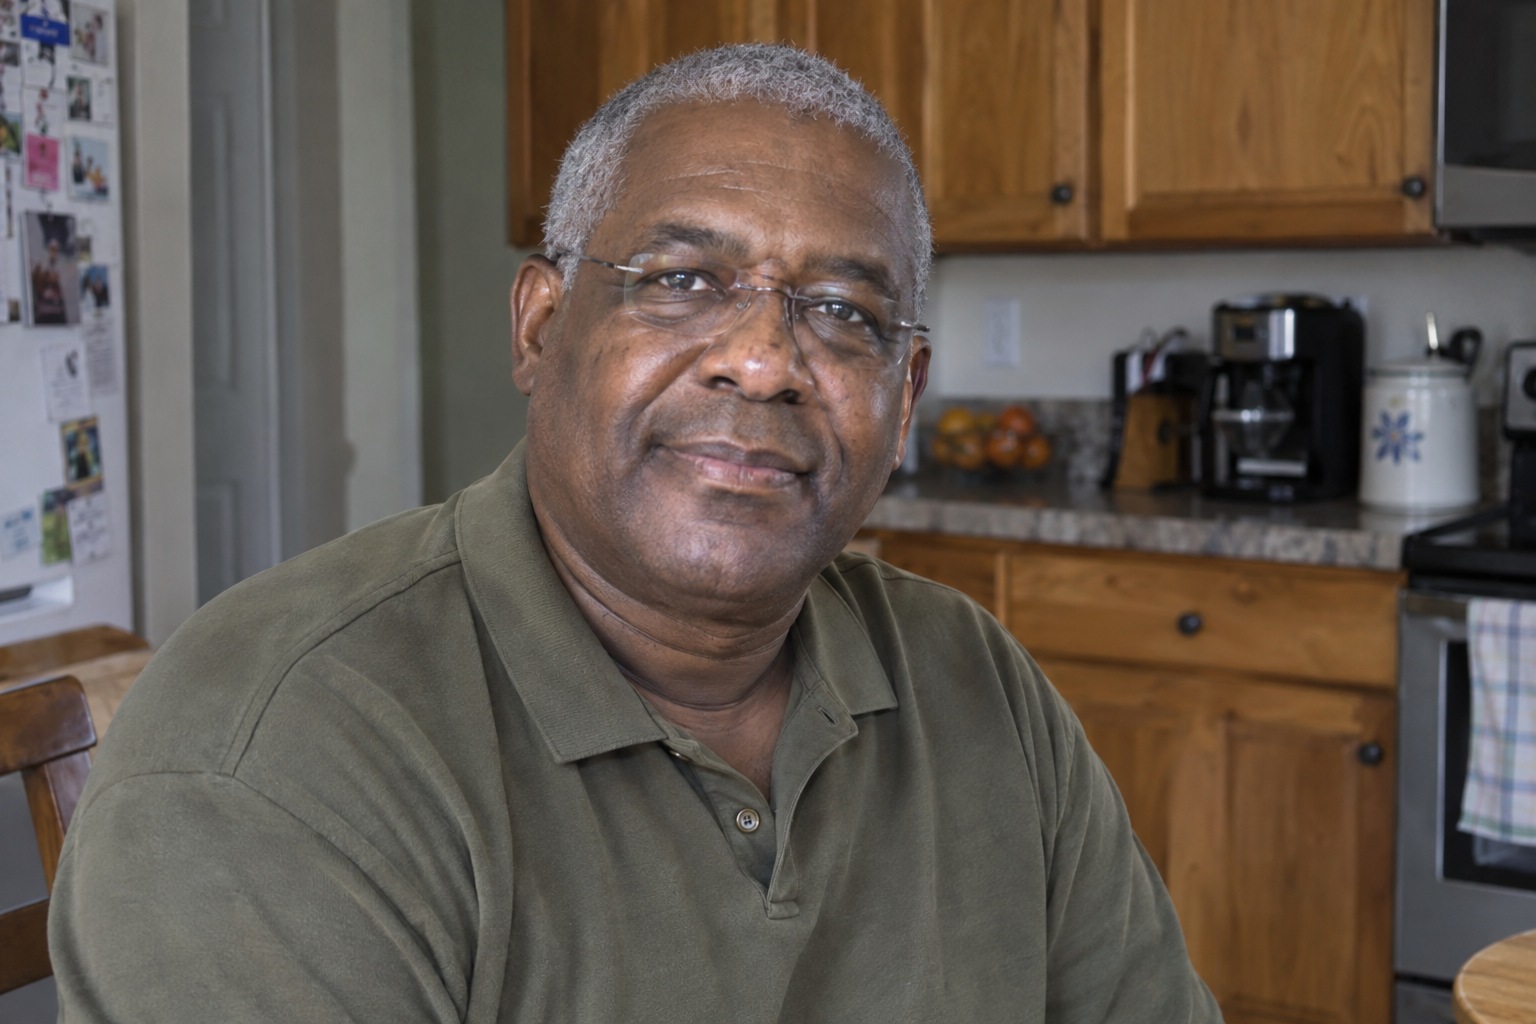
a recent, readable photo of yourself or of an adult who has agreed, an image editor your organisation lets you use (ChatGPT and Gemini both edit attached photos) and the page where the portrait will appear. Keep the untouched original. To practise first, use the fictional kitchen photo.
Example result.

1. Describe executive quality as light, crop and setting
Start with where the portrait will go: a board pack, a leadership page or a speaker biography. Then describe what that use needs in picture terms: readable eyes, soft controlled light, a clean crop and a background that doesn’t compete. “Make me look like a CEO” leaves the AI to invent a stereotype, often a different face, a younger one, or a suit.
A credible portrait doesn’t require a particular age, gender, expression or outfit. Decide about clothing now: keep what the person wore, or try a jacket as a clearly labelled concept.
Why this works: light, crop and background are things you can check in the result. “Executive” isn’t.
What you should see: a one-line brief, such as “soft window light, dark plain backdrop, head and shoulders, same clothes”.
2. Ask for the light and setting, and keep the person fixed
Attach the untouched original in ChatGPT or Gemini and paste the request. If your tool can describe images but not edit them, it can’t do this job: a description isn’t the finished file.
Edit my attached photo into a natural executive-style headshot.
Keep the face, proportions, expression, visible age, hair, glasses, head angle and shoulder posture exactly as photographed.
Use broad soft window light, gentle fill and natural skin colour; light the face, don't brighten the skin.
Use a quiet dark architectural backdrop with no signs or props. Keep full hair and some headroom.
Keep my actual clothes and accessories; add no wardrobe.
No beauty retouching, new smile, hands, badges, logos or text. Return one image.
To try a jacket concept instead, replace the clothes line with “As a labelled styling concept, add a simple navy unstructured jacket over my top, keeping its visible neckline.” If you have a photo of the actual jacket, attach it and say it shows the garment only, not a face or pose.
Why this works: the person is listed as fixed, so the only open choices are light, background and, if you chose it, one garment. “Light the face, don’t brighten the skin” stops illumination turning into a lighter complexion.
What you should see: one portrait of the same person, in a calm dark setting, wearing what you asked for.
3. Check the person before the styling
Put the result beside the original at the same face size. Check eyes, glasses, nose, mouth, jaw, skin detail, hairline and expression first. Then check the styling: lapels that meet, no extra buttons or logo-like marks, no invented hands, no readable signs in the room.
Why this works: a convincing jacket and room pull your eye away from the face. Checking the face first stops a flattering setting from hiding a changed person.
What you should see: a short list of what matches the original and what changed.
Check the result
- Same face shape, glasses, hair and expression as the original.
- Skin colour and texture close to the original: not lighter, smoother or younger.
- Clothes are what the person wore, or a jacket you chose and will label as a concept.
- No signs, logos or extra hands anywhere in the image.
The usual failure: the “executive” treatment polishes the face. It comes back warmer, sharper or smoother than the original. It looks like better photography, which is why it gets approved, but it isn’t how the person looks. Compare cheeks, eyes and hairline at full size.
The lighting and [what works] are good. The face has changed: [what changed].
Using my original photo for the person's appearance, restore that only.
Keep the light, expression and background. No rejuvenation, new pose or added detail. Return one image.
[what works] is the part to keep, such as “the dark backdrop”; [what changed] is the difference you can see, in plain words.
If the face keeps drifting after a repair, start again from the original with a simpler request, or use a light adjustment and crop in an ordinary photo editor.
Worked example: kitchen snapshot to a leadership portrait
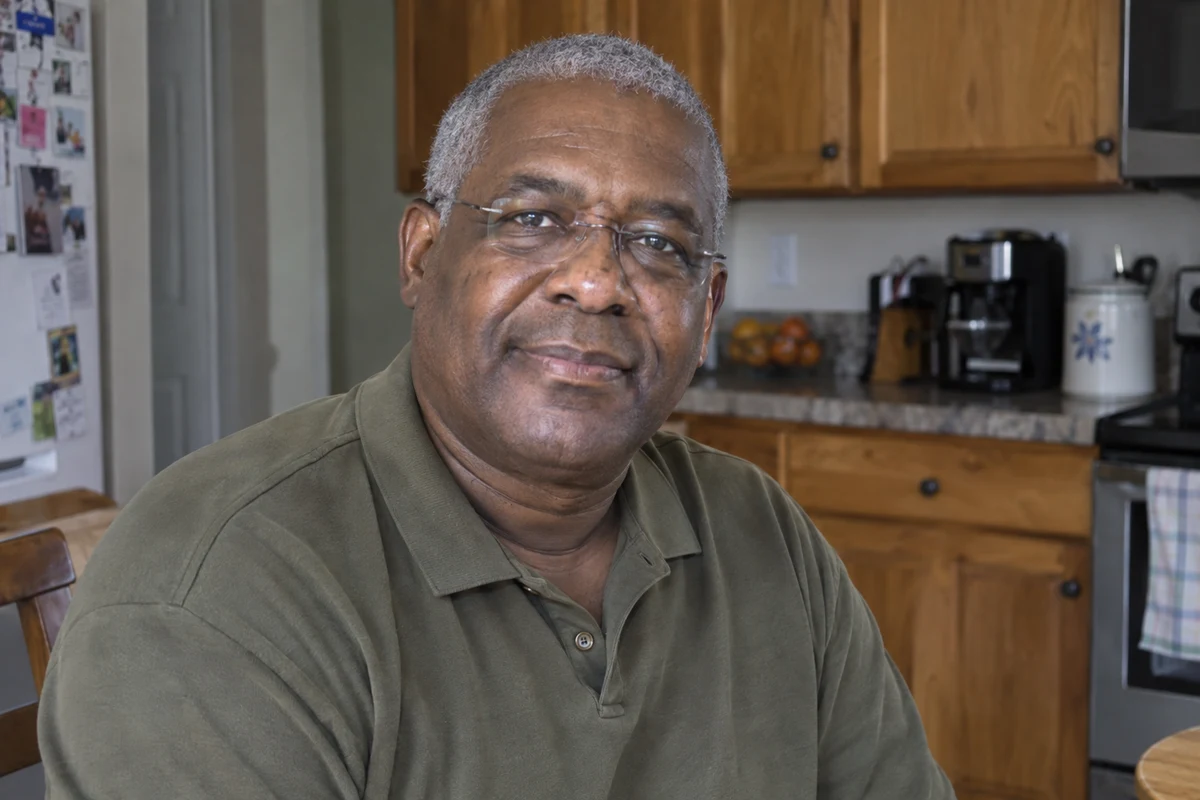
Fictional example. The source is the kitchen photo above: grey hair, frameless glasses, a small smile and an olive polo. This candidate used the jacket swap line, to show what a wardrobe concept looks like.
- What held: the small smile, head angle, grey hair and frameless glasses all survived, and the kitchen became a quiet dark setting with soft light.
- The failure: the face is warmer and more sharply rendered than the original. The repair prompt goes in as “The lighting and the dark backdrop are good. The face has changed: warmer and sharper than the original”, with the original attached again.
- The jacket: it was requested, it wasn’t worn, and it doesn’t make anyone a director. On a real leadership page, use the person’s own clothes or label the image as styled. A generated boardroom is just as fictional, and suspiciously well furnished.
Try it
Inspect the executive treatment
Brief executive light and setting while preserving the person.
The jacket was requested as a concept. Better light doesn't mean the face is unchanged: compare it at full size.
The example in text
- Kitchen source: olive polo
- Requested addition: navy jacket
- Face and expression remain source-led
Fictional photo and AI edit.
Task kit for this job: Download (ZIP) · Reusable instructions
Go deeper
When the new light lightens the skin
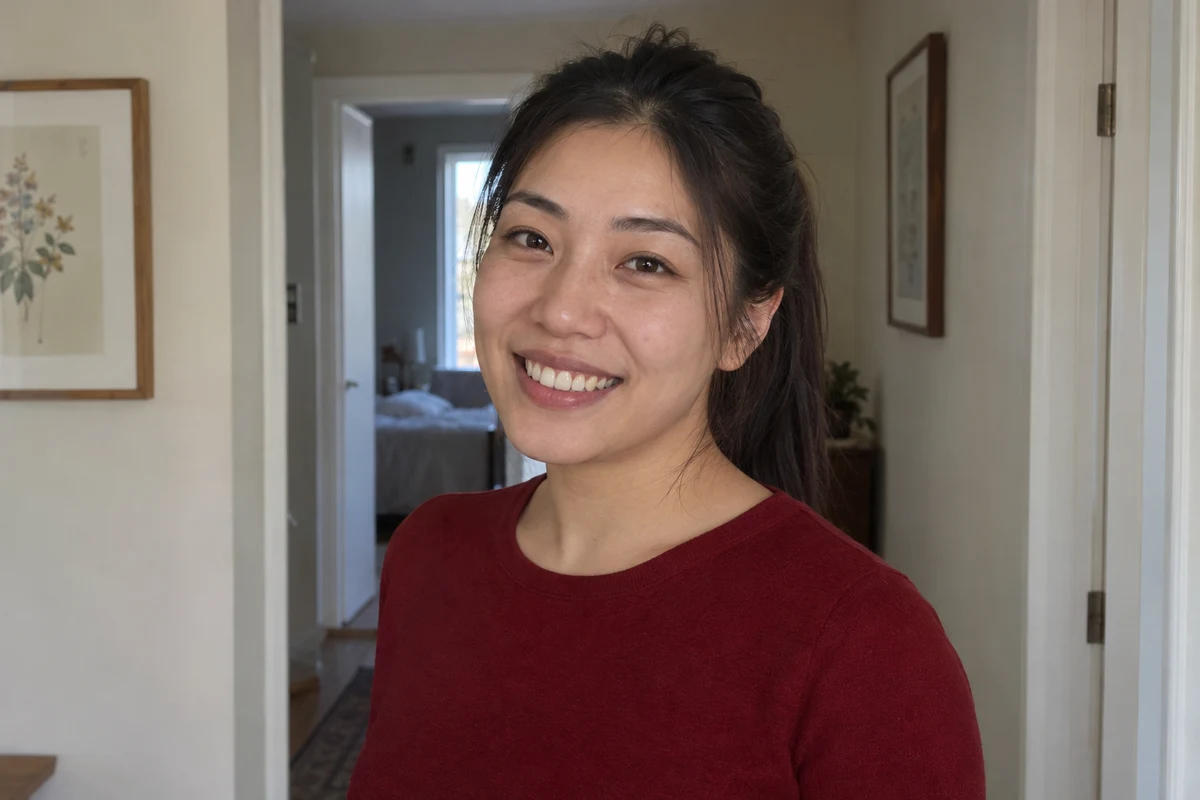
Asking for a “bright office” can change skin tone rather than lighting. In the example below, the smile, turned shoulders and burgundy top all held, but the skin came back warmer and lighter than the original. That’s a change to the person, not the light. Ask for “broad neutral daylight and gentle fill”; words like “flawless complexion” invite retouching. Compare skin tone at the same crop, and if it’s lighter, use the repair prompt with “skin lighter than the original” as what changed.
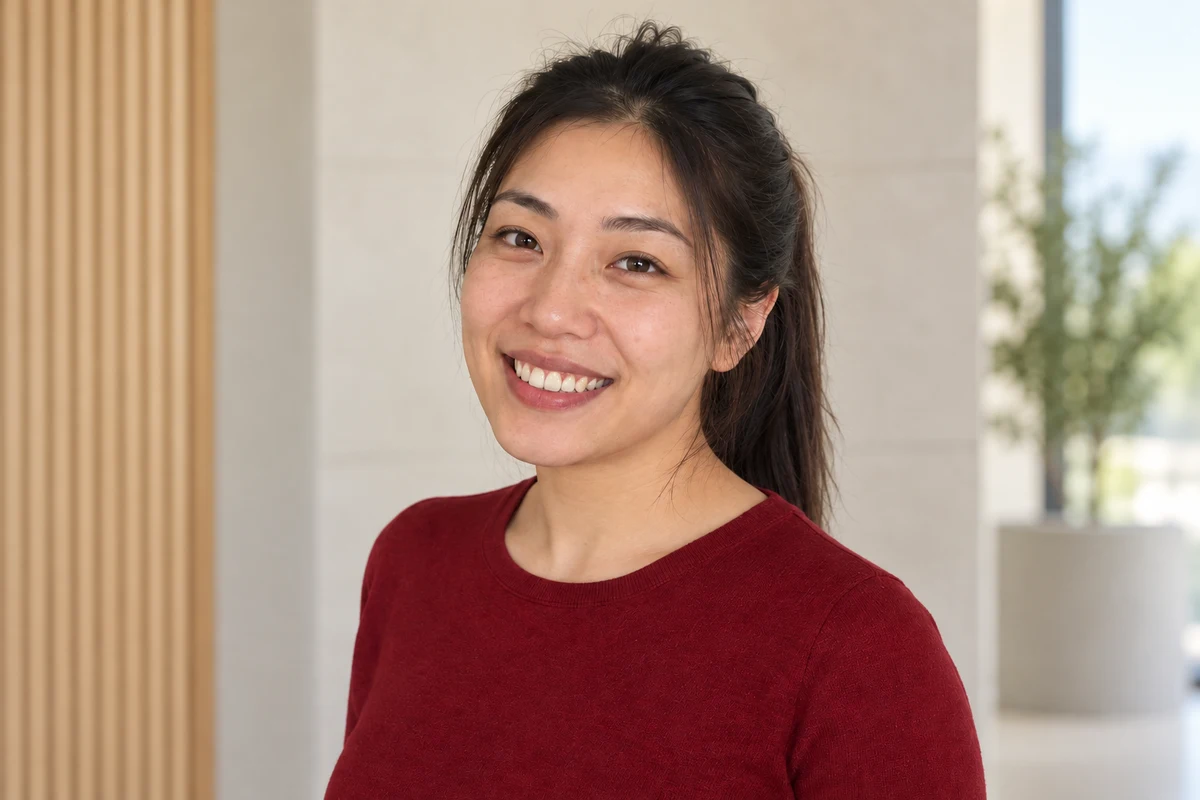
A generated office is a presentation backdrop, not evidence of where someone works. If the photo has to show the real workplace, take a real photo there.
Check it where it will appear
A dark backdrop can suit a large leadership feature and vanish in a small round avatar. Preview the portrait at its real size and crop before publishing; the profile circle guide and the export guide cover both checks.
Keep appearance, brand and permission sign-off separate
The person in the photo signs off how they look; a brand reviewer signs off the treatment; the use itself needs the right permission. Record these separately with the team approval sheet. A polished image doesn’t imply any of them.