Preview a headshot in the small profile circle people will see
A portrait can look great at full size and like a forehead in a Teams call. Check the small circle before you ask AI for another headshot.
What you'll make
a profile crop you’ve checked at the size people will see it, with complete hair and readable eyes, made from your existing photo.
What you'll need
the headshot you’ve chosen (keep the untouched original), the place it will appear and an ordinary crop tool: your phone’s photo editor, the platform’s own upload cropper or ChatGPT or Gemini if you’d rather ask. Allow about 10 minutes.
Example result.
1. Preview it where people will see it
Most places your face turns up at work show it small and cropped to a circle or rounded square: LinkedIn, Microsoft Teams, Slack, Google Workspace and Zoom among them. Their sizes and croppers change, so don’t work from a remembered pixel spec. Upload the photo to the real destination (or open its photo editor without saving) and look at the preview it gives you. Then look at it again in a list view, a chat message or a meeting tile, where it’s smallest.
Why this works: the problem is almost always the crop, and the destination’s own preview is the only one that shows exactly what it cuts off.
What you should see: a note of the shape, the smallest place it appears and what’s wrong, such as “circle in a Teams chat; top of the hair cut off”.
2. Write down what the circle removes
Look at the small preview and name the problem in plain words. “The circle cuts off the top and sides of the hair” or “the earrings sit right on the edge” gives the next step a target. “Make the avatar better” leaves an AI editor free to change the face, which is a far bigger change than you need.
Then check the rest of the photo at that size: are the eyes readable, does the expression still work, and does the background separate from the page or app colour around it?
Why this works: a circle removes the corners of a square, so a crop that fills the frame with the face loses hair at the sides as well as the top. Naming the region keeps the fix about placement.
What you should see: one or two specific observations about the crop, and a separate yes or no on whether the photo itself is still the one you want.
3. Make the crop from the same photo
Use the platform’s cropper or your photo editor first: zoom out a little inside the circle and move the face slightly down. If you’d rather ask an AI tool, attach the original and keep the person fixed:
Use my attached headshot as a fixed image. Prepare a crop for a
[destination shape and size]. Keep the original person pixels; don't
generate a new face, hair, expression or clothes. Show the crop as a
square and inside the destination shape so I can check the hair, eyes
and shoulders. If the photo doesn't have enough space around the head,
tell me rather than filling it in.
[destination shape and size] is what you saw in step 1, such as “small circle for a Teams profile”. If your tool can’t return an image file, ask for the steps in your ordinary photo editor instead. A description of a crop isn’t the exported file.
Why this works: cropping and resizing should never need new facial detail. Saying so stops a “small tidy-up” from quietly regenerating the face.
What you should see: the same person, smaller inside the frame, with the whole hair outline inside the circle.
Check the result
- The whole hair outline sits inside the circle at the smallest size the photo appears.
- The eyes are readable and sit in the upper half of the circle.
- Earrings, glasses and collars are either fully in or clearly out, not sliced by the edge.
- The face, hair and clothes are the same pixels as the original, not a redrawn version.
The usual failure: the circle crops tight to the face and cuts off the top and sides of the hair. It’s easy to miss at full size and obvious in a chat list. If a wider crop still clips the hair because the photo has very little space above the head, ask for background padding around the existing image:
Keep my headshot unchanged. The circle clips [visible feature]. Add
[amount] of plain background around the existing photo that matches its
colour, so a wider crop fits inside a circle. Don't invent missing hair,
shoulders or clothes. Return the file and a circle preview at
[destination size], and tell me its dimensions and format.
[visible feature] is what’s cut off. [amount] is the extra space you need, such as “about a fifth of the image height above the head”. [destination size] is the smallest place it appears. Padding adds background only. If the original photo cuts off the hair, retake it or choose another photo; an attractive invented outline isn’t your hair.
Worked example: a press headshot in a profile circle
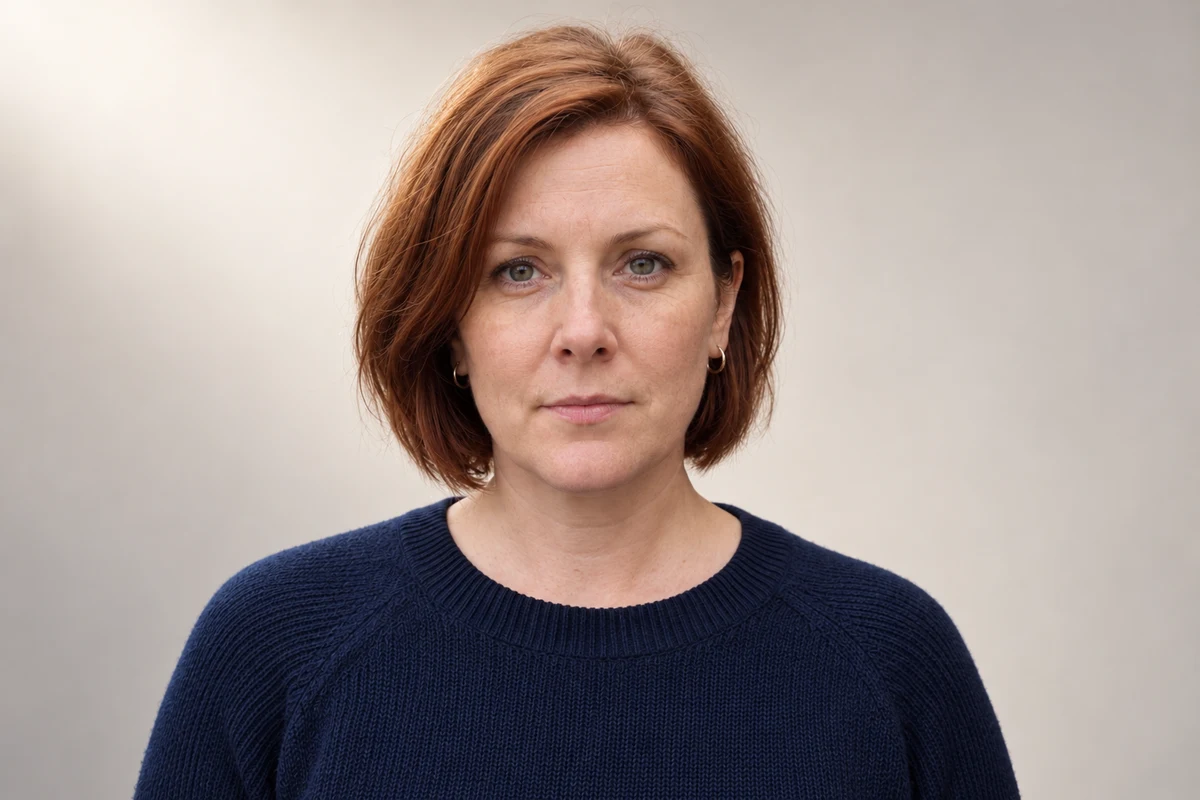
Fictional example. The press-style headshot at the top of this page has the whole bob in the rectangular file, but only a narrow strip of background above the hair. The first crop filled the circle with the face:
- The failure. The tight crop looked fine as a square. In the circle, the top of the hair and both sides of the bob disappeared, and the earrings sat right on the edge.
- The repair. Zooming out inside the circle and moving the face down brought the whole bob back. No AI was needed: it’s the same pixels, placed differently.
- What’s still tight. The hair now touches the top of the circle. That’s acceptable for a small chat avatar. For a larger profile photo with more breathing room, the padding prompt above is the next step, not a regenerated head.
Try it
Try the destination shape
Choose a crop from existing pixels and brief extra space only when needed.
Fix a thumbnail problem with the crop first. Don't regenerate the face to make it fit a circle.
The example in text
- Same image pixels
- Circle removes corners
- Narrow top margin
Task kit for this job: Download (ZIP) · Reusable instructions
Go deeper
Keep a master and an export per destination
Keep the untouched original and the version you chose. Make a separate crop for each place it appears and name each file with its destination and size, such as “headshot-teams-circle.jpg”. The LinkedIn export guide shows how to check the file’s real format and dimensions rather than trusting the filename.
Check how a website card crops on a phone
A team page may show your photo as a wide rectangle on desktop and a narrow one on a phone. Preview the real page at both widths. A centre crop that works on desktop can cut a turned face in half on a narrow screen. Fix it with the site builder’s focal-point or crop setting, or upload a separate phone crop, rather than generating a new person.