Create a wider About-page portrait from a usable source
Your About page wants a wide picture and all you have is a cheerful cafe snap. Ask an image editor for a wider frame and it may helpfully add folded arms you never photographed.
What you'll make
a landscape portrait for a website section, with the person on one side, quiet background on the other and no body parts the original never showed.
What you'll need
a recent, readable photo of yourself, or of an adult who has agreed, that your organisation lets you use in its image editor (ChatGPT and Gemini both edit attached photos), plus the page it’s for. Keep the untouched original. To practise first, use the fictional cafe photo.
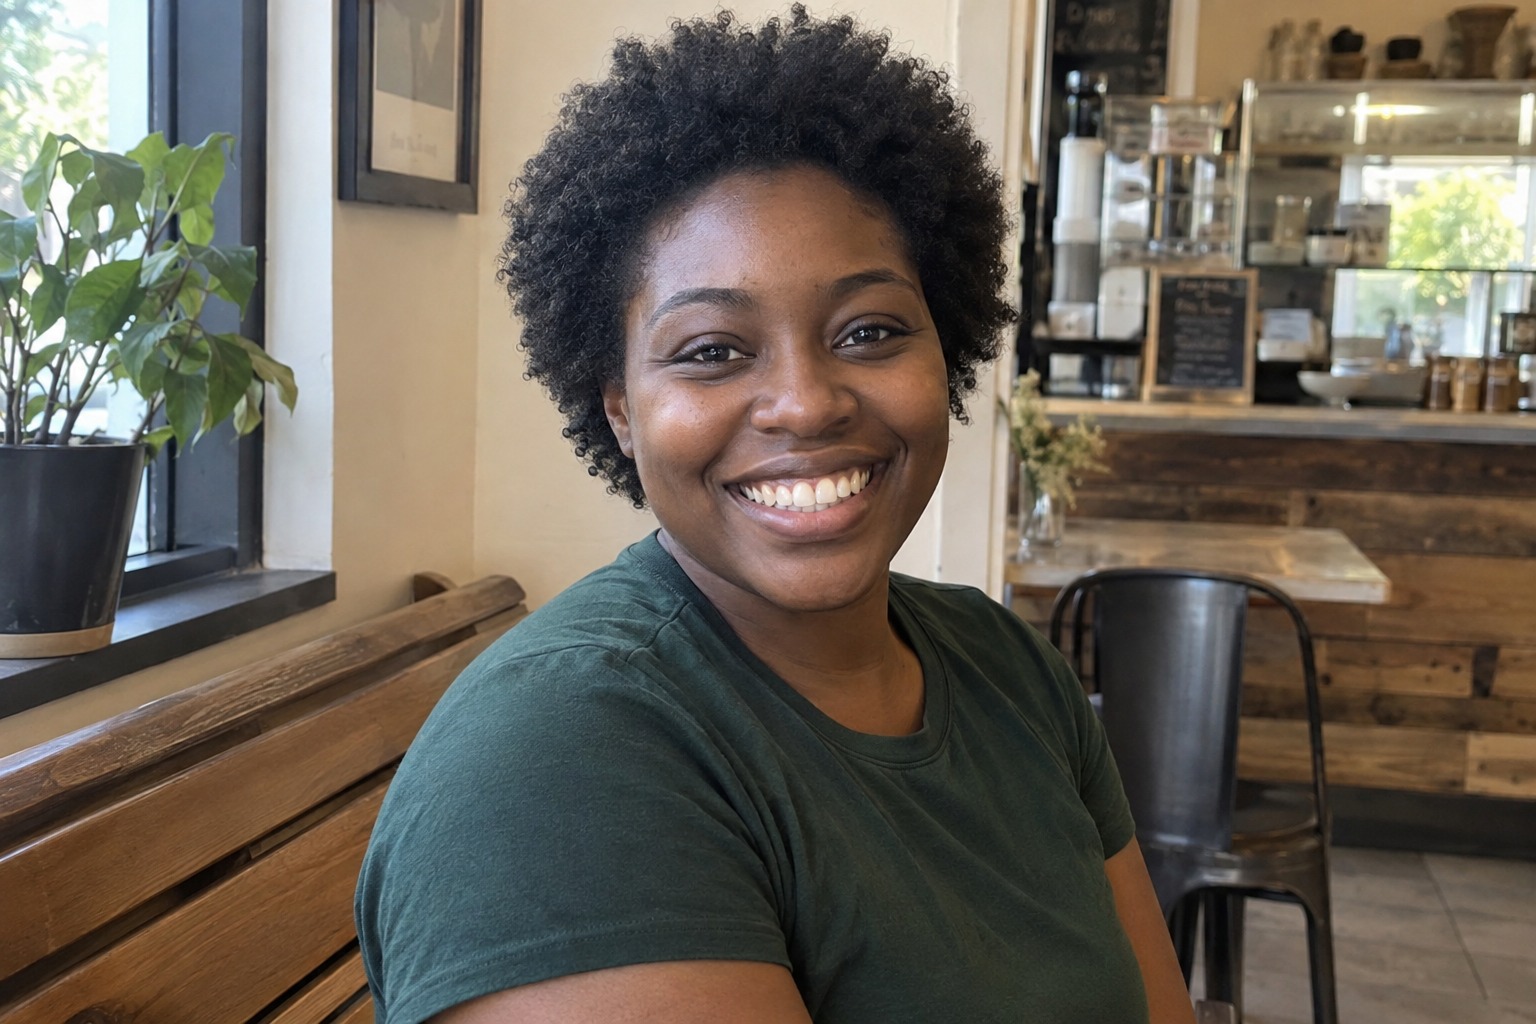
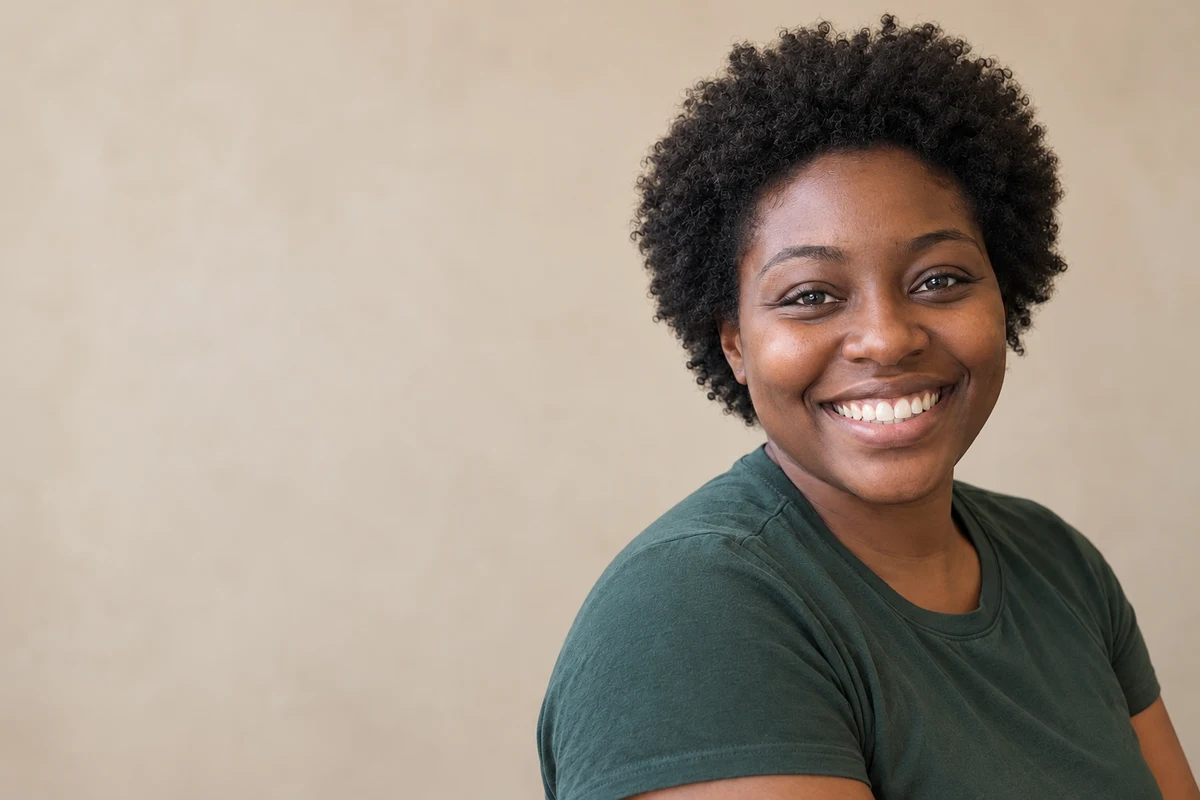
Example result.
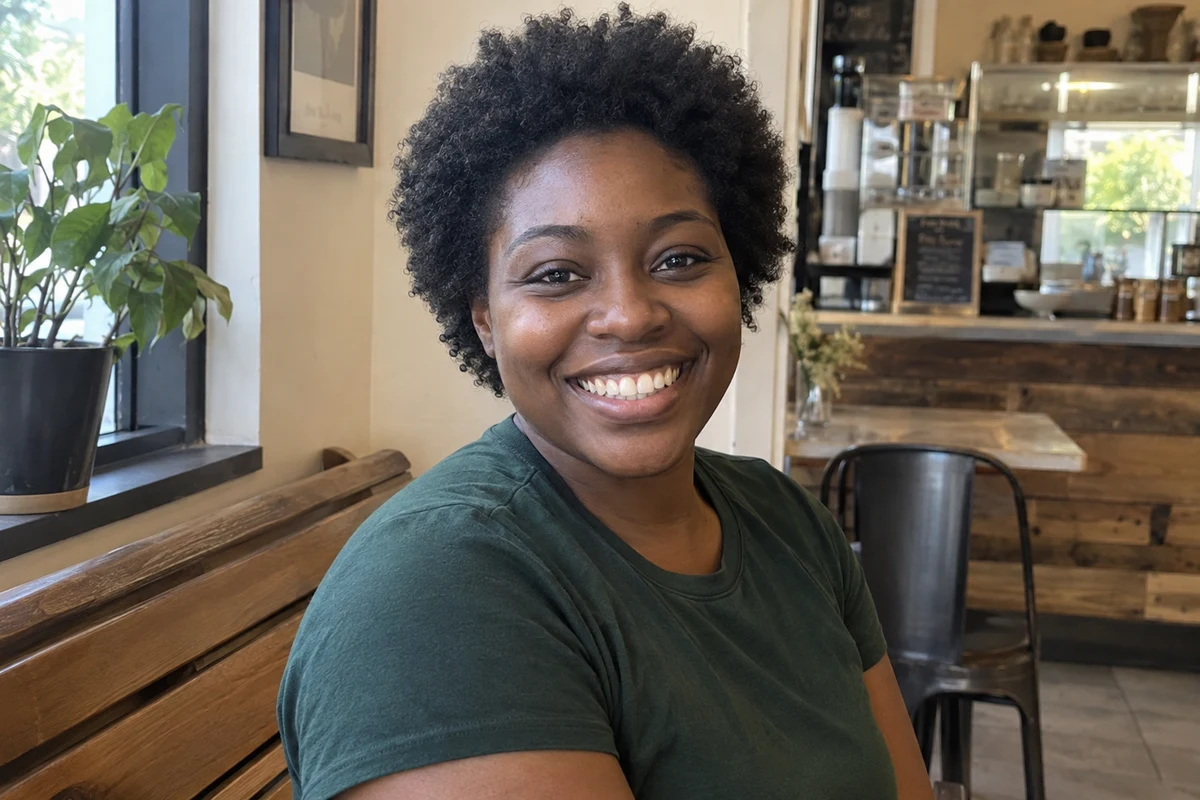
1. Check where the original stops
Before you write the brief, look at the edges of the photo. Can you see complete hair, both shoulders and enough chest for a head-and-shoulders frame? Are hands or the lower body in the picture at all? A readable upper-body photo can support a wider frame by adding background. Turning it into a seated pose with folded hands is a different job.
| Requested change | What the photo can support |
|---|---|
| Quiet extra background beside the person | The face, hair and upper body stay the reference |
| A closer crop of photographed shoulders | Existing detail, once you’ve checked the crop |
| New hands, crossed arms or a full-body pose | Unseen body detail would be generated, not recovered |
If the original clips the hair or hides the face, start from a clearer or wider real photo. More confident wording doesn’t add pixels the camera never caught.
Why this works: the editor will happily fill any frame you ask for. Knowing where the photo stops tells you which parts of the result you can check against something real.
What you should see: a short note to yourself, such as “head, shoulders and upper chest; no hands; hair complete”.
2. Ask for background space, not new body
Attach the untouched original in your image editor and ask for one candidate:
Edit my attached original into a landscape 3:2 portrait for an About-page section.
Preserve the face, apparent age, expression, hair, natural skin detail,
clothes and meaningful accessories. Keep the original head angle, gaze
and shoulder posture; don't impose a standard studio pose.

Place the photographed head and upper shoulders on the [side], with
complete hair and a clear band of background above it. Leave quiet
[background] on the [other side] for the page layout. Use soft, readable
neutral light. Generate no words or logos.

Keep body coverage within what the original shows: no new hands,
forearms, legs, crossed arms or outfit. More background is layout
space, not new detail of the person. Make one candidate.
[side] and [other side] are where the person and the empty space go in your layout. [background] is a plain setting, such as warm stone or pale grey. The headshot preservation guide explains the “preserve” line in more depth.
Why this works: you can compare a collar, a hair outline and a smile with the original. You can’t check a new hand against a photo that never showed one, so the brief rules it out.
What you should see: the same person, moved to one side, with plain background filling the rest of the frame.
3. Check the candidate in your page
Compare the face, expression, hair and clothes with the original first. Then look at the edges: has the neckline changed, or has a jacket appeared over a T-shirt? A new garment is a change even when no hand has arrived.
Then put the image into the real page. In your site builder, preview the section on a phone as well as a desktop. If the phone layout crops the person, use a stacked layout with the image above the text rather than asking AI for a taller image.
Why this works: a frame that looks balanced on its own can lose the top of the head once the page crops it.
What you should see: the full head and hair in both previews, with your words sitting in the quiet space rather than over the face.
Check the result
- The face, expression and hair match the original at full size.
- The clothes and shoulders stop where the original stops; there are no new hands or arms.
- There’s clear space above the hair, and the page crop doesn’t clip it.
- Skin and hair haven’t been sharpened into a more polished version of the person.
The usual failure: the person is fine, but the hair is pressed against the top edge. It’s easy to miss in a full image and obvious once the page crops a few pixels off the top. If that happens, correct only the composition:
The person and light in this candidate are useful, but [layout problem].
Use my untouched original as the reference for appearance and clothing.
Change only the composition so [placement or headroom you need].
Keep the photographed body coverage, expression and light.
Don't invent limbs or a new pose to fill the frame.
[layout problem] is what you saw, such as “the hair nearly touches the top edge”. [placement or headroom you need] is the fix, such as “there is a clear band of background above the hair, with the person slightly smaller in the frame”.
If the candidate added hands or changed the person, don’t repair it. Go back to the original with a shorter brief, crop the original yourself, or take a new photo.
Worked example: cafe smile to a wider About-page portrait
Fictional example. The cafe photo at the top shows a broad smile, a natural afro and turned, seated shoulders in a green T-shirt. It stops at the upper chest, and there are no hands in it. The brief was the step 2 prompt, with the person on the right and warm stone on the left.
- What held. The edit removed the cafe clutter and kept the smile, the hair and the turned posture rather than squaring the shoulders up for a studio pose. The T-shirt still stops where the photo stops, and no hands appeared.
- The failure. The brief asked for a clear band above the hair, and the edit left almost none: the hair nearly touches the top edge. In a page section that trims the top of the image, the hair would be cut.
- The repair. The next request is the repair prompt above, with the two example values filled in. Any new candidate should get the full comparison again, because skin and hair detail in this edit already look a little sharper than in the original. Only the person in the photo can judge their own likeness.
Try it
Ask for space the source can support
Separate a wider background request from a request that would invent unseen body coverage.
The AI skill: Ask for background the photo can support, and spot when a request would need body detail the camera never caught.
Loading the controls…
More background can support a wider page without requiring new hands or a different pose. Compare the actual person and crop after editing.
This is an authored coverage schematic, not a body segmentation, model prediction or recovery of missing pixels.
Your instruction preview
Edit my permitted source for an About-page portrait. Preserve the source face, apparent age, expression, hair, clothes and accessories. Keep the photographed head and upper torso on the right, with quiet additional background on the left for the web layout. Do not extend body coverage beyond the source. Improve the readable light and reduce background distractions. Keep the original shoulder and chest coverage; no new hands, forearms, legs or pose. Make one candidate for comparison with the untouched original and actual page crop. More background is layout space, not new photographic evidence of the body.Try it on your work: Check where your own photo stops before asking for a wider frame. If the page needs hands or a full-body pose, start from a wider real photo; otherwise ask for more background only.
Go deeper
Use a framing sketch as a layout reference
Draw a simple box showing where the person and the empty space should sit, and attach it labelled as composition only. Keep your original photo as the reference for appearance. The reference-pack guide explains how to stop a second attachment from turning into an unrequested identity reference.
Test real words in the space
A quiet background can still be the wrong shape for your heading. The speaker portrait guide shows how to test real text over the empty side and what to ask for when the words and the face won’t both fit.
Apply the same rule to product photos
A product photo that shows only the front can’t establish the back, the ports or what’s inside. Ask for more setting around the real product, or photograph another side. If a mock-up invents parts you haven’t photographed, label it as a mock-up.