Ask AI what to improve before taking your next headshot photo
You've got one usable selfie, the hair is cut off at the top and there's a window glowing behind you. Before asking an image editor to fix it, ask what to change when you take the next one.
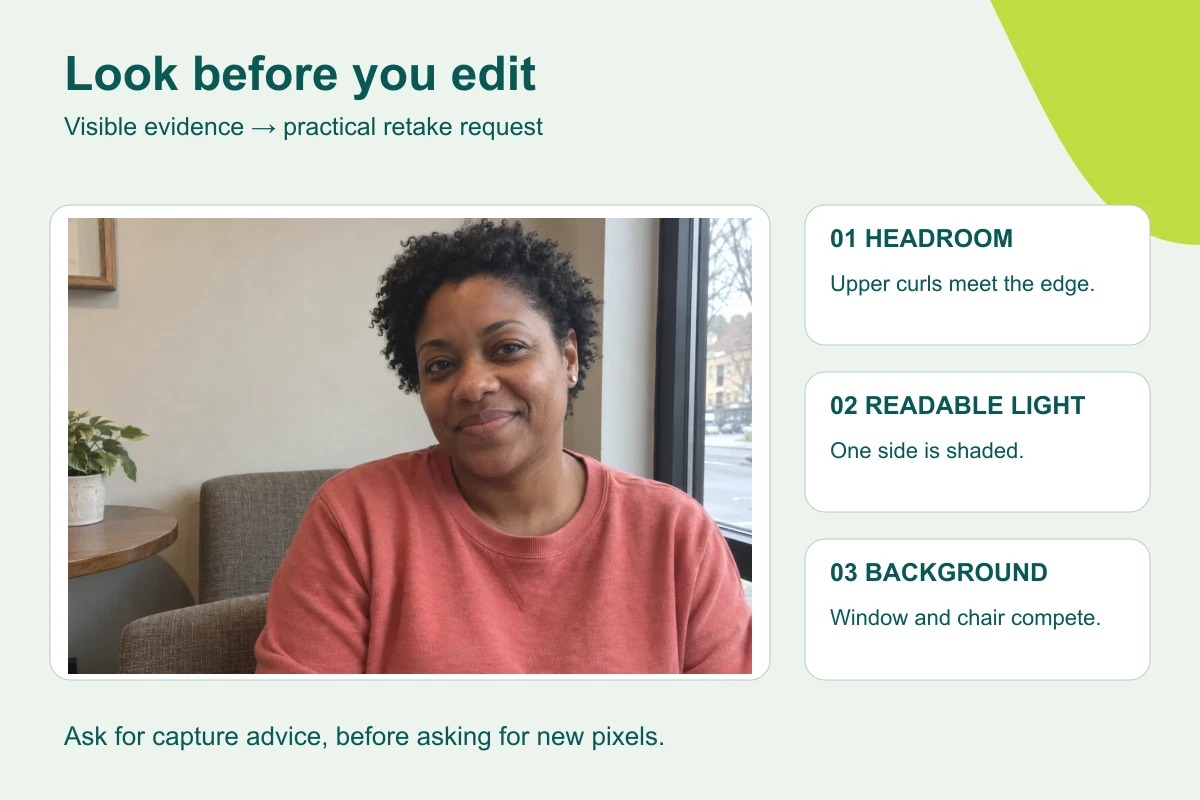
What you'll make
a three-step retake plan based only on what’s visible in your photo, and a clearer new original.
What you'll need
a phone or camera, a photo of yourself (or of an adult who has agreed) that you’re allowed to upload, and an AI chat that accepts images, such as ChatGPT, Claude, Gemini or Copilot. Keep other people, private screens and client material out of the frame. To practise, use the fictional cafe photo. About fifteen minutes, including the retake.
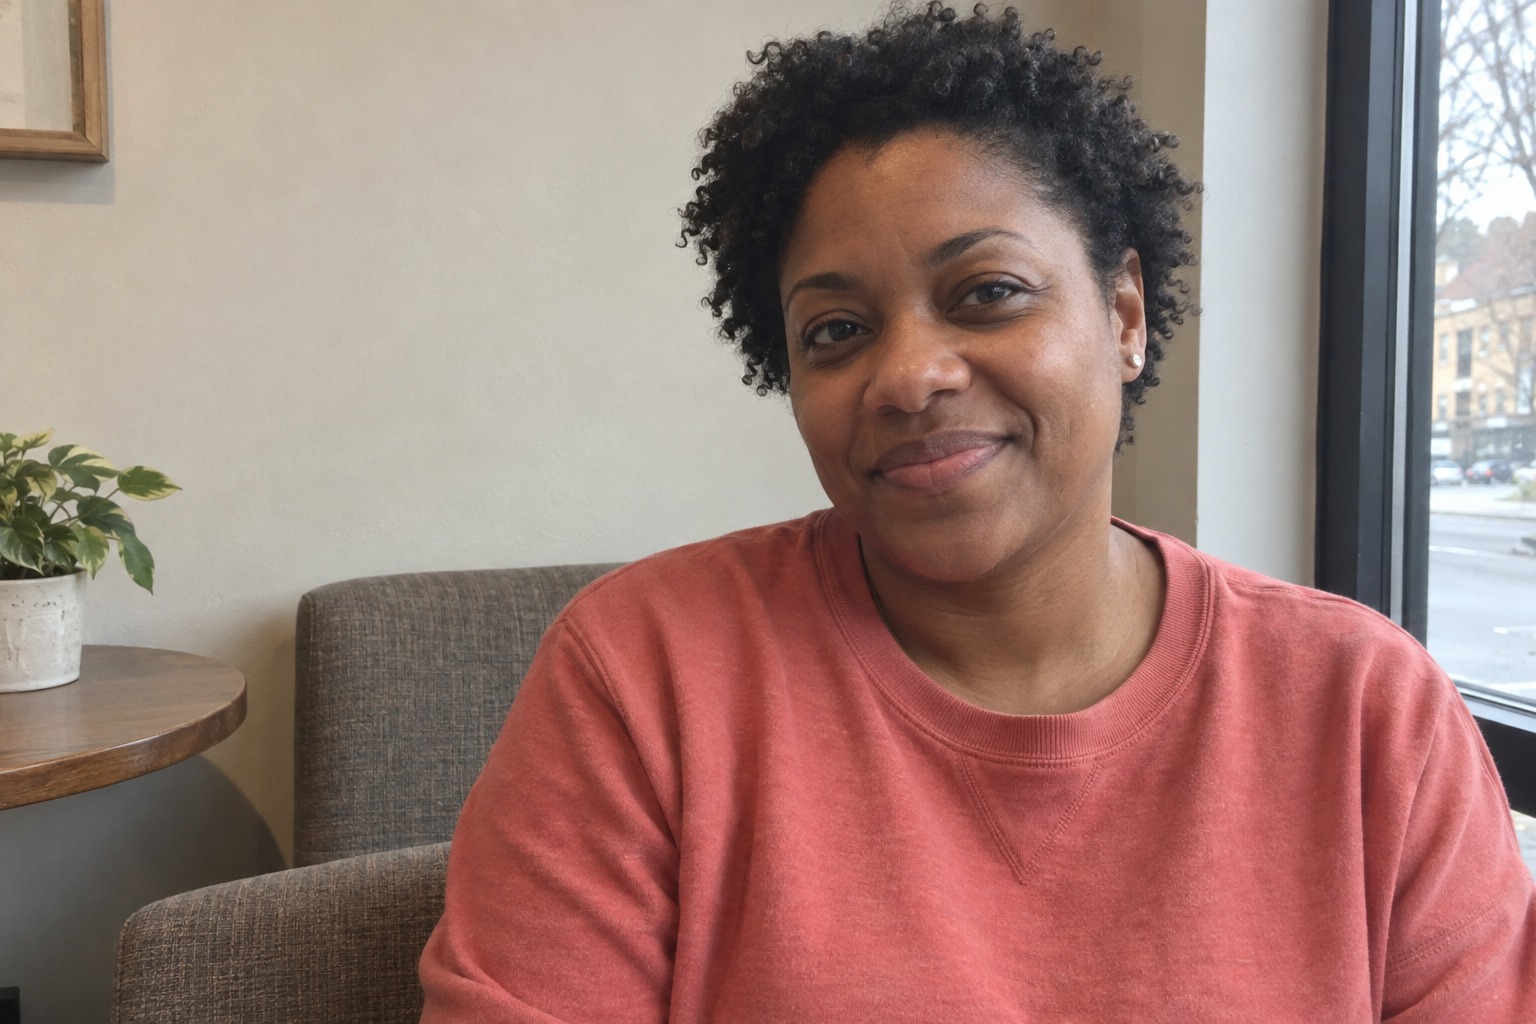
Example result.
- Ask your helper to step back about a metre so all of your hair fits with space above it.
- Move along the wall away from the window, so it isn’t glowing behind your head.
- Turn to face the window instead of sitting beside it, so the light falls evenly across your face.
Check in the new photo: both eyes readable and the whole hair outline in frame.
1. Ask for an inspection, not an edit
Attach the photo to a new chat and ask:
Inspect this photo as a possible source for a simple professional
headshot. Do not generate or edit an image.

Describe only visible issues with: complete hair and shoulders in frame;
readable eyes and face; light and shadow on the face; background
distractions; and whether it looks sharp enough to compare a later edit with.

For each issue, point to where you can see it and suggest a simple retake
action using a phone and daylight. Pick at most three. Do not comment
on the person's personality, job, health, age or how professional they look.
Why this works: “do not generate” keeps the job small, and “point to where you can see it” makes every suggestion checkable. The limit of three stops a photograph becoming a facilities project.
What you should see: up to three issues, each tied to a part of the photo you can find yourself.
2. Turn the issues into a plan you can do
Read each issue against the photo. If you can’t see what it describes, drop it. Then ask for a plan that fits what you really have:
Turn the issues we agreed into a short retake plan.
I have [camera] and [light], and [help]. I can change where the
camera is, the background and where I stand, but not my appearance
or clothes. Give three actions in order and one thing to check in
the new photo. Don't suggest buying anything.
[camera] is a phone or camera. [light] is what’s available, such as “a window” or “an outdoor shaded area”. [help] is a helper or a phone stand.
If a disability, mobility limit or assistive device affects the setup, describe the practical constraint and ask the plan to work with it. Don’t ask AI to remove or disguise it.
Why this works: advice you can’t act on with the kit you have isn’t advice. Naming the camera, light and help keeps it practical.
What you should see: three numbered actions and one check, like the example result above.
3. Take the photo and compare
Keep your normal expression and appearance. Take several frames and pick one with readable eyes and complete hair. Look at it full size; a small thumbnail can hide blur rather efficiently. Then compare the old and new photos: did each issue improve?
Why this works: a better original gives any later edit something real to work from. An image editor asked to add the missing top of your head is inventing it.
What you should see: a new photo you could use as it is, or with a small crop. If so, you may not need an AI edit at all. If you still want one, start with the basic headshot guide.
Check the result
- Every issue in the inspection is something you can see in the photo.
- Each action is something you can do with what you have.
- Nothing comments on the person, only on the photo.
- The new photo fixes the issues the plan named.
The usual failure: vague advice. “Improve the lighting and look more confident” sounds helpful and tells you nothing to do — and the second half is about the person, not the photo. Spot it by asking of each line: where in the picture, and what would I change?
Your advice says "[vague line]" but does not say what is wrong.
Point to the part of this photo that needs attention, say what is
missing or obscured, and suggest one change I can make with the
light I have. If you can't tell from this photo, say so.
[vague line] is the advice you couldn’t act on.
Worked example: the window behind the curls
Fictional example.
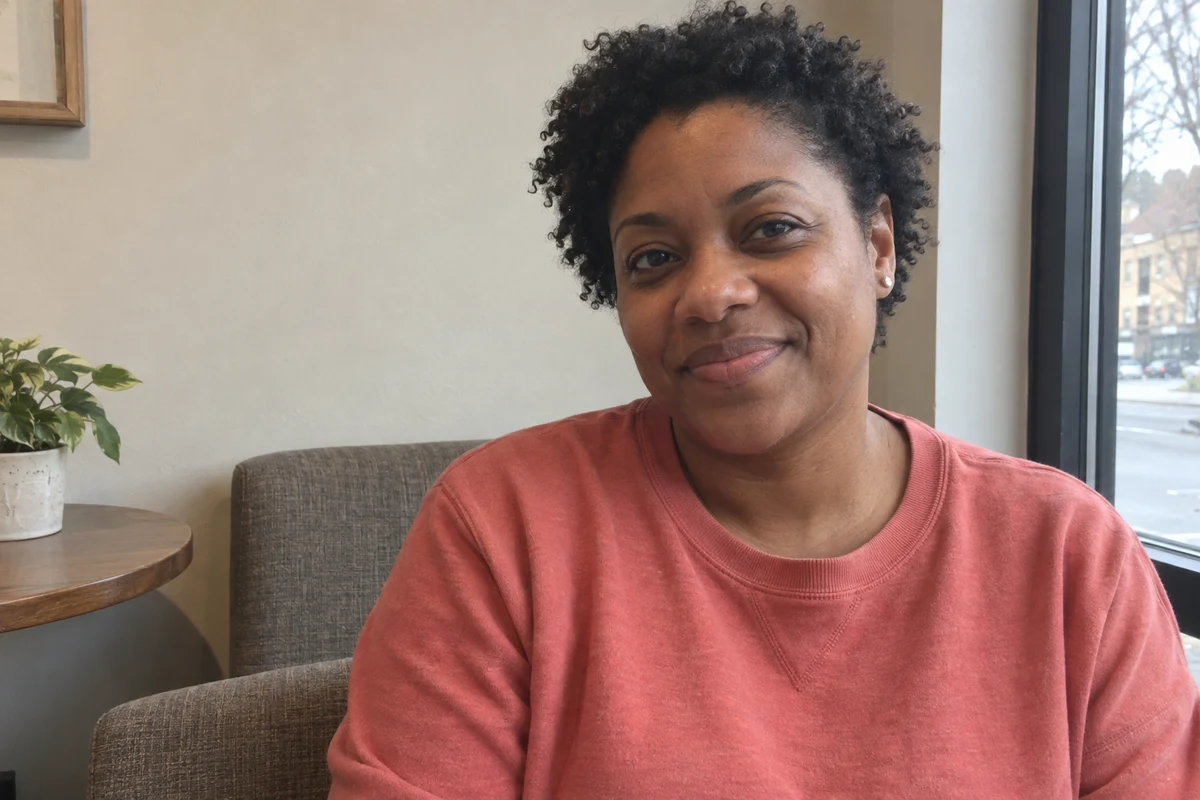
The first inspection found three issues: “the top of the hair is cut off by the frame”, “a bright window is directly to the right”, and “the lighting could be improved — try to look more confident”.
- Two issues were real. The curls meet the top edge, and the window is the brightest thing in the picture. Both are easy to see and easy to fix.
- One was vague and personal. “Try to look more confident” is about the person, and “the lighting could be improved” doesn’t say how. The repair prompt replaced it with “the side of the face away from the window is darker; turn towards the window”, which you can check.
- The plan only uses what’s there. With a phone, the cafe window and a friend, the three actions in the example result need no kit and no edit.
Go deeper
Why an image editor can't recover what the photo cut off
An image editor can add plausible detail, and plausible isn’t the same as photographed. If the top of the head, an ear or the glasses are cropped, blurred or hidden, there’s nothing to check the invented version against. A retake takes a minute; checking an invented forehead takes much longer.
Ask AI to compare two photos, not the people in them
If you have two possible originals, attach both and label them:
Compare Photo A and Photo B as source images for the same headshot edit.
Choose on visible detail, framing and light only. Name one limitation
of the better photo and one retake action if needed.
Do not generate an image or comment on the person's appearance.
Check its reason yourself; you can disagree. Never ask which one looks more employable or trustworthy.