Try an outdoor-shade headshot with a quiet background
An outdoor treatment can feel less formal than a studio backdrop. Give the image editor a small, visible job: soft shade, a quiet setting and a useful crop. Then check that the new greenery has not come with a new face or a conspicuous cut-out edge.
What you'll make
an outdoor-shade portrait with soft light and a quiet green background, checked against the original for edges, colour and crop.
What you'll need
a recent, readable photo of yourself or of an adult who has agreed, an image editor that accepts an attached photo (ChatGPT or Gemini), the size you’ll use it at, and about 15 minutes. Keep the untouched original. To practise first, use the fictional practice photo.
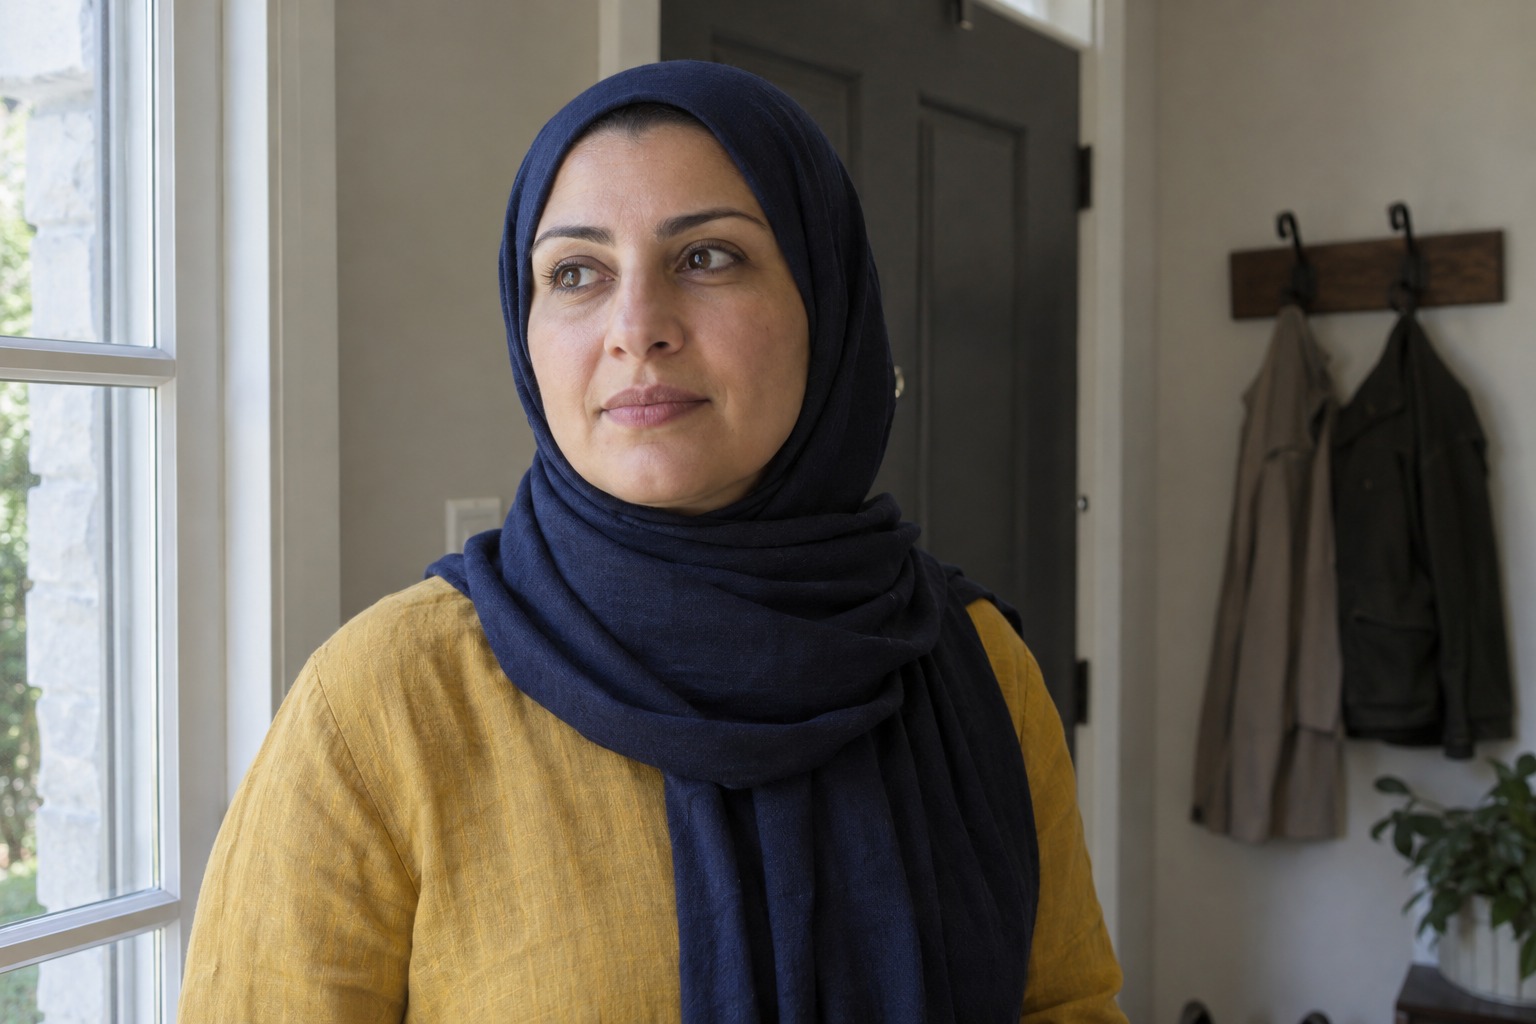
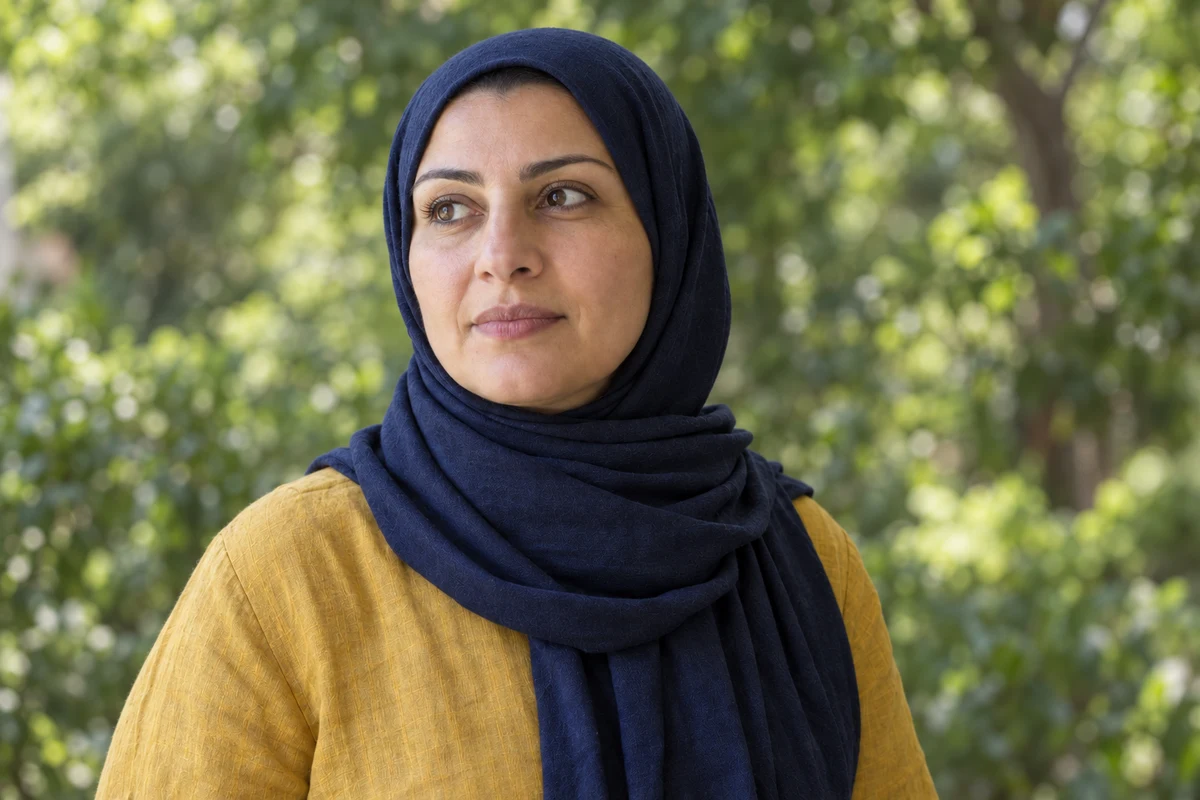
Example result.
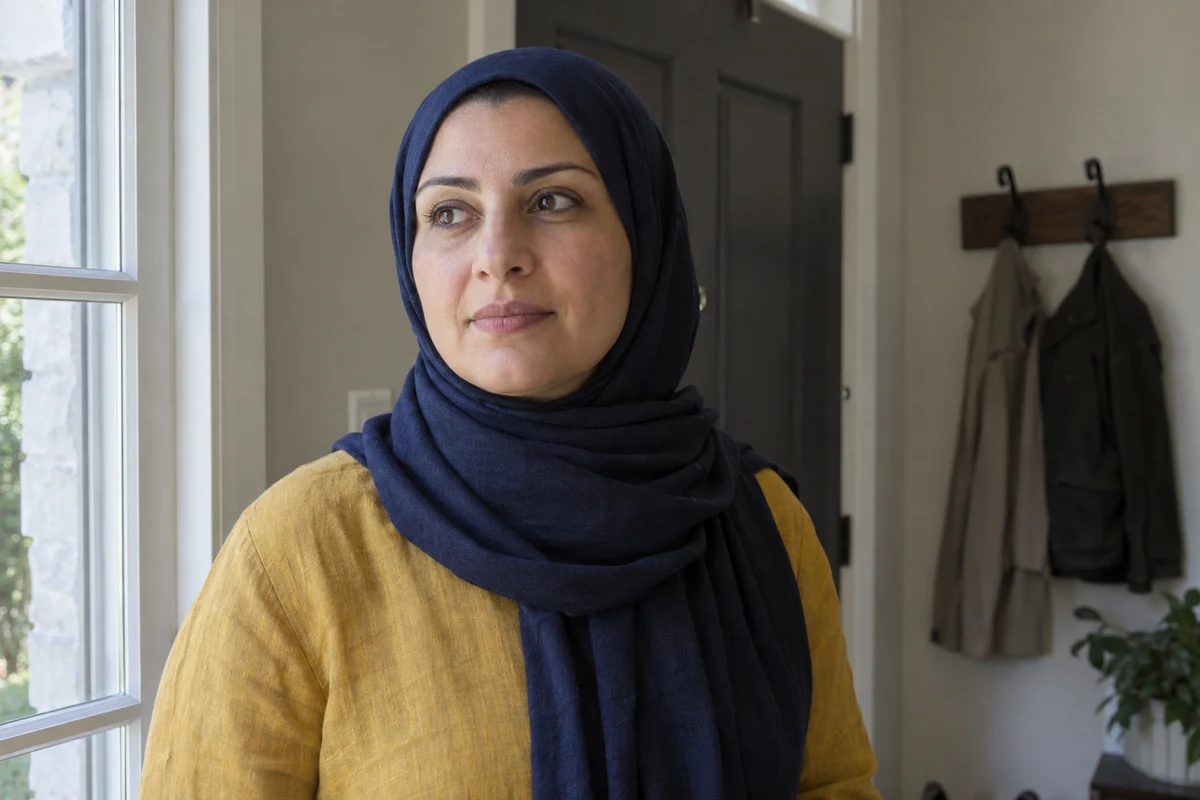
1. Describe the setting without overloading it
Open shade means soft daylight outside, away from direct sun: readable eyes, gentle shadows and no squinting. For the brief, describe what the setting must do, not how lovely it should be. “Outdoor portrait with lots of beautiful plants” invites a busy scene. “Quiet distant foliage, no recognisable venue” keeps the background behind the person, where it belongs.
Decide whether the location matters. A team page that says “photographed at our site” needs a real photo taken there. A generated garden is fine for a profile treatment, as long as nobody presents it as a place the person was photographed. Don’t let a plausible garden quietly become a claim that a shoot happened there.
If the original already has good outdoor light, try a crop first. If harsh shadow hides half the face, take a clearer photo; the model will happily invent the missing half.
Why this works: a setting described by its job gives you something to check, and it keeps the model from building a location story around the person.
What you should see: one line for your brief: the light, the background and whether the place needs to be real.
2. Request one restrained candidate
Upload the untouched photo to a chat in ChatGPT or Gemini and ask for one candidate:
Edit my attached photo into a natural outdoor-shade headshot for
[intended use]. Keep this photo as the reference for the person:
preserve the face, apparent age, expression, head angle, gaze, hair or
head covering, natural skin detail, clothes and accessories.

Use soft open-shade daylight with both eyes readable. Keep skin colour
neutral and true to the original, even against green foliage, with no
background colour spilling onto the face or clothes. Put quiet distant
foliage behind the person, with no recognisable venue, signs or people.

Frame a head-and-shoulders crop with about 10% headroom above the hair
or head covering. Keep hair and fabric edges natural, with no glowing
outline. No new outfit, props, hands or words. Make one candidate.
[intended use] is where the photo will appear, such as a team page or a conference profile.
Why this works: it separates the treatment you want (light, background, crop) from the things that must not change (the person and their clothes), and it names the outdoor-specific risk: colour from the leaves landing on the skin.
What you should see: one candidate with softer light and a quieter background. The head covering or hairline, clothes and gaze should match the original.
3. Check the face, then the edges around it
Put the candidate next to the original at the same size. Start with eyes, nose, jaw, hairline, expression and apparent age. Then compare clothing and accessories: a candidate that quietly adds a jacket has changed the brief, however nice the light.
Then look at the edges where the person meets the background: hair, head covering, glasses arms, ears and shoulders. Look for missing strands, doubled rims or a bright halo. Check the result on both a light and a dark page, and at the small size you’ll actually use.
If an edge is wrong, name that boundary rather than asking for general polish:
The [hair / head covering / glasses / shoulder] edge has [a bright
halo / missing detail]. Use the untouched original as the reference
for that edge. Correct that area only, keeping the face, expression,
clothing, light and crop. Don't add an outline or a new hair shape.
Pick the edge from the first bracket and the fault from the second.
Why this works: a named edge gives the editor one small job. “Make it cleaner” gives it permission to redo the person.
What you should see: the same portrait with that one edge fixed and nothing else visibly changed.
Check the result
- The face, expression, apparent age and gaze match the original.
- The clothes and head covering or hairline match, on both shoulders.
- Edges look natural on a light and a dark page, at full size and at profile size.
- The crop has the headroom you asked for.
The usual failure: the person changes colour with the setting. Skin turns pinker, greener or more golden, and hair gets lighter, because the model has relit the person to match the new garden. It slips past because the whole image looks warmer and nicer. To spot it, put the cheek and forehead of each image side by side, then compare the hair tone.
The new background works. The skin in the candidate is [colour change]
compared with my original, and the hair is [hair change]. Go back to my
untouched original. Keep the new background and soft light, but match
the original skin colour and hair tone. No background colour on the face
or clothes. Keep the expression, glasses, outfit and crop.
[colour change] is what you saw, such as “pinker”; [hair change] might be “lighter” or “unchanged”.
If two repairs still shift the colour, use an ordinary background-removal tool or retake the photo in real shade. Knowing when to stop prompting is part of the skill.
Worked example: two outdoor edits
Fictional example. The edit at the top started from a window-side photo. A second photo, taken at a garden gate, went through a similar brief.
The window-side photo. The edit kept the navy hijab covering the head and neck, the mustard blouse, the off-camera gaze and the neutral mouth. No hair was invented and there’s no glowing outline. Two things still need a look: the scarf folds are more defined than in the original, and the brief asked for about 10% headroom but the candidate has roughly 3%. The head covering nearly touches the top edge, which will hurt in a round crop.
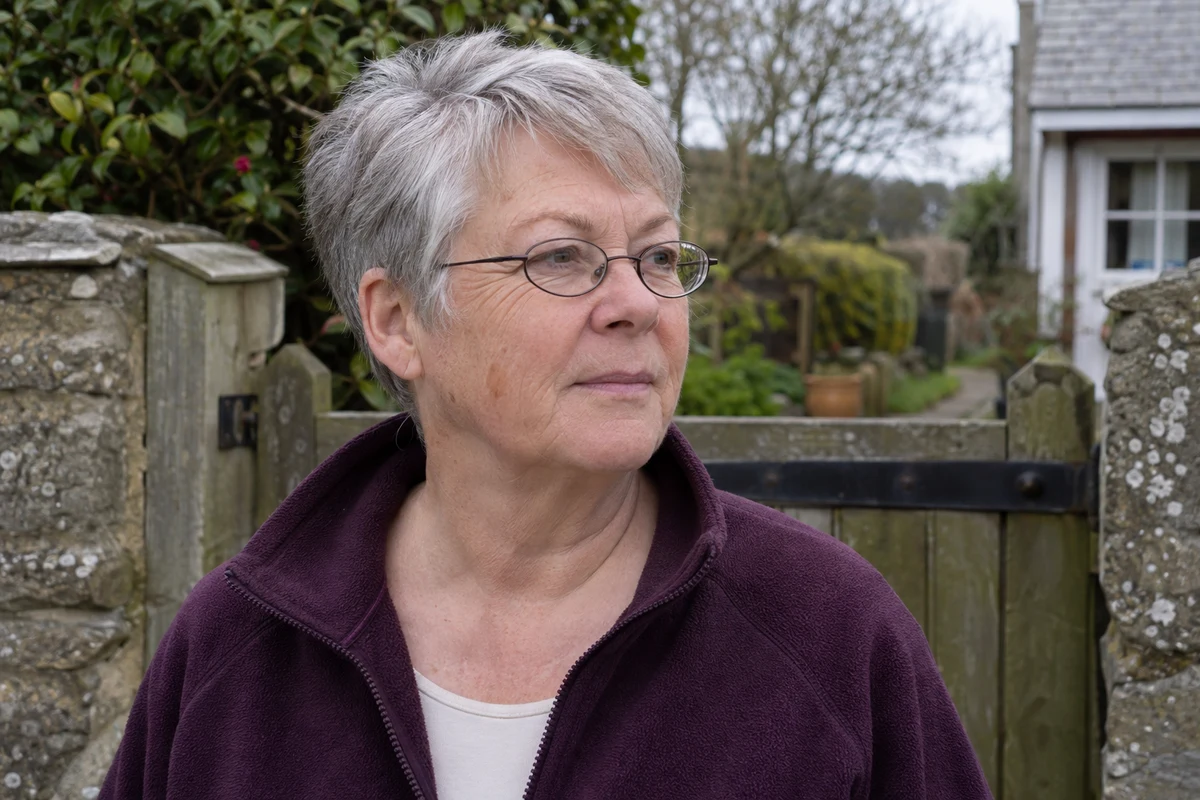
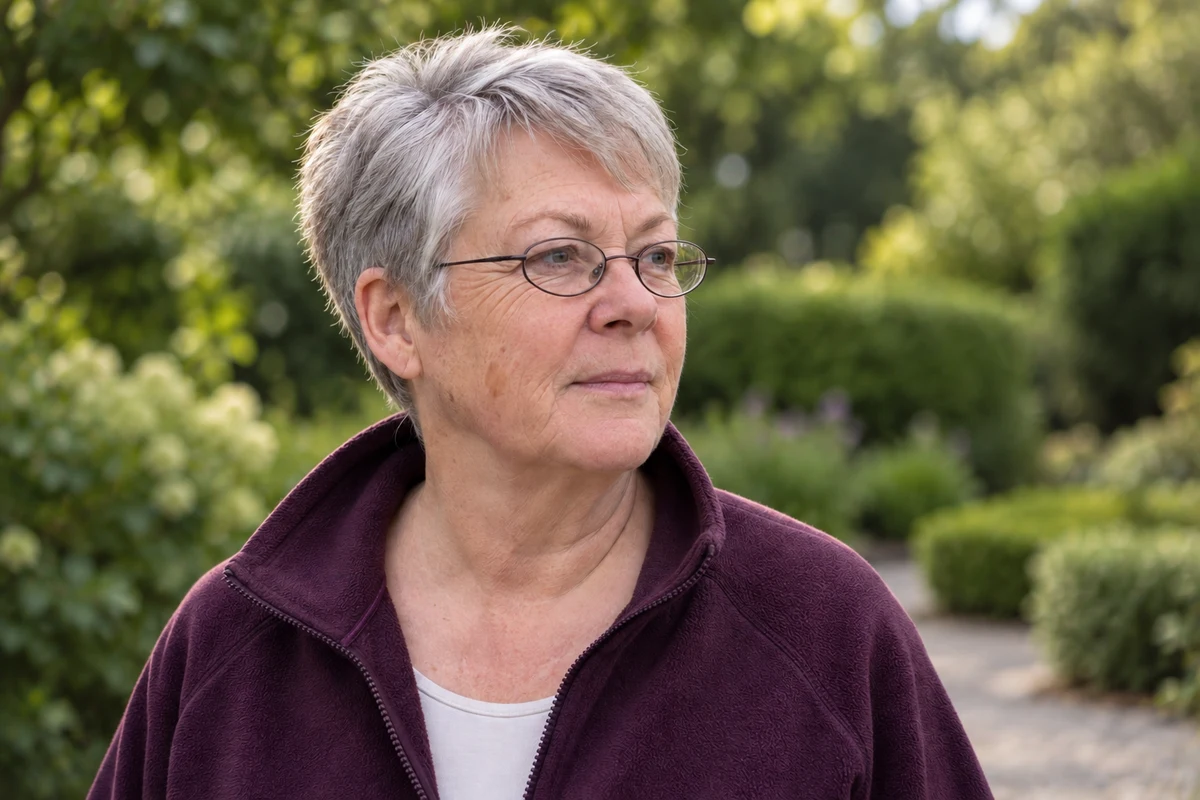
The garden-gate photo. The gate and house became a quiet garden, and the turned head, glasses and plum fleece survived. But the skin is pinker and the hair brighter than in the original: the usual failure. The brief asked for natural skin colour, and the model relit her to suit the leaves anyway.
- Clean edges don’t settle likeness. The first edit passed the edge check and still needs a crop decision and a look at the folds.
- The colour check is a side-by-side, not a feeling. Covering the backgrounds and comparing the cheeks shows the pink shift straight away.
- The repair names both changes. Fill the repair prompt with “pinker” and “brighter”, restart from the untouched original and compare the cheek again. If the fleece is suddenly a suit, that’s a new failure, not a fix.
Try it
Check the boundary against its source
Compare the head covering, clothes and face of the edit against the original before choosing a correction.
The AI skill: Name one visible edge or colour fault and ask for that fix only.
Loading the controls…
The navy hijab still covers the head and neck and no hair has been invented. The top of the scarf now sits close to the frame edge: headroom is tight.
The lens enlarges fixed exported images using browser display cropping. The two views are not geometrically registered, and they do not measure likeness or recover missing pixels.
Your instruction preview
Compare the head-covering outline in my original and the edit. Keep the original coverage and outline. Name any halo, missing fabric or invented hair, then suggest one narrow edge correction.Try it on your work: Look at your own edit at full size and at profile size. Name the edge or colour change before asking for another edit.
Go deeper
Take a real shaded photo when the setting is available
Ask AI for a short capture plan based on your photo and the space you have: softer light, a quieter background and more room above the head. Then check the new original. You may only need a crop afterwards. The source-photo coach keeps that advice tied to visible problems.
Use a background reference without borrowing a person
If you want a particular kind of garden, attach a photo of the place only, labelled “background reference”. Remove signs and anything private first. Your portrait controls the person: never let a photo of someone else in a garden supply a face, outfit or pose.
Transfer the edge check to a product scene
For a real product placed in a new setting, check its shape, label and edges against the real reference. A halo or missing contour can make the composition misleading. Keep the product facts separate from the setting, and don’t let a hidden label turn into invented text.