Keep clothing and meaningful accessories accurate in a portrait
You asked for a smarter background and got one, along with a blazer you don't own. A "professional headshot" request can quietly change what you're wearing.
What you'll make
an edited portrait in which the clothes, neckline and visible accessories match the original photo, or one targeted repair when they don’t.
What you'll need
a recent photo of yourself, or of someone who has agreed, that your organisation lets you use in an image editor, and a short list of what they’re wearing. ChatGPT and Gemini both edit an uploaded photo. To practise, use the fictional navy-knit source. Allow about 15 minutes.
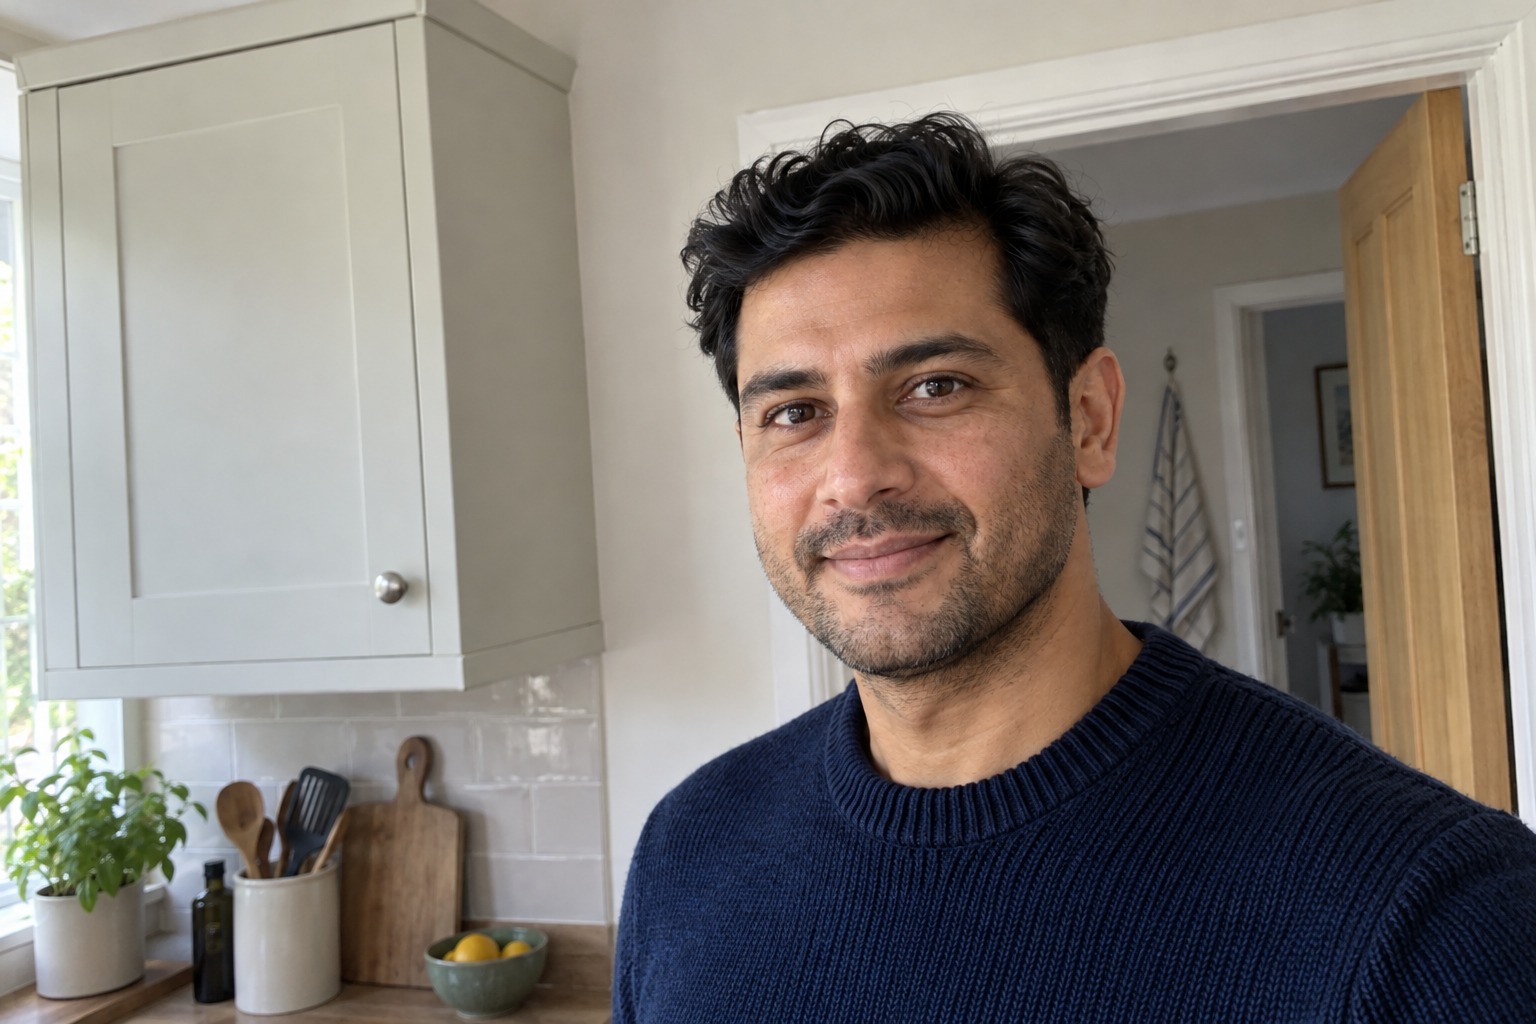
Example result.


1. Describe the clothes and say they stay
An About page, staff directory or speaker bio rarely needs new clothes. A clean background, good light and a sensible crop do the “professional” work. Write a one-line description of what the person is wearing, such as “navy crew-neck knit” or “green T-shirt, small gold hoops”, and put it in the brief:
Edit my attached portrait for [background, light or crop]. Keep the
clothes from the photo: [clothes and accessories], with the same colour,
neckline, layers and coverage. Keep the face, expression, hair and pose.
No new jacket, tie, jewellery, logo or opened collar, and no invented
body or clothing outside the photo. If the crop needs clothing the photo
doesn't show, tell me instead. Make one candidate.
[background, light or crop] is the change you want. [clothes and accessories] is your one-line description.
If you do want a wardrobe change, that’s a different job: say so, and label the result as a concept rather than a photo of what they wear. Don’t ask the editor to guess a hidden logo, badge or piece of jewellery; get a clearer photo instead.
Why this works: “professional headshot” carries a stock image of a suit. Describing the actual clothes gives the editor something specific to keep.
What you should see: one candidate with the new background or light and the same clothes.
2. Keep a reference for light only
If you attach a second portrait to show the lighting or background you like, say what it’s for. Otherwise its outfit can come along too:
My original controls the person and their clothes. The second image is
for [lighting or background] only. Don't take its clothing, jewellery,
pose or props. Keep [clothes and accessories] from my original.
Why this works: an editor treats every attached image as a reference for everything unless told otherwise. One sentence keeps a lighting reference from becoming a wardrobe reference.
What you should see: the reference’s light or background on your photo, with your clothes unchanged.
3. Check the clothes edge by edge
Compare the candidate with the original at the same size and look at:
- Neckline and collar: the same shape and height, not opened or turned into a shirt collar.
- Shoulders and layers: seams in the same place, and no new jacket edge or cardigan.
- Accessories: each earring, necklace, badge or lanyard still there, once each. Watch for a duplicated earring or a necklace floating over fabric.
- Colour and pattern: the same family, allowing for different light.
For glasses, use the glasses check.
Why this works: a new layer often arrives at the edges first: a lapel at the shoulder, a collar at the neck. Checking edges catches it before you judge the whole picture.
What you should see: a note for each area: “same”, or what changed.
Check the result
- The neckline, layers and coverage match the original.
- Every visible accessory is present once, in the same place.
- No jacket, tie, logo or jewellery has appeared.
- Colour differences are explained by the light, not a different garment.
The usual failure: the editor adds a layer, most often a jacket or blazer over whatever the person was wearing, because it reads as “professional”. Spot it at the shoulders and neckline. Repair that one change rather than starting a new outfit conversation:
The [light or background] in this candidate is useful, but it changed
[garment or accessory] from the original. Restore that feature only,
as it is in my original. Keep the face, pose, new light and crop.
Don't redesign the outfit or invent anything the photo doesn't show.
Make one candidate.
[garment or accessory] is what changed, such as “the olive polo shirt, which now has a navy jacket over it”.
Worked example: a polo shirt that gained a jacket
Fictional example. An older man’s kitchen photo shows him in an olive polo shirt. The brief asked for a darker office background for a staff directory, and the candidate came back like this:
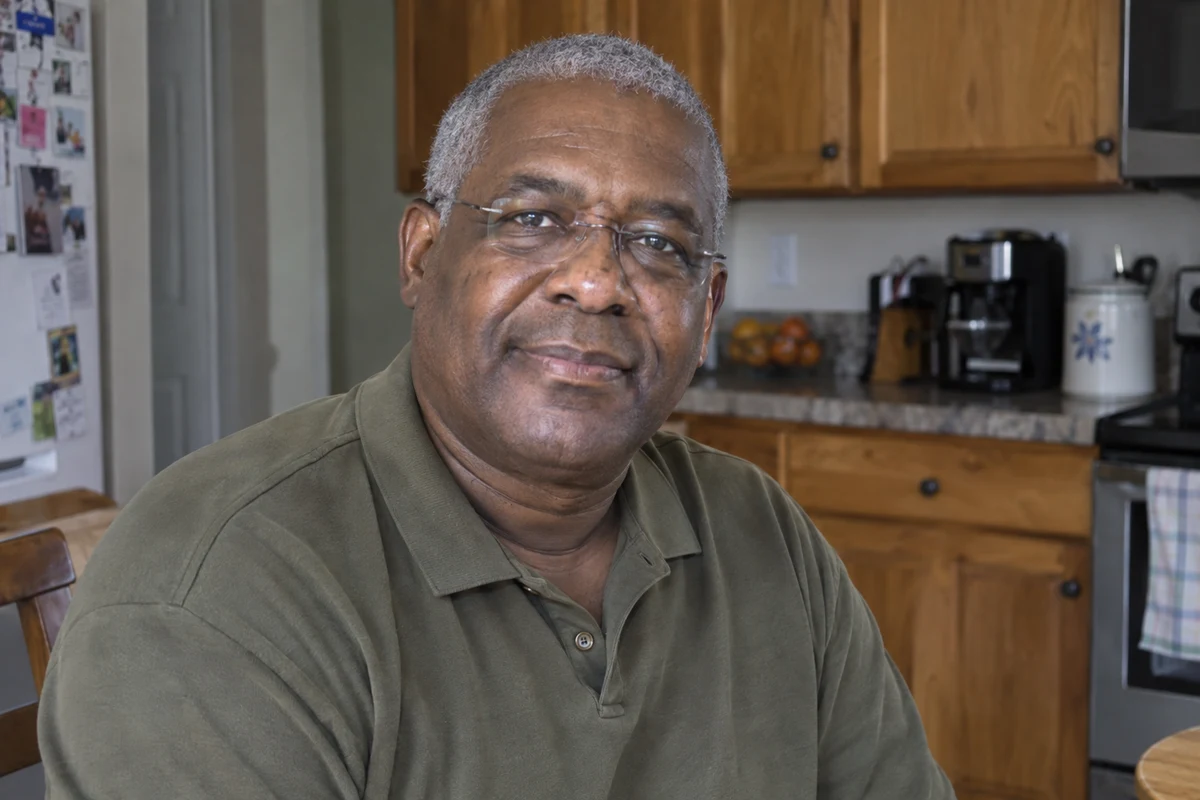

- The failure was at the shoulders. The face, glasses and grey hair are a good match, and the polo collar is still visible. But a navy jacket now covers the shoulders: a garment he wasn’t wearing.
- It’s only wrong for this job. The boardroom headshot guide asks for exactly this jacket as a deliberate wardrobe concept. For a staff directory that should show him as he is, it’s an invented outfit.
- The repair names the one change. The next request is the repair prompt with “the olive polo shirt, which now has a navy jacket over it”, keeping the office background and light. The new candidate gets the same edge-by-edge check.
Try it
Check the clothes edge by edge
Use visible source details rather than letting a style request invent a costume.
Light can change how fabric looks. It doesn't explain a new neckline, jacket or piece of jewellery.
The example in text
- Navy knit
- Round ribbed neckline
- No source jewellery
Task kit for this job: Download (ZIP) · Reusable instructions
Go deeper
Ask for background, not body, when the frame gets wider
A head-and-shoulders photo doesn’t show a whole outfit. For a wider layout, ask for more background around the person, not a standing pose; anything below the photo’s edge would be invented clothing. The About-page portrait guide shows how.
Keep a short preservation list, and update it
Keep one line per person listing what matters, such as “silver hoop earrings; always a high neckline”. Add it to a portrait task kit, but attach a current photo every time. A reusable instruction shouldn’t freeze someone into last year’s jumper.