Keep glasses believable during an AI portrait edit
A portrait can look convincing until the glasses acquire an extra stem or the eyes disappear behind a new reflection. Check the small joins that a polished thumbnail hides.
What you'll make
a short glasses check for an edited portrait, and a one-region repair request if something changed, or a decision to keep the original.
What you'll need
the untouched original and the edited version at full size. ChatGPT, Claude, Copilot and Gemini can all look at attached images and describe them; ChatGPT and Gemini can also edit a photo. If your account can only look, the check is still the useful output. Allow about 10 minutes.
Example result.
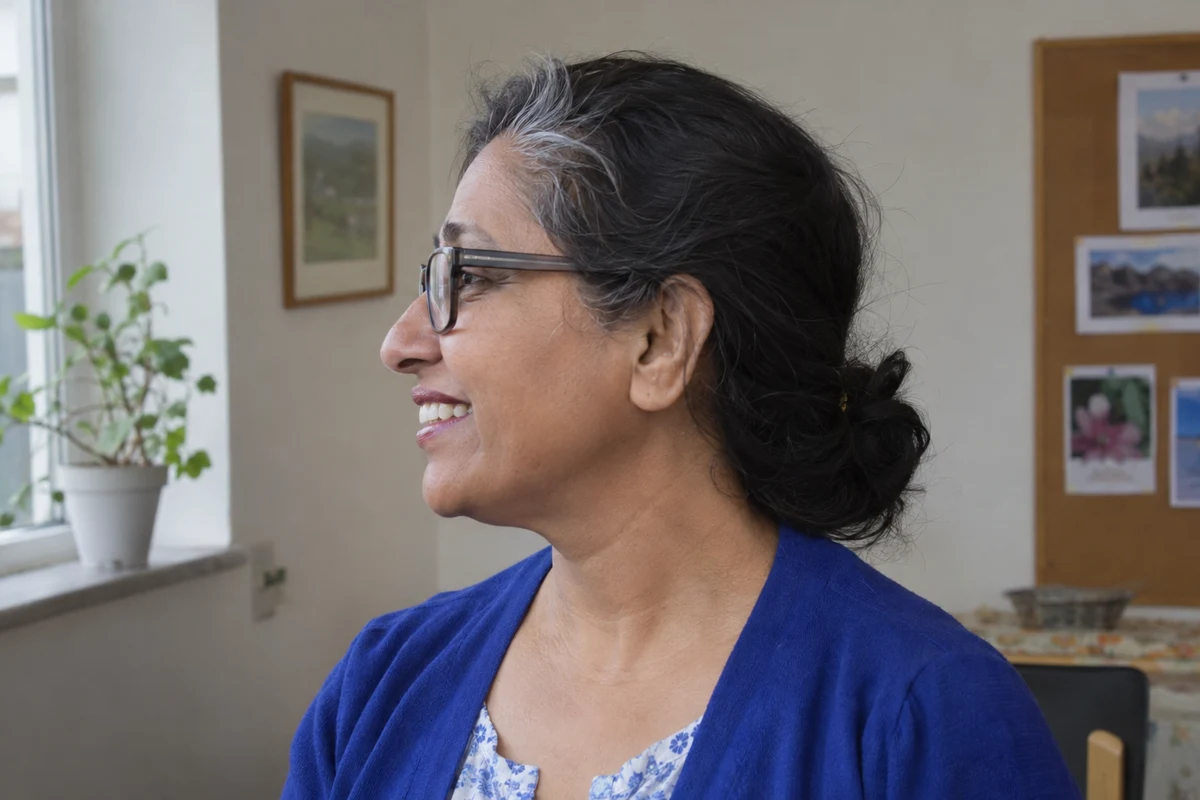
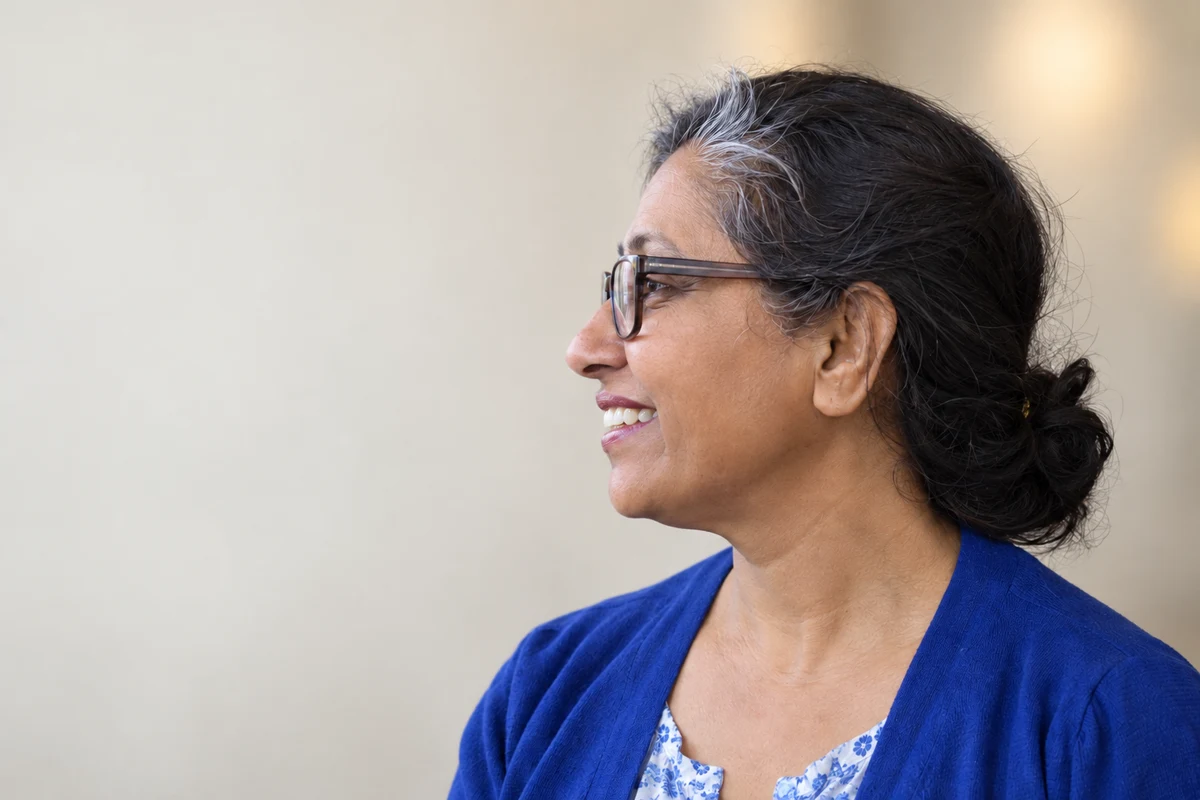
Lens: one visible, same shape and frame colour. Bridge: one, at the nose. Stem: runs back above the ear and disappears into the hair in both images, so the hidden part isn’t checkable. Glare: none over the eye. Result: pass.
1. Ask for a comparison, not a repair
Attach the original and the edit in a chat, saying which is which, and ask about the glasses only:
Attachment 1 is my original photo; attachment 2 is an edited version.
Compare the glasses only, and don't edit either image. Check the lens
outlines, the bridge, the visible stems and where they meet the ears,
any reflections, and whether the eyes are visible. For each difference,
say which image and where. Separate a real change from a part hidden by
hair or the angle. If you can't see a detail clearly, say so.
Why this works: asking for observation first gives you a list you can check, before any edit adds new problems. Naming the parts stops the model from glancing at the face and saying “looks good”.
What you should see: a short list of findings for each part, with “hidden” or “unclear” where the photo can’t show it.
2. Check what the model says against the pictures
Open both files at full size. A model can confidently describe a duplicated stem that is really a strand of hair, or pass a reflection that hides an eye. Check each part yourself:
| Part | What a pass looks like | What you can’t check |
|---|---|---|
| Lenses | Same shape and frame colour as the original | An edge hidden behind hair |
| Bridge | One join across the nose | Detail too small to see |
| Stems | A path towards each visible ear | Parts outside the frame |
| Glare | No new opaque patch over an eye | How the real lenses behave |
Normal reflections aren’t errors. The question is what changed. If the glasses already hide the eyes in the original, a better photo will help more than asking AI to invent the eyes.
Why this works: the model’s answer is a second opinion. Your own look at the pixels is the check.
What you should see: a note for each row: “same”, “changed” (with where) or “can’t tell”.
3. Decide: keep, repair once or go back
If everything passes, use the edit. If one part changed, send the repair prompt in Check the result to an editor (ChatGPT or Gemini), using the original as the reference. If the repair changes the eyes, nose or expression, go back to the original. Don’t treat the latest edit as the new reference for the face.
Why this works: one targeted repair can fix a stem. Repeated repairs on an already-edited face drift further from the person each time.
What you should see: a clear decision, and at most one repair request.
Check the result
- Lens shape and frame colour match the original.
- There’s one bridge and no extra or disconnected stem.
- No new glare covers an eye that the original shows.
- Parts hidden in the original are marked as hidden, not filled in.
The usual failure: the edit adds a second stem, or a reflection that covers one eye. Both are easy to miss at thumbnail size and obvious at full size. Spot them by checking the stem path and both eyes at 100%. Repair only that fault:
In the edited version, [glasses problem] at [where]. Use my untouched
original as the reference for the glasses and eyes. Correct only that
problem. Keep the face, expression, hair, clothes, light and crop. Don't
invent hidden parts of the frame, remove the glasses or change the face
to make the repair easier. Make one candidate.
[glasses problem] is what you found, such as “a second stem crosses the cheek”. [where] is its location, such as “between the ear and the eye”.
Worked example: a profile with one visible stem
Fictional example. The pair at the top is a profile portrait: the woman looks to the left, so only one lens, the bridge and one stem are visible. The stem runs back above her ear and into her tied hair. A first edit from the same original came back with this comparison from step 1:
Lens: same rectangular tortoiseshell frame
Bridge: one, at the nose
Stems: a second, thinner stem now runs across the cheek towards the ear
Glare: none
Hidden: the far lens and the end of the stem behind the hair- The model’s finding needed checking. At full size the “second stem” really was a thin dark line across the cheek, not a strand of hair, so it was a genuine fault.
- The repair named one place. The next request is the repair prompt with “a second stem crosses the cheek” and “between the ear and the eye”. The repaired candidate gets the same table check; the pair at the top shows what a pass looks like.
- Hidden stayed hidden. The far lens and the end of the stem aren’t in the original photo. The check marks them “can’t tell” instead of asking the editor to draw them.
Try it
Inspect connected frame parts
Inspect bridge, lenses, stems and eye visibility before a narrow correction.
A stem hidden by hair can't be checked. Mark it hidden rather than asking the editor to draw it.
Task kit for this job: Download (ZIP) · Reusable instructions
Go deeper
Allow for a style, not a different object
A pencil or duotone treatment may use heavier lines or drop a tiny reflection. Neither should add a lens, break the bridge or change the frame shape. Decide what the style is allowed to simplify, then check the glasses as an object. The pencil portrait guide shows a drawn version of a pair of round wire glasses.
Use a second photo to clarify the glasses
If the main photo hides part of the frame, a second, clearer photo can help, as long as you say what it’s for:
Attachment 1 controls the pose, expression and portrait. Attachment 2
shows only the current glasses more clearly. Before editing, list any
difference between the two frames. Don't combine different frames or
borrow an eye from the other pose.
If the photos show different glasses, ask which pair is current rather than letting the editor merge them.
Use the same check for other small objects
Earrings, collar fastenings and lanyards fail the same way: an extra part, a broken join or a piece that floats. Name the parts, check the joins, then repair one. The clothing and accessories guide applies it to what someone’s wearing.