Know when to return to the original portrait
The second edit fixed the background and brightened the face. The third fixed the face and changed the shirt. At some point the useful next step is no longer another prompt.
What you'll make
a one-line decision for an edited portrait: a narrow repair, an ordinary tool on the original, or a retake, based on what’s actually wrong.
What you'll need
the untouched original, the edited attempts in the order you made them, and what the image is for. Keep the attempts named (attempt 1, attempt 2) so you can see the history. Allow about 10 minutes.
Example result.
Job: transparent cut-out of the person for a slide
Attempt 2: transparency works; face brighter than original; shirt folds changed
Fault types: changed appearance (twice), not a file or edge problem
Decision: stop editing attempts. Remove the background from the original
in PowerPoint, then check the edge on a dark slide.
1. Sort the faults before asking for another edit
Different faults need different fixes:
- File or export (wrong type or size): re-export; no AI needed.
- Destination crop (too tight): a wider ordinary crop or plain padding.
- Edge (halo, leftover background): a mask repair on that edge.
- Changed appearance (face, expression, hair, clothes): go back to the original.
- Missing detail (the photo doesn’t show it): a different photo or a retake.
One attempt can have several at once. Keep them separate, so a correct file doesn’t excuse a changed face and a good face doesn’t excuse an unusable file. If you want a second opinion, ask:
Compare my original, this edited attempt and what it's for: [use].
Sort the problems you can see into file or export, crop, edge, changed
appearance, or detail the original doesn't show. Say where each one is
and how sure you are. Suggest the smallest next step, and don't assume
another generated portrait is needed.
Why this works: most edit loops start by asking for a fix to the wrong kind of problem. A changed face can’t be fixed by tweaking the background, and an edge can’t be fixed by regenerating the face.
What you should see: each problem labelled with its type, and one suggested next step.
2. Repair once, from the original
If one thing is wrong and the rest is good, a single narrow repair is worth one try. Attach the untouched original as the reference for the person, not the latest attempt:
My untouched original controls the person, expression, hair and
clothes. The attempt supplies only its useful [background, light or
layout]. Correct [problem] and keep everything else as in the original.
No new pose, makeover or invented body. Make one candidate.
[problem] is the single thing to fix, such as “the pale outline along the top of the hair”.
Then check the whole result, not just the repaired area. A glasses fix can move a mouth; a crop fix can invent shoulders.
Why this works: each edit of an edit drifts a little further from the person. Using the original as the reference resets the drift instead of adding to it.
What you should see: a candidate where the one problem is fixed and nothing else moved.
3. Stop when the same feature keeps changing
If the repair changes the face again, stop adding adjectives. Go back to the original and use an ordinary tool for the part that needs exact pixels. For a cut-out, that’s background removal: in PowerPoint, select the photo and choose Picture Format › Remove Background (on a Mac, Format › Remove Background). Adobe Express and Canva have similar tools. Then check the edge on a dark slide at full size. If no tool gives a good result, use the original in a plain frame, or retake the photo.
Keep the final file’s approval separate from the history. A person who approved attempt 1 hasn’t approved a noticeably different attempt 4.
Why this works: background removal keeps the person’s own pixels, so the face check passes by definition. Generation redraws the person every time.
What you should see: a final image made from the original, and a note of which attempts you rejected and why.
Check the result
- The final image’s face, light and clothes match the original, not an earlier attempt.
- Each problem was fixed by the right kind of tool.
- You stopped after one failed repair rather than stacking edits.
- The person has approved the final file, not an earlier version.
The usual failure: a series of edits where each one fixes something and changes something else, and the latest attempt quietly becomes the reference. Spot it by putting the newest attempt next to the original, not next to the previous attempt. If the same feature has changed twice, stop:
Stop refining the edited attempts. [Feature] keeps changing. Go back to
my original and limit the job to [one operation]. If you can't do that
without changing the person, say so and give me steps for an ordinary
editor or a retake.
[Feature] is what keeps drifting, such as “the brightness of the face”. [one operation] is the small job, such as “background removal only”.
Worked example: a cut-out that kept changing the person
Fictional example. The job was a transparent cut-out of a man at a home desk for a slide. Two image-generator attempts produced working transparency:
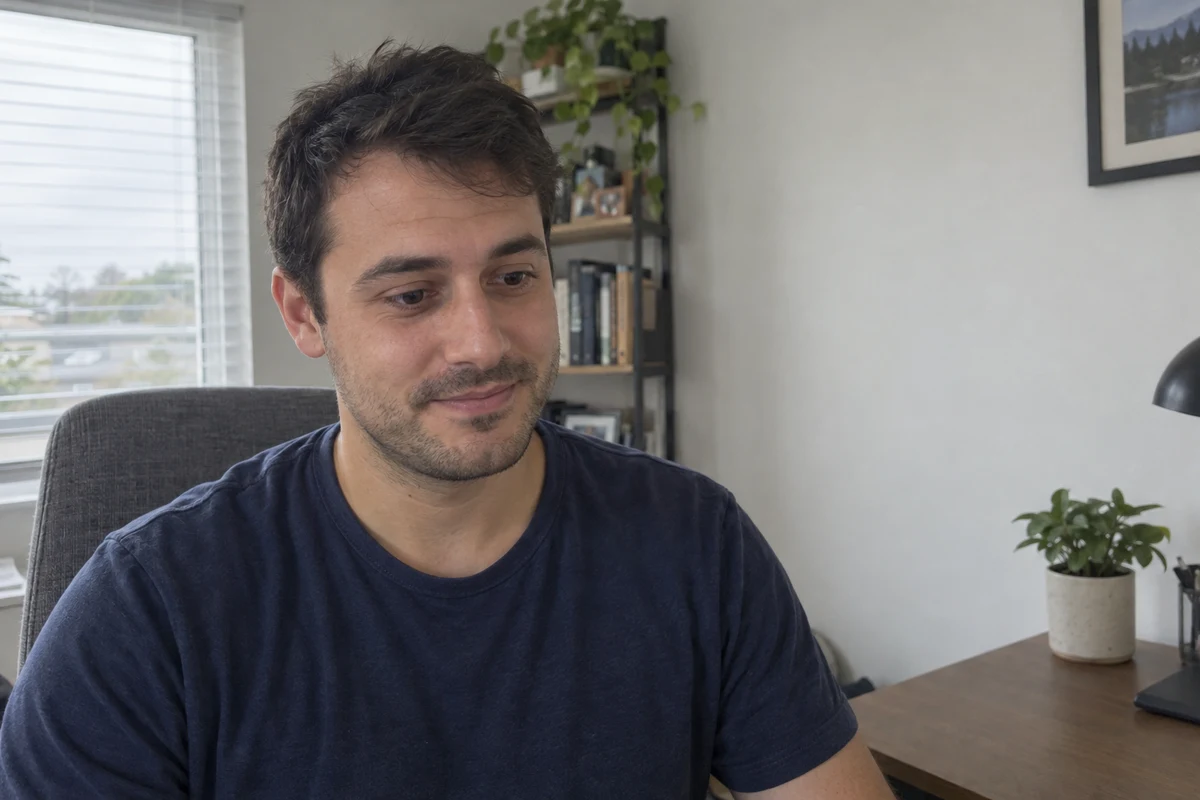
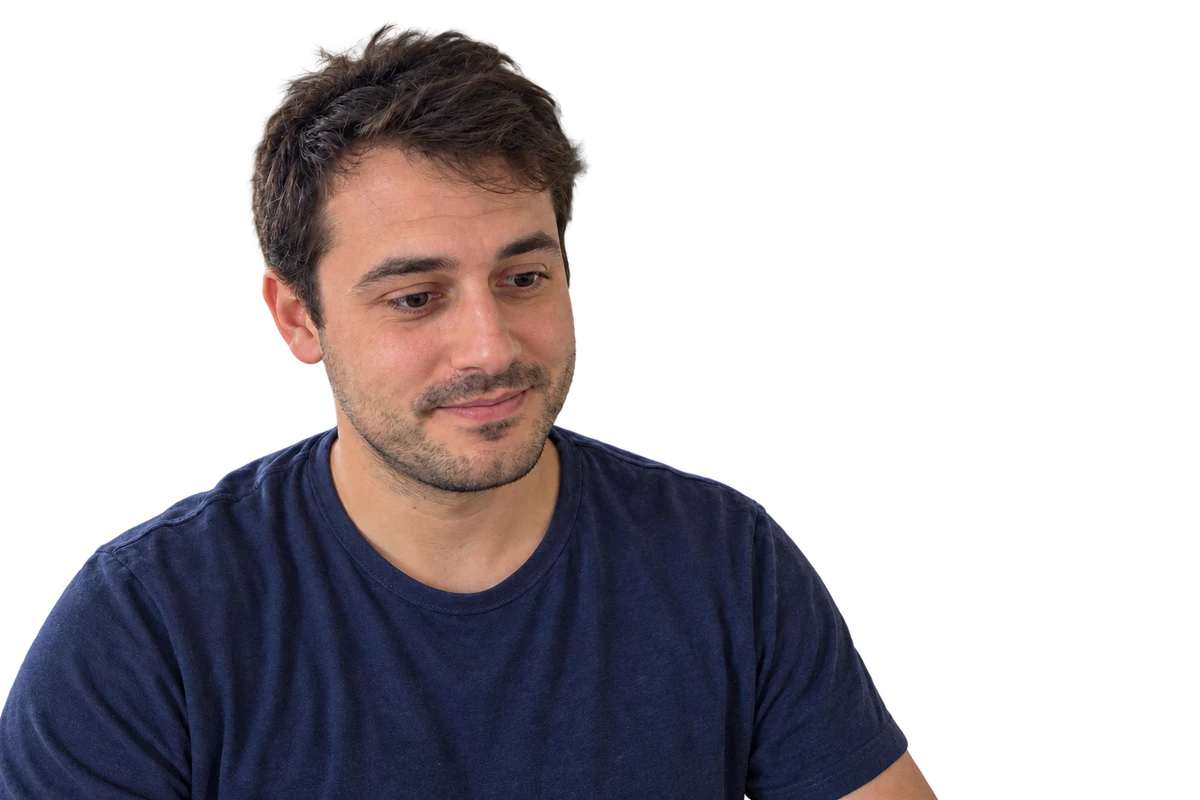
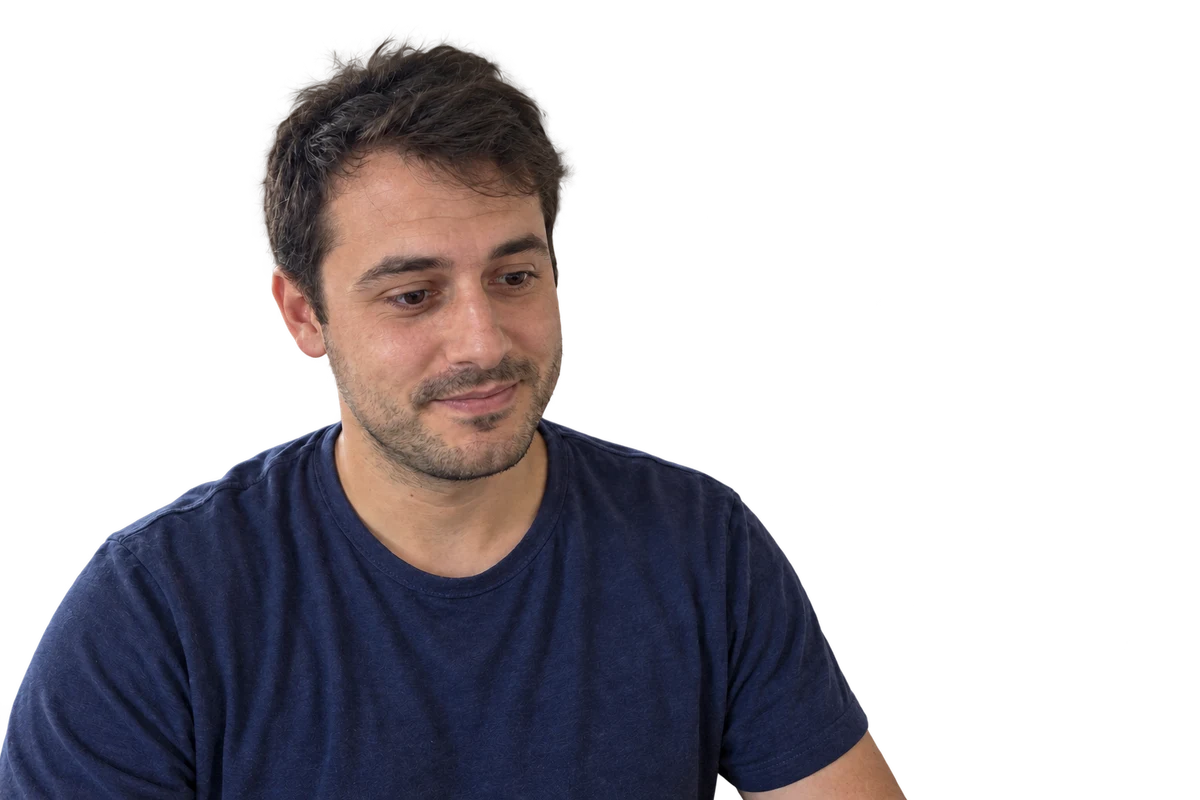
- The transparency worked; the person didn’t. Both attempts removed the room cleanly. Both brightened the face, which the original lights from the window side, and both redrew the T-shirt. That’s a changed-appearance fault, not an edge fault.
- Attempt 2 was compared with the original. Next to attempt 1 it looked like progress. Next to the original, the same brightened face was still there.
- The decision was to stop. The stop prompt above, with “the brightness of the face” and “background removal only”, led to PowerPoint’s Remove Background on the original, which keeps his own pixels. The cut-out portrait guide walks through that route and its edge checks.
Task kit for this job: Download (ZIP) · Reusable instructions
Go deeper
Check how recent the original is
An old photo can be clear and faithfully edited, and still not show the person as they look now. For a current profile, start from a current photo rather than asking AI to update an old face.
Keep a short run record
For each attempt, note the request, what changed and the decision. Keep failed files when they explain why you stopped. The task run record guide applies the same habit to other AI work.
Repair edges with the edge guide
If the only problem is a halo or leftover background along the hair or shoulders, it’s an edge fault, and the background halo guide covers the repair without touching the face.