Create a product scene that keeps the actual product accurate
The mug looks lovely on its new stone counter, next to a plant nobody asked for. Look again and the handle is smaller. A new setting can quietly redesign the product sitting in it.
What you'll make
a product scene you’ve compared with the original product photo, labelled as a concept, or a composite that keeps the real product’s pixels when the image has to be accurate.
What you'll need
a clear photo of the product, its specification sheet, and an image editor that takes attached photos (ChatGPT or Gemini) or a tool with background removal (PowerPoint, Adobe Express). To practise, download the fictional mug. Allow about 20 minutes.
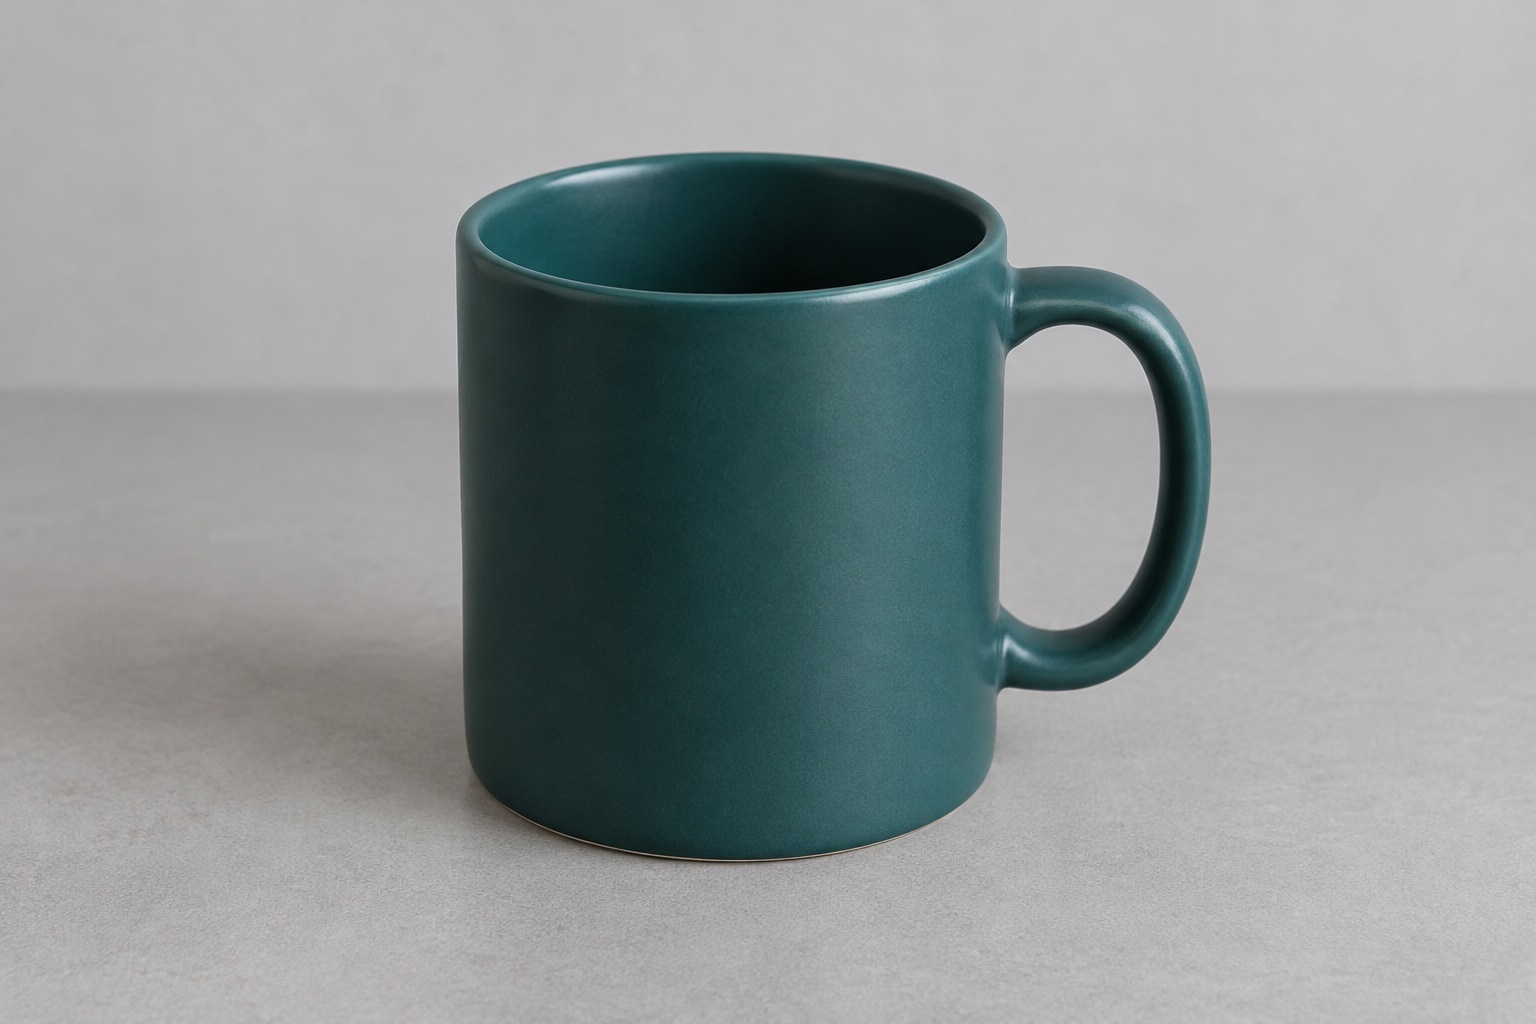
Example result.
Use: mood board for a café pitch (concept)
Shape and proportions: squatter than the original; flag
Handle: smaller and set lower; flag
Finish and colour: same matte teal
Props: plant top right, not requested; remove
Decision: fine as a mood concept; not for the product page
1. Decide what the image is for
Two jobs look similar and need different routes:
- A scene concept (mood board, pitch, early idea): an AI-generated scene with the product redrawn is fine, as long as you check it and label it as a concept.
- A product image (catalogue, product page, packaging): the product must be the real one. Keep its photographed pixels and change only what’s around it.
Write the visible details that must stay: shape, handle or fastenings, label, finish, colour and the angle it was photographed from. Facts like capacity or durability come from the specification sheet, never from how the picture looks.
Why this works: most product-scene trouble comes from using a concept where a product image was needed. Choosing the route first avoids it.
What you should see: a one-line decision, “concept” or “product image”, and a short keep list.
2. Make the scene
For a concept, attach the product photo in ChatGPT or Gemini and ask:
Put the product in my attached photo into [scene] for [use]. The photo
controls the product's shape, proportions, handle, colour, finish, label
and angle. Change only the setting and the light on it. Keep the whole
product visible, standing on the surface with a natural shadow. Add no
props, logos, text or extra parts, and don't invent sides of the product
the photo doesn't show. Make one candidate.
[scene] is the setting, such as “a sunlit stone kitchen counter”. [use] is where it’s going, such as “a café pitch mood board”.
For a product image, don’t redraw the product at all. In PowerPoint, insert the product photo, choose Picture Format › Remove Background (on a Mac, Format › Remove Background) and save it as a picture. In Adobe Express, select the image and choose Remove Background. Then place the cut-out on a generated or photographed background, and add a soft shadow under it.
Why this works: a generator redraws everything it outputs, including the product. Background removal keeps the real product’s pixels, so its shape and label are right by definition.
What you should see: either a concept scene to check, or a composite with the original product on a new background.
3. Compare the product, then the scene
Put the original and the result at the same product size. Check, in order: outline and proportions, each join (a handle has two), rim or edges, label text and finish. Then check the scene: is the product standing on the surface, does the shadow match the light, and has anything been added that you didn’t ask for?
Why this works: the setting draws the eye. Checking the product first, and region by region, stops a nice scene from hiding a changed object.
What you should see: a note per check, like the example result.
Check the result
- The product’s outline, proportions and joins match the original photo.
- Label text, finish and colour are the same.
- No props, text or logos have been added.
- The image is labelled “concept” unless it’s a composite of the real product photo.
The usual failure: the scene is attractive and the product has been subtly redesigned: a different handle, a squatter body, a rounded rim, plus an unrequested prop. Spot it by checking the joins and proportions against the original, not by looking at the whole scene. For a concept, ask for one correction; for a product image, switch to the composite route:
The setting is useful, but [product feature] differs from my photo and
[prop] was added. Use my photo as the reference for the product. Remove
the prop and correct that feature only. Make one candidate. If you
can't keep the product exactly as photographed, say so.
[product feature] is what changed, such as “the handle is smaller and set lower”. [prop] is what was added, such as “the plant in the top right”.
Worked example: a teal mug on a stone counter
Fictional example. A small ceramics brand wanted a warm scene for a café pitch, and later perhaps for the product page.
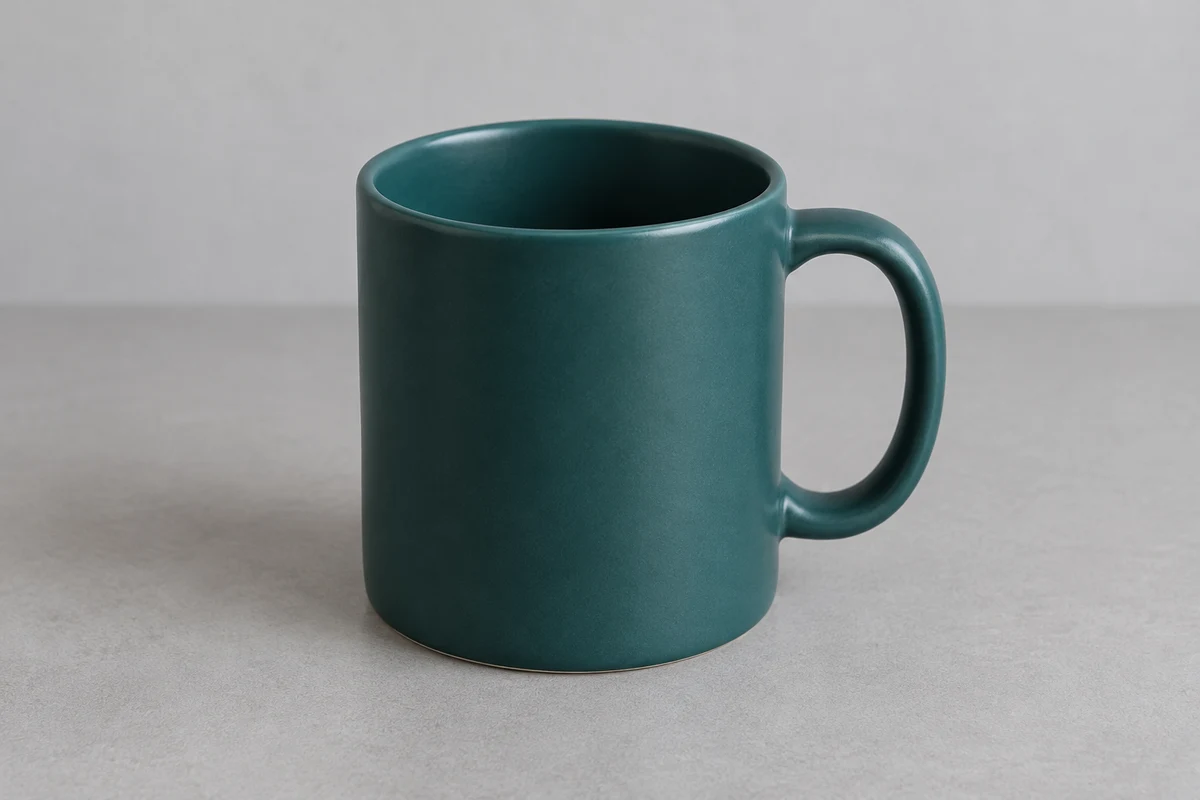
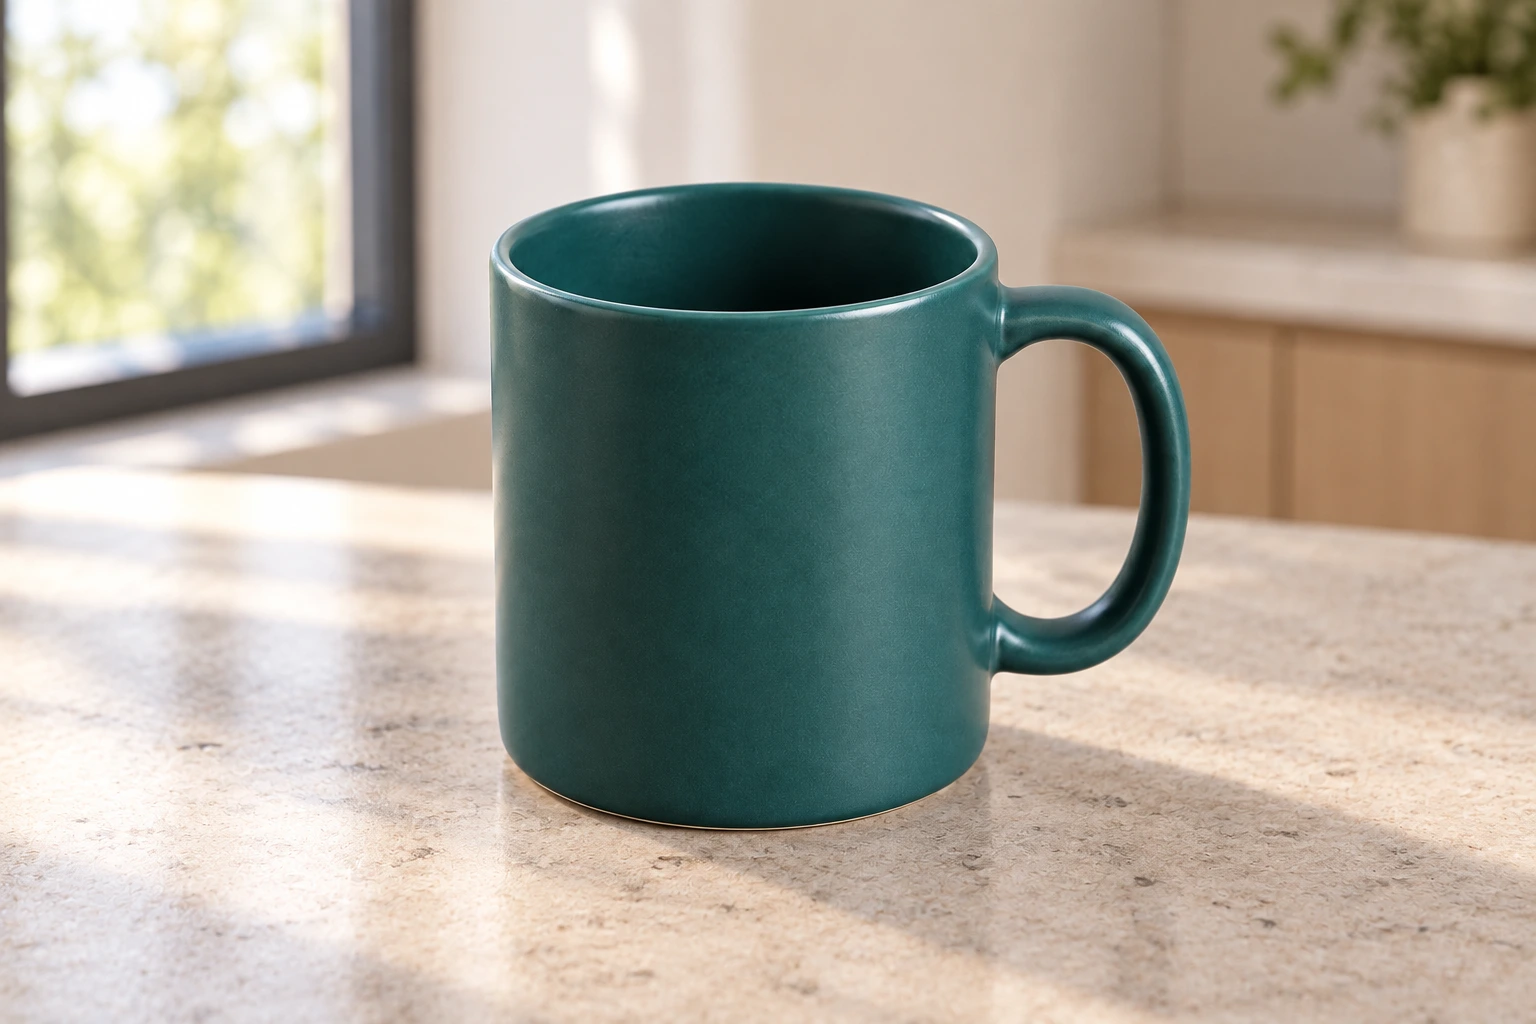
- The product changed. The colour and matte finish held, but the mug is squatter, the handle is smaller and sits lower, and the rim is more rounded. It’s recognisably “a teal mug”, not this mug.
- A plant arrived. The prompt said no props. The repair prompt with “the handle is smaller and set lower” and “the plant in the top right” is the right next request for the pitch.
- The product page needs the other route. Even a corrected redraw is still a redraw. For the product page, the brand removed the background from the original photo in PowerPoint and placed it on the counter scene instead.
Try it
Inspect the mug as an object
Lock product geometry, materials and marks while changing the setting.
The scene redrew the mug: squatter, with a smaller handle, plus a plant nobody asked for. Fine for a mood board; for a product page, use the real photo.
The example in text
- One D-shaped handle
- Two handle joins
- Source rim and proportions
Task kit for this job: Download (ZIP) · Reusable instructions
Go deeper
Keep product facts in editable text
Product names, sizes and claims belong in text layers taken from the specification, not painted into the image. The packaging concept guide covers keeping every word traceable to the brief.
Don't invent the other side
A photo of the front can’t tell an editor what’s on the back or inside. If the scene needs another angle, photograph the product from that angle and attach it with its role labelled (“back view only”). A generated back view is a concept, not the product.
Say what the file is when you hand it over
Name the file and add one line: “AI scene, product redrawn, concept only” or “composite, original product photo”. That line stops a mood-board image from quietly turning up on the product page six months later.